Showing posts with label weaving tips. Show all posts

Thursday, June 04, 2026

How To Make a Repair (Replacement) Heddle on a Glimakra Loom

 At last, I tied up the treadles for the new leaf motif draft and was ready to weave my header. Lo and behold, I had another threading error! I honestly think part of the problem is my bifocals. Even with progressive lenses, it's difficult to get that sweet spot for several activities, such as heddle threading and painting ceilings. I even have trouble viewing my computer screen comfortably. 

I had skipped a heddle, so I searched about for how to add another heddle in the middle of the shaft. I ran across this video by Underwood Textile Arts. I'm embedding it here, for future reference! 


EDIT to add a link to Peggy Osterkamp's latest blog post, Repair Heddles: New (to me) Methods. It looks like another easy method for adding Texsolv heddles.

Monday, May 27, 2024

Dressing the Glimakra B2F Step 5: Tying Up the Lamms & Treadles

Continued from Dressing the Glimakra B2F Step 4: Threading, Sleying, Lashing On 

Tying up the treadles of a countermarch is a big job. The popular jack loom requires only tying up the shafts that rise. With my Schacht Mighty Wolf, treadle tie-up was just a matter of sliding the required shaft cords into the slot on the appropriate treadle. (There's a photo at the top of this post.)

A countermarch, on the other hand, engages all shafts; some rise and the other sink. That means all treadles have to be connected to all shafts. An 8-shaft loom like mine has 8 shafts times 10 treadles. So 80 individual cords need to be attached to the treadles. 

I've got three ways to tie up the treadles of a countermarch loom. Two I've tried, and one I plan to try soon. I'll update this post then.

Preliminary steps

  • Check position of warp
    • Should be centered in the reed and heddle eyes
    • Adjust shafts and beater height as necessary
  • Check the lamms*
    • Should be level and even in height.
    • Adjust if necessary

* Because this is my first warp after re-assembling the loom, tweaking the lamm tie-up and shaft placement should be a one-time job. Once set, future warps shouldn't need it.

The tie-up draft

Example tie-up draft for a countermarch loom

Reading the draft
  • Rows represent the shafts with the bottom being #1. The top row is shaft #8
  • Columns represent the treadles.
  • Xs and Os represent which shafts rise and which shafts sink.
  • Memory tricks for reading CM drafts
    • X as in X marks the spot (to sink the shovel)
    • O are shaped like bubbles which rise

Converting a draft

Most sources will tell you if it's a rising or sinking shed loom draft. If they don't, it's likely a rising shed draft because most American weavers have rising shed (jack) looms. You can make your own CM tie-up draft on graph paper.
  • Fill in the rising shaft squares on the graph with Os.
  • Fill in the remaining graph squares with Xs.
For a sinking shed tie-up (counterbalance loom) 
  • Fill in the sinkng shaft squares on the graph with Xs.
  • Fill in the remaining graph squares with Os.


Tying up the lamms

The lamms are the levers that control whether the shafts rise or sink.

Upper lamms
  • The shorter set of lamms
  • Function to lower the shafts
  • Memory aid: smaller sink
  • Designated by an X on the tie-up draft

 Lower lamms

  • The longer set of lamms
  • Function to raise the shafts
  • Memory aid: lower lift  
  • Designated by an O (or blank) on the tie-up draft
With draft in hand, I start by putting anchor pegs in the holes that don't need to be tied up. So on the upper lamms, I put pegs in the Os. On the lower lamms, I put pegs in the Xs. Then all I need to do is to put the lamm ties in the empty holes.

Tip: a dab of glue on the ends of the ties stiffens them so that it's easier to thread them through the lamms and treadles.

It looks like this when I'm done.

I double check the tie-up when I drop the treadle cords down in front of the each corresponding lower lamm. Each cord should have an empty lamm hole directly beneath it.

Treadle tie-up method 1: traditional

The cords are secured on the bottom of the treadle, with each lamm tie inserted through the corresponding hole in the treadle. 

Loom set-up

Treadles lifted at a height of 6 - 8 inches.

Start with the ties near the back of the loom, which need to be tightest. This is because the angle of the pressed treadle is narrowest at the back of the loom, but sharpest at the front of the loom. Hence more treadle cord is required.

Done. Distance between moving parts (treadles, lamms, & shafts) should be equally spaced.

Advantage to method 1

  • Carries on the tradition of countermarch looms. (Not sure if that's an actual advantage, but I had to think of something positive to say.)

Disadvantages

  • Tie-up for lamms and treadles must be changed for each new draft
  • Time consuming
  • Tiring on the back
  • Poking the pegs of the anchor pins into the underside of the treadles must be done by touch.
  • Requires patience

Method 2: skeleton tie-up

Shortly after I got my Glimakra, I started using a skeleton tie-up. Like the table loom, this ties the shafts to their own treadles, so that more than one treadle may need to be engaged depending on the lift work. 

8-shaft skeleton tie-up for a countermarch loom.
O = rising shafts, X = sinking shafts. Details here.

Advantage to method 2
  • Don't have to re-tie the lamms and treadles again
Disadvantage
  • Footwork is more complicated

Method 3: Tie-up from the top of the lamms

This method was described in the October 2017 issue of Complex Weavers Journal. I found several blog posts and videos on it, and made a blog series about it:

Next time I warp the loom, I'll do a step-by-step on tying up the treadles to the lamms from the top.

© 2024 by Leigh at Leigh's Fiber Journal
Dressing the Glimakra B2F Step 6: Checking the Shed, Weaving a Header

Wednesday, November 15, 2023

Minimizing Draw-In

Something I've been working on is minimizing draw-in. The first pieces I wove on my table loom had more than I'd like, so I've been researching how to minimize it. After trying all the advice and tips to little effect, I stumbled upon Madelyn Van Der Hoogt's "Ask Madelyn: Avoiding Draw-in: All About Weft Angle." 

According to Madelyn, the angle of the weft after shooting the pick and before beating is key. No matter how straight the thread looks, in the end, it must go over and under various warp threads. It needs some "give" room to accommodate that. Pull a weft pick too straight across, and the only give is at the selvedges. The result is the edges drawing in so that the woven piece is narrower than what's threaded on the loom. Madelyn's article states that the best weft angle to minimize draw-in is about 25°.

Weft yarn angled at 25°.

That's what I've been experimenting with as I weave table runner 2, and I have to say it's helping! Draw-in for my dishtowels was over 2 inches. For my first table runner it was exactly 2 inches. For this one, it's about 7/8 inch. 

Because my table loom is so compact, I do find it a bit challenging to achieve that 25° as the fell (woven edge) gets closer to the reed. I'm assuming this will be less of a problem when I can get back to weaving on my floor loom. For now, I'm throwing the shuttle and then adjusting the weft angle by hand, which slows things down a bit. But then, having to switch the levers by hand makes for slower weaving anyway. And that's okay because I'm not so much into speed as I am rhythm. 

Minimizing Draw-In © Nov 2023

Saturday, October 21, 2023

A Find For Keeping Track of Length

I used to use twill tape to keep track of the length I had woven and how much further I needed to go. I'd make a mark at the beginning point and a mark at the length I needed. When I got to that second mark, I knew it was time to finish off. A tape measure would have been better, but I've never found one that wasn't made of plastic, which is difficult to pin to the fabric. 

Not too long ago I was at Hobby Lobby and found this.


It's cloth ribbon with a printed ruler motif. The numbers only go up to 10, which actually works out pretty well. I added a "1" to the second set numbers, then a "2" to the next set, and so on. The length of the ribbon is 5 yards.


It's easy to pin as I weave. I unpin it at the bottom as I wind the fabric onto the cloth beam. It was inexpensive, and Hobby Lobby puts ribbon on discount pretty regularly. I'm guessing it can be found elsewhere as well.

Thursday, October 05, 2023

Table Runner Sampler: Notes on Dressing the Loom

Notes for my records.

1. Marking the reed as a ruler.


This idea came from Curmugeon Weaves via Michele over at Sweet Leaf Notebook. The reed is measured and marked with scraps of yarn. The center is tied with one color, another color marks out one-inch increments, with a third color for the five-inch marks. This is extremely useful! No more having to count and measure to figure out where to start sleying the reed with a new warp!

2. Tying on the new warp.


Not exactly necessary for a short, narrow sampler warp, especially since I had to re-thread the heddles. But I had two things in mind. One was to reacquaint myself with the technique of tying on, the other was to learn the weavers knot. I tried to learn it back in my pre-YouTube days, but found written descriptions confusing. Thanks to video demonstrations, I managed to learn it. I figured a narrow warp would be easier for learning and practicing on, rather than a big project warp.

3. Weighted winding on.


The goal, of course, is even tension across the warp. With my first table loom sampler and twill gamp dishtowels, I used Deborah Chandler's no-tension wind-and-tug method. That actually worked quite well, but I'm in experiment mode and want to see if the weight makes a difference.

Now, on to weaving.

Tuesday, December 02, 2008

Countermarche Tie-Up Tip: Lamms

I don't know about you, but for me, anything to lessen my confusion helps to lessen my mistakes. When I first got my countermarche loom, dealing with two sets of lamms, both rising and sinking was very confusing. It took me at least two full days to tie up the treadles the first time. Gradually I've worked out a system that helps me figure out which lamms to attach the ties to.

Most modern threading drafts are for rising shed (jack) looms, which can be adapted to countermarche looms, where shafts either rise or sink. So, since longer lift & smaller sink, I concentrate on the treadle ties attached to the longer, lower lamms first.

1. The first thing I do is to pull off all old ties so that I can see what I'm doing and know what's tied up for the new draft. I'm often tempted to just move the existing ties around, but this can get confusing.

2. Next I use anchor pegs in the upper (shorter, smaller) lamm holes to mark the tie-up draft. This serves two purposes:

a. It gives me the pattern for the tie placement on the lower, longer lamms. I put ties in the corresponding holes in the lower lamm.


b. When adding the ties to the upper lamm, I simply fill in everything that doesn't have an anchor peg in it.

3. I double check the tie-up when I drop the treadle tie down in front of the each corresponding lower lamm. Each tie should have an empty lamm hole directly beneath it.

One benefit of placing the ties on the lower lamms first, is that I don't have dangling ties from the upper lamms to deal with. I find these distracting.

When I tie up the treadles, I use Dorothy's idea of placing them on a box first, to get a height to aim for. Then I start with the ties near the back of the loom, which need to be tightest.

Friday, October 24, 2008

Color Coding Steel Heddles: Readers' Suggestions

By Leigh

This is a follow-up to my last post, Color Coding Texsolv Heddles. Connie asked about ideas for doing the same with steel heddles. I didn't try this when I had a loom with steel heddles, but there were some excellent ideas in the comments. Here they are:
Janice said, "I have large-eye wire heddles on my loom. In order to see them I painted above and below the eye where the twisted wire part of the heddle is. And, every 10th heddle I painted around the eye as well. It took a few days to do all the heddles, I put two coats on them, but they are really easy to see, now, and they look pretty too."
Trapunto suggested, "...a dab of white out or nail polish for metal heddles? Say, on every other shaft?"
Amelia said, "A local friend just used fingernail polish on her twisted eye metal heddles .... I decided to go with permanent marker on mine"
Phiala had some good advice ..... "I would try either the enamel paint used by modelmakers .... or the new alcohol inks intended for use on non-porous surfaces. The paint would be bright and opaque, while the ink would be less-visible but easier to apply and use because it doesn't produce a raised surface.... In either case .... degrease the metal before applying the colorant, either with one of the degreasers sold for painting, or just washing carefully."
Kimmen (no blog) says, "I went to the local beauty supply place and found a bunch of wildly colored nail polishes for $1/bottle. Worked fine on the metal heddles, and was less expensive than model makers paint.

You really only need 3 colors- leave 1 harness plain, then paint the next 3 different colors. The 5th harness is plain, and repeat the colors..... the color repeats are 4 harnesses apart, and you wont mix them up..... I used repeated the colors on other looms and find I like that better, especially when you are doing patterns that lift in pairs. It's easier to figure out the pairings, and I can color code my draft easily."
Meg in Nelson offered, "I tied embroidery floss at the top of every 10th heddle, through the loop. Though individual heddle eyes are not color-coded, if you shake the shaft a bit while threading, it's easy to know which shaft you're on. This was my 4-shaft loom, and Shaft 1 has red marks, Shaft 2 blue, Shaft 3 yellow and Shaft 4 green. "
Neki Desu suggested, "Craft paints such as Pebeo or even better Lumiere work well. Just paint the eye."

If anyone has other ideas, please let me know and I'll be glad to add them!


Related Posts:
Color Coding Texsolv Heddles

Wednesday, October 22, 2008

Color Coding Texsolv Heddles

By Leigh

The idea of color coding heddles pops up in various weaving discussions from time to time. It always seemed like a useful idea to me, especially if it helps prevent threading errors. Most recently, it came up on the Yahoo Weaving list, so I took some notes and decided to give it a try in preparation for my next S&W sampler.

Materials for this are super simple. The consensus seemed to be to use acrylic paints, so I got the cheapest ones I could find at my local craft store.

Supplies needed to color code Texsolv heddles.The only other supplies were water and brushes.

The slow way to color the heddles.I mixed a bit of the paint with a bit of water and started by dabbing around the heddle eyes.

I can't tell you how tedious this quickly became. I wasn't sure how many texsolv heddles I actually have, but with 8 shafts, I knew that it was a bunch and that this was going to take a long time. A very long time.

Being the impatient sort Having a long list of things to do that day, I decided that my time would be more efficiently spent if I tried idea.

A quicker way to do it.Her method involved diluting the paint and soaking entire heddles in the mixture. I don't have a clue as to the ratio of water to paint that I used. Some colors seemed to stick better than others, so I would add another squirt of paint depending upon how the heddles were looking at the moment.

Here's what they look like on my loom.

Newly painted heddles on the loom.I left the heddles on the first and last shafts white. I used six other colors for shafts 2 through 7.

Since then I've threaded my S&W sampler warp and it was so much easier to pick out the next shaft in the threading order! I like texsolv, but the heddles are pliant so it's sometimes difficult to tell exactly what shaft a particular heddle is on.

My other hope is that this will help when I need to adjust the shed. Again, it's sometimes difficult to tell what shaft an incorrectly threaded warp end is threaded on. Color coding the entire heddle should help with that too.

Next is tying up the treadles and then I'll be weaving. Cally has started on a summer & winter adventure as well, and her results are inspiring. I'm anxious to get weaving too.

For a few more ideas on how to color Texsolv heddles, check out the comments at the end of this post.

Posted 22 Oct. 2008 at http://leighsfiberjournal.blogspot.com

Related Posts:
Adjusting the Loom With Texsolv
Warping the Glimakra: Adjusting the Shed

Thursday, August 14, 2008

Light Bulb Moments with Waffle Weave

By Leigh

OK. So the waffle weave sampler turned out pretty well except for the bleeding red yarn. With the information it gave me, I pressed on to the barcode inspired dishtowels with confidence.

Waffle weave selvedge oops.However, after several inches of weaving, I was puzzled when my selvedges looked like the photo on the left. Even though I am using a floating selvedge warp thread, I was having a problem catching the outermost warp thread (which is not the floating warp). What was the problem? This hadn't happened on my sampler.

I rechecked my threading, but everything was fine there. No mistakes in the point twill threading. I decided to take another look at waffle weave in Mary Black's Key to Weaving. It didn't take long to diagnose my problem.

Yes, I had threaded in a point twill, but I had started at the center of my loom and threaded going outward. Due to the number of ends I had, my threading ended on shaft four, like this.....


The other selvedge was the same way, so that the threading started and ended on shaft four.

What it's supposed to look like is this ......


Threading is supposed to start and end on shaft one. It would seem inconsequential, but because of waffle weave's tie-up and treadling, it's not!

That was light bulb moment number one. Light bulb moment number two came while trying to decide how to correct the threading. I didn't know if it would be better to add or subtract some warp to have it start on the first shaft. To decide, I decided to recheck my project width math.

From sampling, I had learned to expect about a 30% loss in width after washing and drying. To determine the width of my warp, I had taken my project width (18 inches) and added 30%. From that calculation I measured 702 warp ends, which measured 23.5 inches in the reed.

This time, I subtracted 30% from the width in the reed (23.5), and was surprised when the result wasn't 18 inches, but about 16.5. Well, duh. 30% of 18 is not the same as 30% of 23.5. 30% of 18 is about 5.4, while 30% of 23.5 is 7. Light bulb moment number two was in realizing that how I calculated draw-in and shrinkage made a big difference in the final width of my project.

My challenge then, was to add enough extra warp for my finished project to be 18 inches, while starting and ending the threading on shaft number one.

There may have been an easier way to do this, but here's what I came up with:


What I did was to use Peggy Osterkamp's 2-Stick Header, and tie my additional warp on to it. You can either click on the above photo to enlarge it a little, or there's a close-up below.


I weighted the two bouts of warp in the back with half gallon milk jugs filled with water. I was able to experiment with the amount of water in each jug until I got a straight, even fell.

This does widen the borders quite a bit, but who in the world (besides my readers :) is gonna know that I didn't plan it this way in the first place.

Next time I would use a stouter stick to tie the warp onto, although hopefully there won't be a next time. And perhaps someone has a better idea? Two enlightening flashes of understanding are enough for me in one day. I'm rather worn out from it all.


Related Posts:
Waffle Weave
Barcode Waffle Weave Update
Barcode Waffle Weave Off the Loom
List of all my Waffle Weave Posts

Sunday, June 01, 2008

Another Way to Calculate Sett

By Leigh

I've just finished winding on my next warp, so I don't know yet how satisfactory the sett I calculated will be. There are other ways to calculate sett. Trapunto pointed out another one in the comments to that post, and I thought it would be helpful to blog about that one too. The formula is....

Sett = WPI x R ÷ I + R

WPI = wraps per inch
R = warp threads in one repeat
I = intersections of weft with warp in one threading repeat

This formula is found in Sharon Alderman's Mastering Weave Structures, which I don't have, but it's also in Interweave Press's The Weaver's Companion (page 36) and in Peggy Osterkamp's Winding a Warp and Using a Paddle, on page 98. The terms vary a bit in each version, but they all do the same thing.

The formula requires a little more information to get started, so I admit I haven't used it more than once, especially since I usually use charts.

Of course my curiosity is up, so I've decided to give it a try. First I need to know a few things.

My threading draft is a four block pattern with 5 warp ends per block, so there are 20 warp threads in one pattern repeat.

From the tie-up, I can see the interactions of warp and weft, and count 4 interactions per block. Multiplying this by the four blocks in the repeat gives me 16. So....

WPI = 65
R = 20
I = 16

Let me plug those in and see what I come up with.

WPI x R = 65 x 20 = 1300
.I + R ..= 20 + 16 = ..36

= a sett of 36

The sett from the other method? 34

I'm officially relieved!

Next I'll thread the heddles and then on to sleying. Hopefully I'll be weaving by Monday.

Posted 1 June 2008 at http://leighsfiberjournal.blogspot.com

Related Post - Calculating Sett

Monday, May 26, 2008

Calculating Sett

By Leigh

When it comes to calculating sett, I am a great fan of using charts. My favorite sett charts are found in the appendix of Peggy Osterkamp's New Guide to Weaving Volume 1: Winding a Warp and Using a Paddle. (You can see samples of these charts at her website, here.) Usually I can find what I need on one of these charts, however, I do have some oddball yarns that I've picked up here and there, which sometimes aren't listed.

Such is the case with the 16/3 cotton I want to use for my next multiple tabby weave experiment. So far, I've mostly used 8/2s cottons, because that's what I have a lot of. But I want to weave some everyday table napkins in navy and white, and I need a lighter weight warp yarn to go with the heavier navy weft.

Peggy's charts don't list 16/3 cotton, so I'm going to have to resort to another method to calculate the sett. I've decided to try something new, so here I am, thinking "out loud." Trying to explain concepts to others always helps clarify them for me. I only hope that in the end, all of this makes sense to you too!

The first step for any method is to figure out the wraps per inch.

Wraps per inch (WPI) can be calculated in one of two ways. The first way is to physically wrap the yarn around a one inch measure and to count how many wraps it takes to achieve a solid inch of yarn. A more detailed description of how to do this is here.

The second way is by using the Ashenhurst Rule.

The Ashenhurst Rule calculates the wraps per inch without doing the wrapping. This is especially helpful for fine or slippery yarns. This method is found in Winding a Warp and Using a Paddle, on page 90. If you don't have that book and would like to read a more detailed explanation, you can find the excerpt here.

Here's the formula:

WPI = 0.9 x √ of YPP

WPI = wraps (diameters) per inch
√ = square root of
YPP = yards per pound

The key to this one is knowing the yards per pound of the yarn. Sometimes this information is readily available, sometimes not. In my case I have absolutely no idea. However, I can figure it out with a McMorran Balance.

I considered doing a tutorial on how to use the McMorran Balance, but Laritza at Yorksett Arts & Crafts already has a good one, so I will refer you to it; just click here.

Using my McMorran Balance, I discover that the ypp is 5250. Grabbing my calculator and plugging that number into the formula, I get:

0.9 x √ of 5250 = 65.25 WPI.

Okay. So 65 and a quarter wraps will give me a solidly covered inch of my yarn. However, I need to make room for the weft, so that requires another calculation (this version also from Osterkamp):

Sett = WPI x weave firmness

This is how I learned to calculate sett.

WPI ÷ 2 = epi for balanced plain weave
WPI x 2/3 = epi for balanced 2/2 twill

Where WPI = wraps per inch and
..............epi = ends per inch

This gives what Peggy calls "maximum sett" for a balanced weave. If the sett is closer, then the fabric becomes warp dominant. One the other hand, the weaver may want a softer fabric. We have two choices here too. One can either weave a bunch of samples to decide what is best, or one can try ....

Allowing for the Purpose

This is something else found in Peggy's book. She lists suggested percentages to use depending upon the weave firmness wanted. This is based on the purpose for which the cloth will be used. You can find the box chart on page 93 of her book, or read the excerpt online here.

The threading draft I am planning to use is a broken twill, and my yarn is 65.25 WPI, so here are my calculations:

65 WPI x 2/3 (or .67 on my calculator) = 43 epi maximum sett

Taking Peggy's recommendation for 80% of maximum sett, (see "Sett: Making Your Weaving Easier").

43 x .8 = 34 epi to start.

So there you have it. The art and science of calculating sett. The science is in the math, and the art is in the weaver's choices based on knowledge and experience.

There are a couple of other methods, but these are the only ones I have experience with so far. I'd love to hear your thoughts and experiences, so please leave a comment if you feel so inclined.


Related posts:
Another Way to Calculate Sett
Measuring Wraps Per Inch (WPI)
How to Use a McMorran Balance (Yorksett Arts & Crafts)

Saturday, March 01, 2008

Hemming Handwoven Fabrics

By Leigh

I want to thank everyone who responded to last Sunday's post, How Do You Hem Your Handwovens. I received both encouragement as well as good ideas. As promised, here is what I learned from you all. I've tried to organize everything in a logical manner, and have tried to paraphrase as best I could. Hopefully, this will help it all "sink in." If anything needs further clarification, please let me know!

I was able to organize your information with two basic categories, "still on the loom" and "once off the loom."

Preparation for hemming starts in the planning for a piece. While it is on the loom, the fabric needs to be prepared for the type of hem desired.

To make a less bulky hem, quite a few of you, such as Annie, recommended a finer weft for the hem folds. Beryl reminded me that a finer weft for the hem will keep the plain weave section from weaving wider than the body of the towel. Marie uses an inch or two of sewing thread for the weft for the hem. I have to admit that I have actually tried this, but used a polyester thread on a piece woven in cotton. Unfortunately, these didn't shrink the same, so I wasn't happy with the result. I am making a note to purchase some cotton sewing thread! Christine weaves plain weave with a lighter weight yarn of the same fiber content. For example, 10/2s for the hems if the project weft is 5/2s. I really like this idea as it means I can give myself permission to buy more yarn! (To have a supply of lighter weight, you see. :)

Alice weaves about and inch of a solid colored tabby for the hem, and Kristin has a clever idea for making a neat, straight fold line for the hem. She shoots in a couple of picks of a thicker white yarn, leaving the ends stick out of the fabric selvedges. These are pulled out when the hem is ready to be turned, making a nice fold line.

Kathy hemstitches everything while it's on the loom. On her utility pieces, she then weaves a section of plain weave. Once the piece is off the loom, she then has the flexibility of deciding whether she wants to leave it fringed, or sew a hem after all. Marie always hemstitches for wool. If she doesn't want fringe, then she adds a short plain weave section for the hem, using in a lighter weight wool weft. Isabelle also hemstitches towels, using a technique her mother taught her. She references Weaver's Craft Magazine. If you have a copy of issue 17, check it for information on hemstitching. (Thanks to Valerie, I have several back issues of Weaver's Craft, but not that particular one.) Isabelle also weaves in a thick mop cotton to separate her towels. Once off the loom, she uses a zipper foot to sew one row of stitches on either side of th emop cotton, before removing it and cutting between the towels.

Bonnie, on the other hand, has a more free spirited approach. She warps for 2 to 4 towels at a time and then makes color changes in the weft as the mood strikes her. Measuring for cutting only comes after the towels are off the loom, warp ends are knotted, and the entire length given a hot wash and dry. One advantage I can see to this is that it would be easy to ensure that all the towels are the same length. (Some of you may recall how I finally worked out measuring weaving length with a twill tape.) I often fret over length, so this method would definitely solve that.

Bonnie also told me that her elderly aunt enjoys handwork, so they work together when it comes to the sewing part. Bonnie bastes or pins the hems, and her aunt does the handsewing. It's a happy cooperation for both of them!

Many others of you, such as Bspinner, also handsew hems. Textillian packs his weft in securely enough to be able to cut and fold over the waste weft (a shot or two of a different color) for the first fold of the hem. This is folded again, and he then runs his stitches about every 4 or 5 warp ends, depending on the sett. He also finishes the edges of the hem with a few overcast stitches. I really like this idea as it encases the raw edges. I'm going to have to start doing this too.

For machine sewing, Marie uses a zig zag stitch like I do before cutting the towels apart. Then she uses a straight stitch for the actual hemming. Annie suggests that the straight stitch is preferable, as the fabric can stretch with zig zag. She also hems by hand, but bastes first, instead of using pins.

Laritza and quite a few others use a serger for hemming. Catherine sometimes leaves the serged edge as the hem, or presses the serged edge over and hems by hand. Sayward also like serging for a simple hem, but also likes hemstitching and fringing for fancier pieces.

Last but not least is washing them! It's pretty scary to put one's precious handwoven fabric in water for the first time, but wow, what a wonderful difference wet finishing makes.

Annie recommends a hot wash for both cotton and linen. This increases their absorbency, which is what towels are made for! She prefers wind drying to machine drying. Marie puts them through a full hot water cycle and then drys them in a hot dryer after sewing.

Hopefully, I've covered all the comments and suggestions. More are welcome! This is by no means comprehensive.

Susan and CreativeTextiles (aka Deep End of the Loom), I was very interested in both of your comments. Please let me know how you get on with this!

And Kristi, about that possibility of being turned into a weaver one of these days, jump on in, the water's fine! ;)


Related Posts:
How Do You Hem Your Handwovens?

Sunday, February 24, 2008

How Do You Hem Your Handwovens?

By Leigh

In the comments to my "M's And O's Dishtowels" post, Bspinner asked how I hemmed my handspun dishtowels. I was very interested in how she did hers, and, being the sort of person who loves new ways and methods, thought I would ask you all the same. How do you hem a dishtowel? Or a handtowel? Or blankets? Or place mats and table runners? Or anything handwoven?

I have to admit that it took quite a few years before I could build up the nerve to actually cut my handwoven cloth, let alone sew it. In fact, I still have several lengths of yardage from years ago. These remain packed away in a trunk, because I couldn't bring myself to cut and sew them. It was quite an occasion when I finally did it. In fact, it wasn't all that long ago; it was when I made the log cabin necktie for my DH.

I admit it was several posts ago that Bspinner first asked this question. Hopefully it hasn't been forgotten by now but, being a visual person myself, I wanted to wait until I could get the last M's & O's dishtowel off the loom, so I could take photos of what I'm doing.

Probably most of you do something similar, but I would be interested in your feedback and comments. I'm always looking for either confirmation or better ways to do things.

My current method is to start by running a quick zig zag stitch over both ends of the fabric right after I take it off the loom. Then it is wet finished in whatever manner I intend for the finished item to be laundered. In the case of cotton dishtowels, I wash in cold water and laundry detergent.......

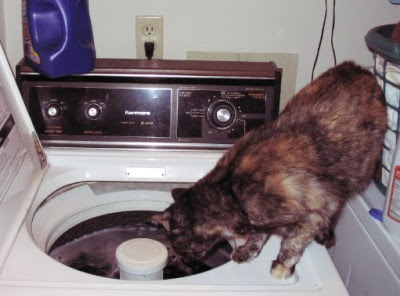
Curious Catzee, "helping" with the washing.
.... and then dry in the dryer on medium. If it's too wrinkly after that, then I iron it.

To prepare them to cut apart, I run two more zig zag rows on either side of the cutting line.

2 not-so-straight cutting lines.
I used white thread here so you could actually see the stitches. Usually I use a color that matches.

I'm not sure why I prefer a zig zag stitch. Perhaps because it offers a little "give" to the fabric. Does anyone like a straight stitch better?

Then I cut them apart and prepare to sew the hems.

I do a double fold hem, and I find that it's neater if I press the first fold and then pin for sewing.

Pressing the 1st fold of the hem.
I say "press" rather than "iron" because they aren't the same thing and I have found that which one I do makes a difference. Ironing is the act of sliding the hot iron back and forth over fabric to remove wrinkles. Pressing involves setting the hot iron straight down on the fabric, holding it there, and then lifting it up again. I found that when I ironed, I somehow pushed or stretched the cut edge of the fabric so that it ended up a tad wider than the rest of it. This didn't make for nice square corners!

Sewing the hem.
After folding and pinning, I either hem by hand (because I enjoy hand work) or use a zig zag stitch. I do prefer to pin them so that I can remove the pins as I get to them. (I've broken too many needles running over pins.)

The label sewn into the hem is an idea I got from my friend Ann in England. Awhile back, I purchased 50 labels from Heirloom Woven Labels. However, I was rather dismayed at how long they turned out to be.....

Label for my handwovens.
Close up of the label as a loop for hanging.This has been okay for some projects, like my afghans, but the labels are a little too long for smaller projects. I thought Ann's idea was a clever way to both attach a label, as well as create a loop to hang the dishtowel up with.

So that's how I've been hemming my handwoven dishtowels. Now it's your turn. I'd love to know how you hem handwoven fabric, as well as any other tips, experiences, or ideas for sewing it. If I get a good response, I'll put all your ideas and suggestions into another post. (Click here for that post.)


Related Posts:
Hemming Handwoven Fabrics

Saturday, January 19, 2008

Tying On To A B2F Warp

Last summer I did a blog post on how I tied on a new warp. (That post here.) I like to tie on because it lets me take advantage of a particular threading for as long as possible. Sometimes it involves a re-sleying for a different sett, or sometimes it involves a different treadle tie-up, but even with these it is a time saver.

I first learned how to tie on when I was warping front to back (f2b). When I warped f2b, my warp was tied to the back apron rod in bundles. Warping back to front (b2f) is a little different. The warp isn't cut for the back apron rod, rather the apron stick is slipped through the uncut loop at one end of the warp.

The end of my 1st warp looped around the back apron rod.
This makes tying on a little challenging. Once the weaving is cut off the loom, the remaining warp is no longer secured because it isn't tied to the apron rod. It can easily be pulled off. When I tie on a new warp, I'm careful to not pull the old warp ends off, but they do become very uneven from my pulling and tying. No matter how careful I am, I end up with uneven lengths of warp.

I was thinking about this as I finished weaving my advancing twill sample warp. My plan was to tie on a different size yarn and experiment with that. So to secure the old warp, I decided to see if I could weave in an inch or so of waste weft, close to the back apron rod to hold the warp in place.

To do this I needed tension on the warp, so I waited to cut off the woven fabric. First I pulled the lease sticks out, and then from the back of the loom, pushed the treadles down to make a tabby shed. It was pretty awkward, but I was able to weave in about four picks of a heavy yarn. I beat them down with a hair pick and then put the lease sticks back in the same way.

A few picks woven in behind the heddles.
I found that this helped stabilize the warp quite a bit; though not enough to prevent it from being pulled out if I tugged hard enough. Even so, it helped a lot. The next time I tie on, I'll weave in a bit more and that should do the trick.

© 2008 Leigh's Fiber Journal


Friday, December 21, 2007

Preparing To Weave - Problem!!!

OK. I thought everything was going well. My first warp on this loom had been successful, so I had every reason to believe that this one would be even better. Winding on the warp on had gone well and I was ready for the next step: tying up the treadles.

I reviewed the Glimakra set-up video. I re-read Tying Up the Countermarche Loom. I borrowed a nifty idea from Dorothy.....

I used a box to support the treadles during tie-up.
.... a put a box under the treadles to support them while tying them up. Very helpful! Not only was it easier to reach under the treadles, but it gave me a height to aim for while tying them up.

Happily, the tie up went much quicker than the first time. The first time took me all day. This time it only took about two hours.

Then I took out the locking pins. These hold the shafts in place while the loom is being warped, threaded, and tied up. This is the "Before" photo of the shafts before I took the pins out.....

Photo before I pulled the locking pins out.
(Shaft number 8 is bowed and does ride higher.)

And this is the "After" shot...

Photo after I pulled the locking pins out.
Notice anything different? They all (except #8) sank!!! They aren't supposed to do this! I couldn't believe it! This didn't happen the first time! I wanted to scream and pull my hair out. But instead, I reminded myself that I always learn more from my problems and mistakes, than from just happening to get a thing right. I was so frustrated at that point, that I decided to sleep on it and try again with a rested mind.

The next day I put the locking pins back in and shifted into problem solving mode. I started at the top of the loom and worked my way down, noting that the warp was centered in the heddle eyes, the upper lamms were slightly elevated at the open end, and that the lower lamms were parallel to the floor.

Next, I re-read Dorothy's "Treadles Again and A Few Inches Woven" post. This time I took notes so I could remember her rules for tying up the treadles and tried to think them through as I followed them. When I finished my adjustments, I held my breath and pulled out the locking pins again. This time they stayed. What a relief!

Next will be to weave about an inch or so of plain weave and then check and adjust the shed.

After that, I can actually start weaving!

Wednesday, December 19, 2007

Responses to "Preparing to Weave" Comments

The s-hook works better than either shoe laces or the metal rings.This first photo is for Carol, who was interested in how I attached the 1/2 gallon milk jug weights to my warp bouts. I've done a lot of experimenting with this and for me, the slip knot & s-hook method has been the easiest.

The s-hooks are the heavy dutiest (is that a word???) ones I could find at Home Depot. I've also tried shoe laces and the large rings found in embroidery kits. But I like the s-hooks the best.

The milk jugs have worked well, however they are not without their hazards, especially if one has cats. Check out what happened in these posts, "Undulating Shadow Weave 1" and "A Weaving Setback", to see what I mean.

Laritza uses dumb bells as weights, something that is still on my list to try!

Peg commented on the placement of my raddle in my latest warp . . .

Warping set-up for my current warp.
. . . . which is in front of the shafts. This leads me to a true confession - this latest warp hasn't gone on without it's glitches!

Raddle groups as measured on a warping board.This one had to do with which end of the warp I marked my raddle groups. Even though I planned to review the steps to warping my Glimakra, I didn't review the part about measuring the warp (I've done that one a squillion times, right?)

For my Schacht Mighty Wolf, I use one of Deb Chandler's methods, which marks the raddle groups (pictured at right) at the end opposite the threading cross. The raddle groups are dropped into the raddle, which is placed on the back beam. (Photo here) After the warp has been wound onto the warp beam, the cross remains at the front of the loom, ready for heddle threading.

In the Glimakra set-up video however, the raddle groups are marked at the same end as the cross. The cross is positioned at the back of the loom to be attached to the back apron rod. It is held by lease sticks as the warp is wound on to the warp beam. (For photos and details on this, check out my "Warping the Glimakra: Winding It On" post.)

Well, when I carried this six yard long chained warp to the loom, I realized that the raddle groups were at the "wrong" end, i.e. the opposite end from the threading cross. So I had to put the raddle at the front of the loom, where the raddle groups are. At first this worried me, as I thought I needed it behind the shafts to thread the heddles. However, I remembered that, in the set-up video, the raddle is removed completely and the individual warp ends are picked out from the cross for threading. So alls well that ends well.

I realize that this may be a somewhat confusing post, certainly for the nonweaver, but probably for weavers too. Fortunately not a lot of things in weaving are written in stone. We have our preferred ways of getting results, but thankfully there are back-ups if needed. And I certainly needed one here.


Related Post