Showing posts with label sewing. Show all posts

Wednesday, July 19, 2023

Wardrobe Dilemma: Inspired But Clueless

With my soon-to-be studio still in a state of unpacking boxes and trying to find homes for everything, I've been thinking about the book I recently reviewed, The Re:Fashion Wardrobe. A couple of the boxes I pulled out of storage contain clothing that needs mending or alterations (such as the bust fits but the hips don't, or vice versa). And then there's my closet, with a hodge-podge of items that I have because I liked them when I bought them. Or maybe it's a top or skirt to match one of those hodge-podge garments. I did a pretty good closet purge last winter, but I still have a lot clothes. 

Two concepts from that book have been my take-away points.
  • "Re-fashioning" existing clothing
  • The capsule wardrobe

Being in the retired class of persons, my husband and I live on what is known as "fixed income." That means income is limited and the budget is tight. We've learned to live comfortably that way, although I'm pretty sure our lifestyle is too austere to suit most. The point I want to make is that, with a few exceptions, buying new clothing is out, as is sewing new clothing. I learned how to sew in junior high school, and at that time sewing was how low income people got new clothes. But, sewing has become expensive nowadays, between the cost of patterns and fabrics. Plus, I have a history of sewing things that looked good in my head, but not in the mirror. That's why Portia Lawrie's idea of re-fashioning garments (also known as upcycling) is infinitely appealing.

The capsule wardrobe concept is also extremely interesting. The idea is to keep a smaller wardrobe (such as 20 to 30 individual pieces, or so) that all coordinate and can be mixed and matched to make a variety of outfits.

So, there's the inspiration. The challenge is, how can I use this to apply to me?

I started by looking at the simple 4-step plan in the book:

  1. Sort your current wardrobe
  2. Pick your palette
  3. Identify gaps
  4. Make a plan  
After reading step one, however, I knew I needed a different approach because my lifestyle is so different. So, I started poking around the internet for more ideas on how to build a capsule wardrobe. Most of it was not useful. Most of the articles I found are telling you what you need (with affiliate links for the various items), and all in black, white, beige, and brown, in a particular style that doesn't interest me. Or else they address sewing everything and discuss patterns and fabrics. Portia Lawrie's book at least advocates starting with one's current wardrobe.

The most useful (to me) web page I've found to date is r (attempts to) build a capsule wardrobe. R approached her analysis in a way I can relate to. (Quoting here):

"Things I need to consider:
- what items do I need?
- what items are comfortable?
- what do I enjoy wearing?
- how many do I need to allow for wash days?
- what colour theme am I choosing?
- what sort of aesthetic do I want to aim for?
- what is easy to repair?
- what do I already own?
- probably more I haven't thought about yet."

R also referred to An Introduction to the Capsule Wardrobe. From that, I gleaned:

 "How do I get started? 
- Determine your personal style.  
- Discover your body shape and most flattering cuts and proportions for you."

Again, useful and practical advice. 

When I sat back to process all of this, I realized I need to approach a wardrobe analysis from my particular lifestyle and my own needs.

More on that here


Tuesday, July 18, 2023

Book Review: The Re:Fashion Wardrobe

I discovered this book when I was leaving the library the other day. It was part of a display of new library acquisitions. The title grabbed my attention and the subtitle clinched it.


I picked it up, flipped through it, and immediately understood what the author was doing. Portia Lawrie is showing us how to take "old" clothing from our closets, re-sale shops, and yard sales and turn them into garments that accommodate our personal style and fit properly: dresses from t-shirts, skirts from shirts, shorts from curtains, a quilted duster coat from a duvet(!).

What I especially like, is that the Lawrie's wardrobe concept is built around a capsule wardrobe. From the author:

"The most sustainable garment is the one that gets worn over and over again. We should be making clothes that earn their place in our wardrobes by working hard for years to come."

So what's a capsule wardrobe? "Capsules focus on incorporating good-quality garments that are versatile, coordinate well together, and fir the needs of individual lifestyles and personal aesthetics. . . Everything works together, and everything goes with something else. . . Quite simply, a capsule wardrobe enables you to achieve more with less."

In other words, not a hodge-podge of random items that I got just because they caught my fancy. The author goes on to teach the reader how to evaluate their current wardrobe, pick a palette, identify wardrobe gaps, and make a plan.

The next section discusses the secrets of secondhand shopping, how to do a burn test to identify fiber content, how to piece and combine different fabrics, over-dyeing, etc. Then comes tools and equipment, and after that, the projects. Eleven projects teach the concepts with clear instructions and pictures. Each project includes tips & tricks, and ideas for experimentation. The section closes with ideas for how to combine the garments into a variety of outfits. 

The last section teaches re:fashion techniques: how to make pattern templates, fitting, sizing garments up or down, deconstruction, plus a variety of sewing techniques; everything from bias tape facings to zippers and button holes. A glossary and index follow.

My style is not necessarily the author's style, but she provides information I can use to find my own way. I discover so many appealing items on the thrift store $1 rack, but too often they are the wrong size or too faddish for me to consider buying. And then I often ask myself, do I really need another flannel shirt? I think this book is going to help me find a sustainable style that suits me, and helps me make wise clothing choices in the future. 

© July 2023 by Leigh at Leigh's Fiber Journal

Related Posts:

Thursday, June 22, 2023

Tool Roll for My DPNs

In anticipation of the outcome of our current house remodeling project, I'm trying to get some things organized and ready to go. Some of the things that badly need organizing, are my crochet hooks and knitting needles. My straight needles reside in a tall decorative can, which is fine. The size is embossed on the ends of the needles, so I can easily find what I need. 

My circular needles, crochet hooks, and double pointed knitting needles, however, are another matter. Mostly they reside in pencil cases, so that I have to hunt for what I need. The crochet hooks are easiest, because they too, have the size on the hook. The circs and DPNs, though, aren't labeled, so I have to use my needle gauge tool to figure out which is which. Plus, the DPNs are usually scattered everywhere, so finding enough to make a set is another chore. I needed a better system. 

That's when I learned about tool rolls. What a great idea, I thought. I can keep things organized, tidy, and easy to find. I started with my double pointed needles. 


I looked at a number of designs, but eventually figured out my own. A tool roll is basically a rectangle of fabric with pockets, that can be rolled up and tied into a compact bundle. 


One of the things I didn't realize, is how many DPNs I have. I have multiple sets of some sizes, but there are some gaps in my collection as well. The nice thing about a customized tool roll, is that the pockets can be made to suit. 


This will be home for my sizes US1 through 10. 


I left empty pockets for needles I need, and had enough space for a pocket for my needle gauge tool!


Folded, it looks like this...


And here it is rolled up and ready to tuck away in a handy place.


Besides being extremely useful, this is a great project for fabric scraps. 

One tool roll down and two more to go.

© 2023 Leigh's Fiber Journal

Monday, March 20, 2023

Sewing a Zokin

March is the month when we start to spend more time outside. The earth is awakening, the weather is milder, and it's lovely to be out of the house. But there are still plenty of cold and rainy days. Days that are good for indoor projects, like sewing zokin.

Zokin is Japanese for "cleaning cloth." It is made from old, torn, or stained cloth, and has become a somewhat universal term for this style of cleaning cloth. But it has an interesting cultural background, and the best explanation comes from Atsushi Futatsuya of Sashiko Stories. In his video, Zokin with Sashiko (Zokin as Cleaning Rug) & Apply it to Ordinary Days, he describes the stages (or progressive uses) of Japanese cleaning cloths.

  • Fukin - kitchen cloth (dish cloth or tea towel)
  • Daifuki - for wiping tables
  • Zokin - final form, used for cleaning the floor, washing the car, or scrubbing a sink

I love this philosophy. It's so true to the "use it up, wear it out" concept of that little ditty so many of us frugal people love.

Use it up
Wear it out
Make it do
Or do without

Old dishtowels are perfect for making zokin, and I had several old terry cloth dishtowels that were too worn for their original purpose.


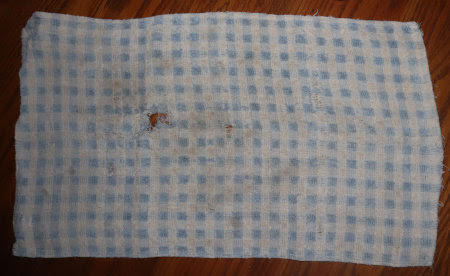
I got these years ago. We lived in an apartment and one kitchen wall had blue and white checkered wall paper. I bought these dish towels to match. When the first one became holey and frayed, I cut it into cleaning rags. I'm pleased to keep old clothing and towels out of the landfill that way, but my rag bin is almost overflowing. That's when I learned about zokin and thought it was a great idea. 

Finished size is arbitrary and I decided I could make two zokin from one dishtowel. I cut each one in half lengthwise, pressed down the cut edge, and folded the strip into thirds. 

The layers are stitched together with sashiko. You may recall from my Japanese Mending post, that sashiko is simply running stitch. It's often colorful and decorative, but for these, mine is simply functional.


Finished zokin

Besides old towels, I've seen these made out of old t-shirts and sweats. It's a great way to re-purpose end-of-life garments. My only recommendation would be to use natural fabrics, because polyesters and acrylics don't absorb water well. That, and when the zokin are beyond use, natural materials (in this case cotton), can be composted to feed the soil. That final act completes the cycle.

Sewing a Zokin © March 2023

Monday, January 04, 2021

Mending: Plain

I wonder how many textile artists think of mending as part of their skill set. Especially, in our modern consumer society, where it's easier and cheaper to discard old clothing and buy new. Even so, the techniques of plain mending are given their very own chapter in Thérèse de Dillmont's classic Encyclopedia of Needlework.

Encyclopedia of Needlework is now public domain and available
 as a free download from Project Gutenberg or the Internet Archive.

"How best to disguise and repair the wear and tear of use or accident is quite as valuable an art, as that of making new things."

 Thérèse de Dillmont, Encyclopedia of Needlework 

A page from Encyclopedia of Needlework.

I do think mending is making a come-back because people are becoming more environmentally conscientious, and mending is a valuable way of keeping discarded clothing out of the landfills. But also, it is becoming an art form in it's own right, and it's been exciting to rediscover the old techniques and explore the new. 

Plain mending utilizes basic sewing skills and generally includes patching, darning and seam repair. While it may not be considered a creative outlet, I still think it's important to master the techniques and take pride in one's work. Since I have an overflowing mending basket, I'm going to do just that.

Friday, June 20, 2014

Draperies for the Bedroom

If you follow my homestead blog, then you know we've been working on a bedroom remodel. Most of it was done last fall and winter, spring and summer being the time for outdoor projects. At long last, we're finally down to the finishing touches. After shopping around for draperies, I decided to make my own. I found the fabric at Hobby Lobby.

I found drapery fabric to match the carpet we bought. Story on that here.

Then I found the perfect drapery DIY at 7 Layer Studio. I modified it somewhat, and am very happy with the results.My sewing machine is on the fritz, but no matter, I love handsewing and this was quick.

The gold thimble is one of my treasures. It
belonged to my great-grandmother, an avid quilter.

The grosgrain ribbon loops was a quick, clever idea, I thought. I only made them half as long as the directions.


The result is a very nice natural gather.


I also liked the idea of pinning the hem while the drape is hanging.


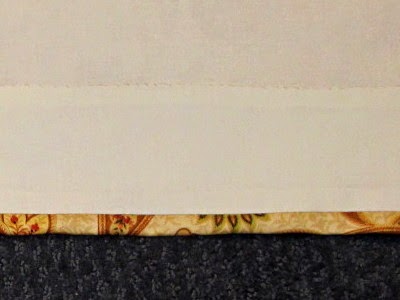
Because I had estimated the amount of fabric before we put up the rods, I decided I was a little short on length and needed to somehow lengthen the drapes while still getting a nice 4" hem. To accomplish that I sewed on a strip of lining fabric.

A faux hem made by adding a strip of lining fabric.

That way I had the weight of a 4" hem for the draperies to hang properly.


And there they are. I'm happy with them. The only things left to finish the bedroom are the carpet (what you see is padding on the floor in the photo above) and the door. Then it's done!

Sunday, March 16, 2014

Sunday, November 06, 2011

Hemming Dishtowels

I'm keeping my hat in the crafting ring by hemming the Summer & Winter dishtowels I wove in ....... 2007! I posted about them here, "Summer & Winter - 1st Dishtowels", and here "Summer & Winter - 2nd Dishtowels". They've been sitting in my trunk of handwovens all this time, just waiting for me to do something with them. Now that we're working on my kitchen remodel, I've discovered that they are a prefect match for my new kitchen colors!

New kitchen cabinet & handwoven dishtowels, yet to be hemmed

I wrote a post on this blog a long time ago, about machine hemming dishtowels (How Do You Hem Your Handwovens? along with a reader comment motivated follow-up, Hemming Handwoven Fabrics). These however, must be hand hemmed because my sewing machine has a broken bobbin case, and I haven't done any sewing lately to motivate me to replace it. Even so, I find handwork relaxing after a long day of gardening or working on the kitchen. :)

Hemming Dishtowels © 6 November 2011
by Leigh at Leigh's Fiber Journal

Wednesday, October 14, 2009

A Little Quilting

By Leigh

What better thing to do on a drizzly, damp, chilly, dark day than sit by a cozy fire ...

I love our new woodstove
... and do a little sewing.

Thanks to our fireplace project, everything around here has been dusty and disorganized. With the new hardwood dining room floor to be put in next, the forecast is for more of the same, especially when we get to sanding it. So, weaving projects like living room draperies, and even sock knitting (I discovered that I can't find my needles) are on hold at the moment.

Still, I have to do something, which turned out to be an inspiration to make some pillow shams to match a comforter...

Color inspiration for some pillow shams
... which matches the green walls of our bedroom.

Initially, I had rag rugs in mind, so when I thought about sewing some pillow shams, I thought about making something that I could coordinate with a rag rug. I chose a very simple block pattern...
This color sequence will work well in polychrome weaving.
... and used a progressive color sequence which I can reproduce as a polychrome rag rug.

Quilting was my introduction to the world of fabric and textiles. Though it's been a long time since I've pieced any tops or done any quilting, I still very much appreciate the art.

At first I thought I'd do the quilting by hand. I used to have both a quilting frame and a quilting hoop, but I believe these were left behind along the way. I believe I still have some large embroidery hoops somewhere, but I'm really not sure where at the moment. So, I'm doing something I've never done before...

Machine quilting - a 1st for me!
... quilting by machine. I appreciate how quickly it's going though and this is meant to be a simple project after all.

I'm not really following a pattern, but I did find instructions to sew mitered corners, here. There's lots of other good stuff there too.


Related post:

Wednesday, April 22, 2009

Calculating Handspun For Weaving

By Leigh

I decided I would start this series the way I ordinarily would, by looking what I will need for the final product. In the next post, I will show you how I measure my handspun.

If you are a weaver, then you are already familiar with how to measure warp and weft for your projects. If you don't weave, then all of this may be quite foreign to you. My goal is to explain this so that non-weavers can get the gist of what goes into the process. I will try not to get too technical, but I may get long winded!

I've already mentioned that I have my eye on the Folkwear Turkish Coat pattern for the pol-paca I've been spinning. The obvious question is, how much yarn will I need to spin for this coat? As with any sewing project, the first thing I need to know how much fabric is required. Below is the information I found on the back of the package:

Click on above for a better look-see.

I have a 59 inch width loom, but only the first two measurements are possible for me. Why? Because of several factors that aren't apparent at first glance. Besides planning for finished fabric length and width, I also need to allow for loom waste, take-up, draw in, and shrinkage.

Loom waste - the part of the warp that is tied to the front and back of the loom and doesn't get woven. This can be anywhere from 18 to 36 inches depending upon one's loom.

Take-up - the result of the over and under path of the yarn as it is woven. Usually 10% is added to the project length to allow for this.

Draw-in - the pulling in of the selvedges during weaving. Usually 1 to 2 inches is allowed for this.

Shrinkage - From wet finishing (washing and drying) the fabric after it's off the loom. While this varies with the type of yarn, typically 10% is added. However, if the weaver is unsure, it is imperative that a sample is woven, washed, and dried!

Consider too, that the fabric is stretched tightly on the loom during weaving Simply cutting it off the loom causes it to relax and "shrink" somewhat. All these things must be accounted for when planning how much yarn will be needed for any project.

Let's say I plan to go with the second measurement, for a width of 45 inches, and length of 3 and 7/8 yards. I need to consider several things in order to plan the amount of yarn I will need. The formula I need to use looks like this:

Desired finished project length
+ fringe or hem (none here as it is yardage for sewing)
+ take-up (about 10%)
+ shrinkage (another 10%)
+ loom waste (I allow 24")
= total warp length.

I usually calculate in inches, and then convert to yards for measuring. Without boring you with all the math, I can tell you that to weave 3 and 7/8 yards of fabric, I will need a warp length of a tad over five yards. I will round this up to a minimum of 5.5 yards for the project.

What about weft? The formula for that is:

Desired finished width
+ draw-in (10%)
+ shrinkage (I'm allowing 2")
= total warp width

Taking all that into account, I need to plan on a width of about 52 inches on the loom, to end up with 45 inch wide fabric. If I wanted to weave the 54 inch fabric mentioned on the pattern, I would need to plan on a 62 inch width on the loom. With my loom only accommodating a 59 inch width, you can see why this isn't a possibility for me.

However, this doesn't tell me how many warp threads I'm going to need in order to put a 52 inch width of warp on my loom. For that, I need to decide how many threads per inch I want my fabric to be. Here are a few more terms to help explain that:

EPI - Ends Per Inch, i.e. threads per inch

Sett (noun), Set (verb) - referring to ends per inch.

Obviously, the more ends per inch, the thicker and heavier the fabric will be.

Calculating sett is a science in itself. I often use charts, such as these. Or methods such as these or this. But for this example, I'm going to rely on experience, and choose a sett of 8 epi. This is based on my working similar size acrylic knitting yarns for twill afghans. I will weave a sample before actually warping for the pol-paca cloth, and this will let me know if adjustments need to be made. If the sample is too thick or too heavy for a coat, I will try a lower sett. If it isn't thick enough, I will increase the sett.

Armed with that number (8 epi), I can figure out how many warp ends I will need.

52 inch width on loom
x 8 epi
= 416 ends

Multiply this by the 5.5 yard length I need to warp, and I come up with a total of 2288 yards of handspun required for the warp.

And for the weft? First, a few more terms:

Pick - term for individual weft threads

Shot - same as pick

PPI - Picks Per Inch

If I plan to make a "balanced" cloth, i.e. with as many weft picks per inch as warp ends per inch, then I will use 8 (the EPI), to multiply by the number of inches in 3 and 7/8 yards.

52 inch width on loom
x 8 PPI
x 140 inches in 3 and 7/8 yards
= 58,240 inches, which rounds up to 1618 yards needed for the weft

Assuming I've calculated correctly then, I will need approximately 3906 yards of handspun yarn to weave the fabric for this coat. Plus a little more for the sampling.

So, how much handspun do I have so far? We'll look at that next time.

Posted 23 April 2009 at http://leighsfiberjournal.blogspot.com

Related Posts:
Spinning For Weaving, Knitting, Crochet, Etc. An Introduction
Calculating Sett
Another Way to Calculate Sett

Friday, February 27, 2009

Spring Cleaning: Find #3

By Leigh

If you read Thrums, then you've probably seen Susan's blog posts about some of the beautiful and inspiring things she has in her home and studio. The interior decorator in me is always interested in things like this, and in reading them I was reminded of something I had packed away.

We made two long-distance moves in six months, so a lot of stuff stayed in boxes. The idea was that apartment dwelling would be temporary, so why bother to unpack everything. That has turned out to be longer than we expected, so a number of things I love remain out of sight. After moving everything out of storage, it only made sense to go through boxes and repack them as needed. Inside one of those boxes I found these...

Click on either photo to enlarge.


These are framed plates from Godey's Lady's Book, given to me by the same grandmother who gave me the coverlet. Godey's Lady's Book was a popular publication in the 19th century, so obviously these were saved by my great-grandmother. I'm not entirely certain which issue these came from as there is no date on them. The caption reads Le Bon Ton. There is a signature on one, Heloise Leloin. I assume this is the artist.

Eventually they will find their way onto my walls, but in the meantime, they are being repacked, with the hope that they won't remain that way for too terribly much longer.

A few issues of Godey's Lady's Book can be viewed online; just click right here.


Related Posts:
Spring Cleaning: Find #1
Spring Cleaning: Find #2
Spring Cleaning: Find #4

Wednesday, May 14, 2008

Serger Research & Decision

By Leigh

In my Sewing With Handwovens (???) post, I mentioned that I was researching sergers. I was very interested in all the comments to that post; both the opinions and the advice. I wanted to share with you what I've discovered through my research and what I decided.

I started with the weaving lists I subscribe to, Weaving, WeaveTech, and the Online Guild of Weaver's, Spinners, & Dyers. It was interesting because the different lists had quite different ideas about serging handwoven fabric. The opinions ranged from "wouldn't be caught dead using it on my handwovens," to "use it all the time on my handwovens."

For those of the first opinion, the objection seems to stem from an association of serging with cheaply made, mass produced garments. This group primarily seemed to be those who've woven many years, and started sewing long before sergers became available to home sewers. The second group were largely younger weavers, who seemed to more readily accept serging as common practice.

One question that I needed to answer for myself, was what a serger could do for me that a sewing machine couldn't. Some of the appealing points were:
  1. Ravel-free edges and seam finishing - I learned to sew when pinking was enough. Not only is this no longer common practice, but handwoven fabrics especially need something to prevent unraveling.
  2. One step finishing and trimming. A serger/overlocker seams, overcasts, and trims all in one step. This is a big plus for someone like me, who wants to spend time on other things.
  3. Less bulky seams
  4. Rolled edges for things like napkins and fine fabrics.
  5. 2 feed dogs for differential feed - How often have I finished a seam to find that the two layers of fabric didn't finish up evenly! I always thought this was me, but it turns out that ain't necessarily so. It's also the fabric. The speeds of the separate feed dogs on a serger can be adjusted individually to take care of that.
  6. Decorative stitching wasn't so much a selling point for me. Having done a lot of hand embroidery in the past, any sort of machine decoration doesn't appeal to me much.
Now, it may be true that some or all of these things can be accomplished with a sewing machine. Mine is six years old and is a very basic model manual model. This serves me for what I am interested in doing: basic garment construction. Newer, upgraded machines do a lot more and are beginning to imitate overlock features. So, one possibility would be to replace my old sewing machine with a newer, upgraded model. However, those are all way out of my price range. Since I don't buy things on credit and my current sewing machine is still serviceable, I decided it to research inexpensive sergers to see what I could come up with.

Thanks to the customer reviews on Amazon.com, this is what I decided on.....

A Brother 1034D Overlock Machine.

For me, the selling points included:
  1. Compact - a must in our decidedly dinky living space
  2. Can use standard spools of sewing thread as well as serger cones
  3. Uses standard sewing machine needles (some sergers requires special needles)
  4. Choice of 3 or 4 thread overlock stitches
  5. Blind hem stitching
  6. Easy conversion to rolled hem function
  7. Easy threading
  8. Free arm capability
  9. Easy disengagement of cutter blades.
  10. Includes three, easy change presser feet: multipurpose, gathering, and blind hem.
  11. 2 instruction booklets and 2 instruction CDs, with tips such as: one doesn't have to thread from scratch every time; simply tie on the new thread and pull it through.
  12. Price - it was within my budget
  13. Value for cost - this per customer reviews.
Another nice feature is a built in threading chart for the loopers, though it came pre-threaded with sample spools.

... and the color coded tension dials ....

So there you have it. I still have the learning curve to face, but I'm not terribly daunted. Yet.


Related post:

Saturday, April 26, 2008

Sewing With Handwovens (???)

By Leigh

For two weeks I've been wanting to tell you about this month's Western North Carolina Fibers/Handweaver's Guild meeting. The program for April was "Sewing With Handwovens" with Liz Spear. What an inspiration!

Liz started by telling us about her own journey into the world of weaving, creating, and marketing her own designer clothing. Then she shared many of the garment making tips she learned through her own experience, and answered all our questions. She also brought an entire garment rack of her own designs which we were able to see, touch, try on, and take a close look at.

Sewing was my introduction into the world of textiles. I learned how to sew in a mandatory home ec class in junior high, and absolutely loved it. I loved looking at fabrics, at threads, and at patterns. I loved creating my own designs and was forever combining sewing patterns to get what I wanted. All through high school I "designed" and made my own clothes. In fact, my mother encouraged me to apply to the Art Institute of Chicago to study clothing design. In those days however, I wasn't one to follow my mother's advice, but on this I sometimes wish I had.

Gradually I became interested in other fiber arts, going next to quilting and embroidery. Later, I sewed most of my daughter's clothing when she was little, doing a lot of smocking and embroidery on them. Spinning and weaving didn't come until she was in high school. Now, I occasionally sew for myself with commercial fabrics, but most of my time seems to go to weaving, spinning, knitting, and blogging. Of my own handwoven fabrics, I can pull out one vest (no photo), one necktie (that post here), and a few bags (click here to see those). But that's it.

Liz's program has made me think about why I've been reluctant to do more sewing with my handwovens. It's not as though I haven't woven yardage with the intention of sewing with it.....

Photo of some matching fabrics I wove about 5 years ago.
2 matching cottons fabrics of log cabinOr that I don't have plenty of oddments and scraps to create with.....

Assorted samples and leftovers.Somehow I just don't feel confident enough to tackle it. One reason is knowledge, or rather lack of it. I've assumed that working with handwoven fabric requires special techniques. Another reason is that I've not always been satisfied with what I've created. Too often, the finished item didn't match the idea in my head. That's bad enough with boughten fabric, but with handwoven fabric?? It breaks my heart just to think about it. Then too, I'm reluctant because I never learned anything about fine sewing or tailoring. I can do basic garment construction from a pattern, with barely passable zippers and button holes. But that's about it. My inner sense tells me that handwoven cloth deserves the very best of all the details.

What I'm trying to get around to saying, is that Liz's program has equipped me with a new resolve to actually start sewing with my own fabrics. Like everything else, I realize that I'll never get started if I continue to think of reasons why I can't do it. Like everything else, it starts with a decision and a first step. So, I've made the decision and am ready to take that first step. I've been researching sergers and thinking about getting one.

Please don't expect too many posts about my actually doing this. I may have found the resolve to take that first step, but I still have to get up the nerve to take the second one.


Related Posts:
Hemming Handwoven Fabrics
How Do You Hem Your Handwovens?
Serger Research & Decision

Saturday, March 01, 2008

Hemming Handwoven Fabrics

By Leigh

I want to thank everyone who responded to last Sunday's post, How Do You Hem Your Handwovens. I received both encouragement as well as good ideas. As promised, here is what I learned from you all. I've tried to organize everything in a logical manner, and have tried to paraphrase as best I could. Hopefully, this will help it all "sink in." If anything needs further clarification, please let me know!

I was able to organize your information with two basic categories, "still on the loom" and "once off the loom."

Preparation for hemming starts in the planning for a piece. While it is on the loom, the fabric needs to be prepared for the type of hem desired.

To make a less bulky hem, quite a few of you, such as Annie, recommended a finer weft for the hem folds. Beryl reminded me that a finer weft for the hem will keep the plain weave section from weaving wider than the body of the towel. Marie uses an inch or two of sewing thread for the weft for the hem. I have to admit that I have actually tried this, but used a polyester thread on a piece woven in cotton. Unfortunately, these didn't shrink the same, so I wasn't happy with the result. I am making a note to purchase some cotton sewing thread! Christine weaves plain weave with a lighter weight yarn of the same fiber content. For example, 10/2s for the hems if the project weft is 5/2s. I really like this idea as it means I can give myself permission to buy more yarn! (To have a supply of lighter weight, you see. :)

Alice weaves about and inch of a solid colored tabby for the hem, and Kristin has a clever idea for making a neat, straight fold line for the hem. She shoots in a couple of picks of a thicker white yarn, leaving the ends stick out of the fabric selvedges. These are pulled out when the hem is ready to be turned, making a nice fold line.

Kathy hemstitches everything while it's on the loom. On her utility pieces, she then weaves a section of plain weave. Once the piece is off the loom, she then has the flexibility of deciding whether she wants to leave it fringed, or sew a hem after all. Marie always hemstitches for wool. If she doesn't want fringe, then she adds a short plain weave section for the hem, using in a lighter weight wool weft. Isabelle also hemstitches towels, using a technique her mother taught her. She references Weaver's Craft Magazine. If you have a copy of issue 17, check it for information on hemstitching. (Thanks to Valerie, I have several back issues of Weaver's Craft, but not that particular one.) Isabelle also weaves in a thick mop cotton to separate her towels. Once off the loom, she uses a zipper foot to sew one row of stitches on either side of th emop cotton, before removing it and cutting between the towels.

Bonnie, on the other hand, has a more free spirited approach. She warps for 2 to 4 towels at a time and then makes color changes in the weft as the mood strikes her. Measuring for cutting only comes after the towels are off the loom, warp ends are knotted, and the entire length given a hot wash and dry. One advantage I can see to this is that it would be easy to ensure that all the towels are the same length. (Some of you may recall how I finally worked out measuring weaving length with a twill tape.) I often fret over length, so this method would definitely solve that.

Bonnie also told me that her elderly aunt enjoys handwork, so they work together when it comes to the sewing part. Bonnie bastes or pins the hems, and her aunt does the handsewing. It's a happy cooperation for both of them!

Many others of you, such as Bspinner, also handsew hems. Textillian packs his weft in securely enough to be able to cut and fold over the waste weft (a shot or two of a different color) for the first fold of the hem. This is folded again, and he then runs his stitches about every 4 or 5 warp ends, depending on the sett. He also finishes the edges of the hem with a few overcast stitches. I really like this idea as it encases the raw edges. I'm going to have to start doing this too.

For machine sewing, Marie uses a zig zag stitch like I do before cutting the towels apart. Then she uses a straight stitch for the actual hemming. Annie suggests that the straight stitch is preferable, as the fabric can stretch with zig zag. She also hems by hand, but bastes first, instead of using pins.

Laritza and quite a few others use a serger for hemming. Catherine sometimes leaves the serged edge as the hem, or presses the serged edge over and hems by hand. Sayward also like serging for a simple hem, but also likes hemstitching and fringing for fancier pieces.

Last but not least is washing them! It's pretty scary to put one's precious handwoven fabric in water for the first time, but wow, what a wonderful difference wet finishing makes.

Annie recommends a hot wash for both cotton and linen. This increases their absorbency, which is what towels are made for! She prefers wind drying to machine drying. Marie puts them through a full hot water cycle and then drys them in a hot dryer after sewing.

Hopefully, I've covered all the comments and suggestions. More are welcome! This is by no means comprehensive.

Susan and CreativeTextiles (aka Deep End of the Loom), I was very interested in both of your comments. Please let me know how you get on with this!

And Kristi, about that possibility of being turned into a weaver one of these days, jump on in, the water's fine! ;)


Related Posts:
How Do You Hem Your Handwovens?

Sunday, February 24, 2008

How Do You Hem Your Handwovens?

By Leigh

In the comments to my "M's And O's Dishtowels" post, Bspinner asked how I hemmed my handspun dishtowels. I was very interested in how she did hers, and, being the sort of person who loves new ways and methods, thought I would ask you all the same. How do you hem a dishtowel? Or a handtowel? Or blankets? Or place mats and table runners? Or anything handwoven?

I have to admit that it took quite a few years before I could build up the nerve to actually cut my handwoven cloth, let alone sew it. In fact, I still have several lengths of yardage from years ago. These remain packed away in a trunk, because I couldn't bring myself to cut and sew them. It was quite an occasion when I finally did it. In fact, it wasn't all that long ago; it was when I made the log cabin necktie for my DH.

I admit it was several posts ago that Bspinner first asked this question. Hopefully it hasn't been forgotten by now but, being a visual person myself, I wanted to wait until I could get the last M's & O's dishtowel off the loom, so I could take photos of what I'm doing.

Probably most of you do something similar, but I would be interested in your feedback and comments. I'm always looking for either confirmation or better ways to do things.

My current method is to start by running a quick zig zag stitch over both ends of the fabric right after I take it off the loom. Then it is wet finished in whatever manner I intend for the finished item to be laundered. In the case of cotton dishtowels, I wash in cold water and laundry detergent.......

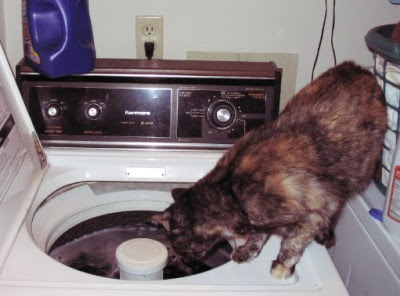
Curious Catzee, "helping" with the washing.
.... and then dry in the dryer on medium. If it's too wrinkly after that, then I iron it.

To prepare them to cut apart, I run two more zig zag rows on either side of the cutting line.

2 not-so-straight cutting lines.
I used white thread here so you could actually see the stitches. Usually I use a color that matches.

I'm not sure why I prefer a zig zag stitch. Perhaps because it offers a little "give" to the fabric. Does anyone like a straight stitch better?

Then I cut them apart and prepare to sew the hems.

I do a double fold hem, and I find that it's neater if I press the first fold and then pin for sewing.

Pressing the 1st fold of the hem.
I say "press" rather than "iron" because they aren't the same thing and I have found that which one I do makes a difference. Ironing is the act of sliding the hot iron back and forth over fabric to remove wrinkles. Pressing involves setting the hot iron straight down on the fabric, holding it there, and then lifting it up again. I found that when I ironed, I somehow pushed or stretched the cut edge of the fabric so that it ended up a tad wider than the rest of it. This didn't make for nice square corners!

Sewing the hem.
After folding and pinning, I either hem by hand (because I enjoy hand work) or use a zig zag stitch. I do prefer to pin them so that I can remove the pins as I get to them. (I've broken too many needles running over pins.)

The label sewn into the hem is an idea I got from my friend Ann in England. Awhile back, I purchased 50 labels from Heirloom Woven Labels. However, I was rather dismayed at how long they turned out to be.....

Label for my handwovens.
Close up of the label as a loop for hanging.This has been okay for some projects, like my afghans, but the labels are a little too long for smaller projects. I thought Ann's idea was a clever way to both attach a label, as well as create a loop to hang the dishtowel up with.

So that's how I've been hemming my handwoven dishtowels. Now it's your turn. I'd love to know how you hem handwoven fabric, as well as any other tips, experiences, or ideas for sewing it. If I get a good response, I'll put all your ideas and suggestions into another post. (Click here for that post.)


Related Posts:
Hemming Handwoven Fabrics

Monday, November 12, 2007

Sock Knitting Bag

By Leigh

My project over the weekend was to make a new bag to carry my sock knitting.

Materials to make a bag to hold my socks in progress.
You might remember this fabric as from an earlier post. It is leftover from one of my space-dyed warp experiments. The warp was variegated 4-ply cotton yarn. The weft was an 8/2 white cotton. Part of the fabric was used to make a diddy bag for my dad, but I had enough leftover for a bag for myself.
Close up showing how a needle could slip through the fabric.
For my purposes, I wanted a small bag with a squared bottom and handles. Since the handwoven fabric wasn't dense enough to guarantee that I wouldn't loose any double pointed knitting needles, I also decided to line it with a commercial fabric. For the handles, I found a sturdy polyester belting at Hobby Lobby.

Before I could start sewing however, I needed to do something about my sewing machine. The tension knob was not at all responsive, and I was afraid that the machine needed some extensive repair. I did some searching on the Internet first, and found an excellent article on Secrets of Embroidery. From that article, I learned about tension problems and how to fix them. It gave instructions about how to adjust the bobbin tension, though Singer doesn't make this at all easy to do! Fortunately, I achieved an acceptable bobbin tension without too much difficulty. Then I could start sewing on my bag.

Sewing a square bottom.The fabrics were cut into 12 by 24 inch pieces. I sewed the sides up lengthwise. To make the squared bottom, I opened the side seams and sewed them across the bottom of the bag, to forming triangle shaped flaps.

When turned right side out, this forms a nice, square bottom on the bag...


Square bottom from the outside of the bag.I tacked down the handles on the right side of the bag, and then sewed the outer and inner pieces around the top, right sides together. I left a four inch opening to pull it outside out.

Right sides together.
After turning, I slip stitched the opening closed, gave it a quick press, and there you have it.


Related Posts:
What I Took Off My Old Loom - The fabric & a diddy bag.