By
LeighIt has been said that the best way to learn something is to teach it. One of the challenges I had in preparing
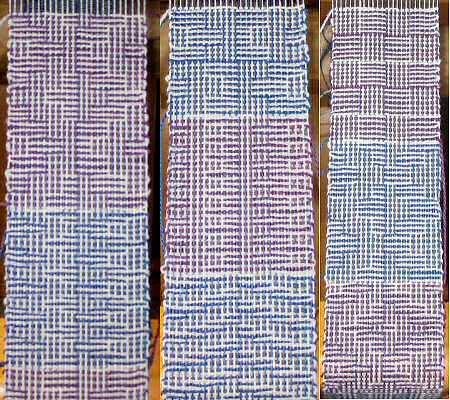
this warp, is that the shadow weave pattern was not written as a draft or even a profile, but rather a description in paragraph form. It is the undulating 4 shaft shadow weave found on page 80 of Margaret B. Windeknecht's
Color-and-Weave II.
The description goes something like this:
Blocks A, B, & C are threaded 4 times for a total of 8 ends per block
Blocks D, A, & B are threaded 3 times for a total of 6 ends per block
Blocks C, D, & A are threaded twice, for a total of 4 ends per block
Blocks B, C, D, & A are threaded once, for a total of 2 ends per block
Blocks B, C, & D are threaded twice, for a total of 4 ends per block
Blocks A, B, & C are threaded 3 times for a total of 6 ends per block
Block D is threaded 4 times for a total of 8 ends
Repeat
I couldn't follow this to thread my heddles, so I opened up WinWeave and tried to create a draft from these directions. I still got confused. Then I wondered if I tried to write it as a profile first, then perhaps it would make more sense to me. So I came up with this:

For some reason this looked easier to follow than the text description. Each small blue square on the graph paper represents one unit, i.e. one dark and one light thread. The number of squares in each rectangle represent how many times that unit is repeated in that block.
This profile is read right to left, the blocks on the bottom being the A blocks, the next line up being the B blocks, etc. So the first A block on the right is 4 units (1 dark thread and 1 light thread for a total of 8 threads), the next block, B, is 4 units (8 threads), etc.
After that I had to figure out how to translate all that into a heddle threading pattern. This was a bit more challenging as the profiles Ms. Windeknecht uses are different from the profiles I had become familiar with in Marian Powell's
1000+ Patterns.
Ms. Powell uses adjacent shafts for threading the blocks, while Ms. Windeknecht uses opposite shafts as developed by Mary Meigs Atwater. So:
Block A - Atwater, shafts 1 & 3 - Powell, shafts 1 & 2
Block B - Atwater, shafts 2 & 4 - Powell, shafts 3 & 4
Block C - Atwater, shafts 3 & 1 - Powell, shafts 2 & 1
Block D - Atwater, shafts 4 & 2 - Powell, shafts 4 & 3
I wrote out the 2 shafts for each square of the profile using the Atwater system, and came up with this (these are the first 4 blocks with A, which uses shafts 1 and 3 on the right, all the way to D, using shafts 4 and 2 on the left):

A standard tie-up is used and it is to be treadled as drawn in. After I finally got it onto WinWeave, the draft and drawdown something like this:

Of course, this isn't the entire pattern. WinWeave wanted to print in out on 5 pages, which I decided not to do.
If anyone has actually read through this, congratulations! If anyone actually understands it, stand up and take a bow! I would love to ask for feedback as to whether or not it makes any sense, but I think that would be asking a bit much of my readers. So thank you for bearing with me. I think I understand it better for trying to explain it, though I don't know if I could do a repeat performance in a month or two.
Related Posts:
Profile DraftsUndulating Shadow Weave 1 - WeavingUndulating Shadow Weave 2 - HemstitchingUndulating Shadow Weave 3 - FinishingShadow Weave Samples 1 - Begins the series of samples
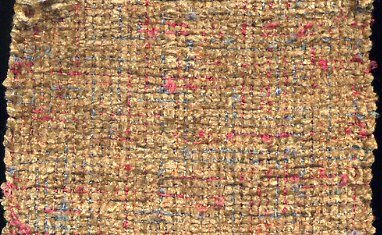
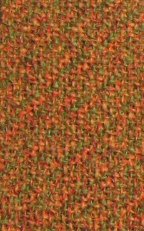
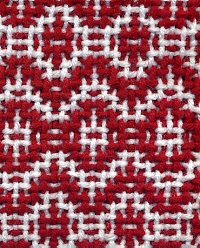
 And when you step back:
 So I'm pleased. I think this fabric would make a nice stole or scarf, or even vest fronts. Perhaps if I ever buy some black rayon chenille I'll give it a try.