Friday, May 31, 2024

Dressing the Glimakra B2F Step 6: Checking the Shed, Weaving a Header

Continued from Dressing the Glimakra B2F Step 5: Tying Up the Lamms & Treadles

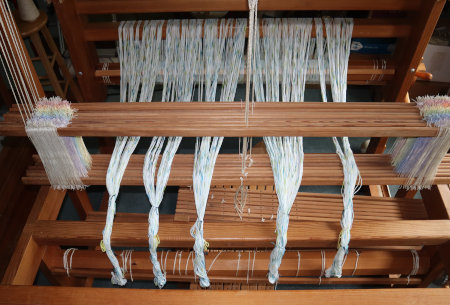
Remove the countermarch locking pins

The locking pins keep the jacks (and everything else) from moving.

The shafts shouldn't drop more than slightly.

Evaluate the shed

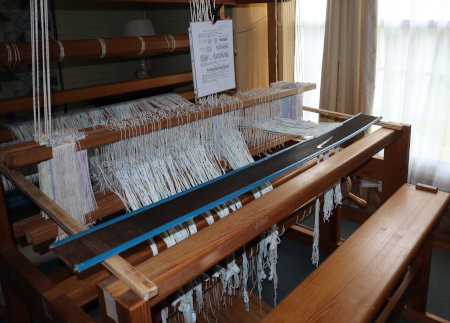
This involves weaving a couple shots and then pressing each treadle in turn to check the levelness of the bottom of the shed. 

Adjustments needed on both bottom and top

Fortunately, I took good notes on adjusting the shed the first time I set up the Glimakra. That post is here. Plus, I have Joanne Hall's Tying Up the Countermarch Loom (book review here). The summary of the process as follows.

All adjustments to a countermarch loom start at the top. 
  • With locking pins in place, check:
    • That the shafts are centered to the loom. 
    • That the warp runs through the center of the heddle eyes. If it doesn't, then the shafts need to be raised or lowered accordingly by adjusting the cord on the anchor pins on the jacks at the top of the countermarch.
    • That the beater height allows the shed to run through the middle of the reed.
    • That the lamms are level with one another. Adjust if necessary.
  • Remove the locking pins
    • Depress each treadle in turn and examine the shed. 
    • If all the warp ends are level, that's it.
    • If some of them are above or below the others, make notes of which shaft they are on.
To adjust the shed, replace the countermarch locking pins.
  • To adjust the bottom threads of the shed:
    • Start by adjusting treadle cords at the upper lamms. Use your notes.
    • For shafts with warp threads that are too high, shorten the treadle ties.
    • For shafts with warp ends that are below the shed, lengthen the treadle ties.
    • Remove the locking pins and check again. Make more adjustments needed.
  • To adjust the top of the shed:
    • Adjust the treadle cords at the lower lamms, using your list.
    • For threads that run too high, lengthen the treadle ties.
    • For threads that run too low, shorten the treadle ties.
    • Recheck and repeat if needed.
    • Note that this is opposite of what was done with the upper lamms.

Note: Treadles don't have to be even in height.

Weave the header

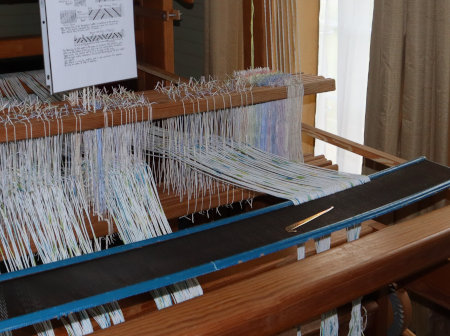
Couldn't help but be a little nervous. Did I get my shed adjustments right? Did I make any threading mistakes? I caught a few when I sleyed the reed. Did I get the tension even across the warp? I'll find out now!


Things to check:
  • Shed: good
  • Treadle height: comfortable
  • Fell line: straight
  • Threading errors: the only "error" turned out to be a dropped treadle cord
  • The ski shuttle worked well

Next time should go more quickly. For one thing, the shafts and lamms should need no further adjustment in the future. Plus, with this warp, I spent a lot of time researching, reading, re-reading, and comparing notes from various sources. For future reference, I have this blog series to refer to. 

And with that, I'm ready to weave.

Wednesday, May 29, 2024

Taking My Ashford for a Spin


My Ashford Tradtional is my first spinning wheel. No wait. Actually, my first spinning wheel was a Babe Production Wheel. This is an inexpensive PVC spinning wheel, which was all I could afford at the time. That link will take you to its maker's website. I got a lot of friendly teasing about it at spinning group, but I didn't care. I had a wheel and I was spinning! Later, I took it to spinning demonstrations. I put a length of commercial acrylic yarn on the bobbin and invited interested folk to give it a try. It was a great teaching tool.

Anyway, the Ashford was my first "real" spinning wheel, although later on I mostly used my Kromski Minstrel because its slightly more portable. When Goatldi sent me that lovely Shetland roving . . .


. . . I looked first to my Kromski, but all it's bobbins are full (of ancient singles, which I wasn't ready to deal with). So, I dug around in my spinning equipment drawer and found some empty bobbins for the Ashford. I got it out, dusted it off, and did a quick review on its maintenance. I had to replace the drive band and give it a good oiling, but other than that, it was ready to go!

After a little practice treadling, I secured some of the roving to the leader and cautiously began to spin. I was pleased that my hands remembered what to do. I had forgotten how much I love this. 


Practice is still in order, but with a nudge from Goatldi, I'm spinning again!


Related post

Monday, May 27, 2024

Dressing the Glimakra B2F Step 5: Tying Up the Lamms & Treadles

Continued from Dressing the Glimakra B2F Step 4: Threading, Sleying, Lashing On 

Tying up the treadles of a countermarch is a big job. The popular jack loom requires only tying up the shafts that rise. With my Schacht Mighty Wolf, treadle tie-up was just a matter of sliding the required shaft cords into the slot on the appropriate treadle. (There's a photo at the top of this post.)

A countermarch, on the other hand, engages all shafts; some rise and the other sink. That means all treadles have to be connected to all shafts. An 8-shaft loom like mine has 8 shafts times 10 treadles. So 80 individual cords need to be attached to the treadles. 

I've got three ways to tie up the treadles of a countermarch loom. Two I've tried, and one I plan to try soon. I'll update this post then.

Preliminary steps

  • Check position of warp
    • Should be centered in the reed and heddle eyes
    • Adjust shafts and beater height as necessary
  • Check the lamms*
    • Should be level and even in height.
    • Adjust if necessary

* Because this is my first warp after re-assembling the loom, tweaking the lamm tie-up and shaft placement should be a one-time job. Once set, future warps shouldn't need it.

The tie-up draft

Example tie-up draft for a countermarch loom

Reading the draft
  • Rows represent the shafts with the bottom being #1. The top row is shaft #8
  • Columns represent the treadles.
  • Xs and Os represent which shafts rise and which shafts sink.
  • Memory tricks for reading CM drafts
    • X as in X marks the spot (to sink the shovel)
    • O are shaped like bubbles which rise

Converting a draft

Most sources will tell you if it's a rising or sinking shed loom draft. If they don't, it's likely a rising shed draft because most American weavers have rising shed (jack) looms. You can make your own CM tie-up draft on graph paper.
  • Fill in the rising shaft squares on the graph with Os.
  • Fill in the remaining graph squares with Xs.
For a sinking shed tie-up (counterbalance loom) 
  • Fill in the sinkng shaft squares on the graph with Xs.
  • Fill in the remaining graph squares with Os.


Tying up the lamms

The lamms are the levers that control whether the shafts rise or sink.

Upper lamms
  • The shorter set of lamms
  • Function to lower the shafts
  • Memory aid: smaller sink
  • Designated by an X on the tie-up draft

 Lower lamms

  • The longer set of lamms
  • Function to raise the shafts
  • Memory aid: lower lift  
  • Designated by an O (or blank) on the tie-up draft
With draft in hand, I start by putting anchor pegs in the holes that don't need to be tied up. So on the upper lamms, I put pegs in the Os. On the lower lamms, I put pegs in the Xs. Then all I need to do is to put the lamm ties in the empty holes.

Tip: a dab of glue on the ends of the ties stiffens them so that it's easier to thread them through the lamms and treadles.

It looks like this when I'm done.

I double check the tie-up when I drop the treadle cords down in front of the each corresponding lower lamm. Each cord should have an empty lamm hole directly beneath it.

Treadle tie-up method 1: traditional

The cords are secured on the bottom of the treadle, with each lamm tie inserted through the corresponding hole in the treadle. 

Loom set-up

Treadles lifted at a height of 6 - 8 inches.

Start with the ties near the back of the loom, which need to be tightest. This is because the angle of the pressed treadle is narrowest at the back of the loom, but sharpest at the front of the loom. Hence more treadle cord is required.

Done. Distance between moving parts (treadles, lamms, & shafts) should be equally spaced.

Advantage to method 1

  • Carries on the tradition of countermarch looms. (Not sure if that's an actual advantage, but I had to think of something positive to say.)

Disadvantages

  • Tie-up for lamms and treadles must be changed for each new draft
  • Time consuming
  • Tiring on the back
  • Poking the pegs of the anchor pins into the underside of the treadles must be done by touch.
  • Requires patience

Method 2: skeleton tie-up

Shortly after I got my Glimakra, I started using a skeleton tie-up. Like the table loom, this ties the shafts to their own treadles, so that more than one treadle may need to be engaged depending on the lift work. 

8-shaft skeleton tie-up for a countermarch loom.
O = rising shafts, X = sinking shafts. Details here.

Advantage to method 2
  • Don't have to re-tie the lamms and treadles again
Disadvantage
  • Footwork is more complicated

Method 3: Tie-up from the top of the lamms

This method was described in the October 2017 issue of Complex Weavers Journal. I found several blog posts and videos on it, but still had questions. So, I ordered that back issue of CWJ and will give this a try in the near future.

 © May 2024 by Leigh at Leigh's Fiber Journal
Dressing the Glimakra B2F Step 6: Checking the Shed, Weaving a Header

Friday, May 24, 2024

Dressing the Glimakra B2F Step 4: Threading, Sleying, Lashing On

1. Prepare the loom for threading the heddles.

With a large loom, the important thing is to be comfortable. To accommodate heddle threading, I removed the breast and and knee beams. Then I had room to place a chair closer to the heddles.

I'll probably replace the chair with a slightly shorter stool next time.

This next idea I found on Peggy Osterkamp's blog, Threading the Loom Without Mistakes. She credits Jim Ahrens for teaching her this trick. 

A stick, such as an apron rod or broom handle, is hung from the castle. The warp (coming from the warp beam) is draped over the stick as you see below.


Lease sticks are placed in the threading cross and secured so that the cross hangs behind the shafts and easily accessible for threading. You can see a nice diagram at Peggy's blog (link above).

It just a matter of cutting the bottom warp loops to separate the ends and then picking the next one from the cross, threading as you go across the warp.

2. Threading the heddles

With a little experimentation, I found that the warp needs to hang in length to about the top of the lower lamms.

With this length I could easily pull bundles of warp ends through to cut the loop on the bottom from the warping board.

It also gave me enough length to secure the warp in the threaded heddles with a slip knot.


3. Sleying the reed. 

In the beater or not? I chose to lay the reed flat across support sticks. 
  1. Put the breast and knee beams back in place.
  2. Remove lease sticks and holder
  3. Lay the reed horizontally on support sticks
The set-up

This was a good time to double/triple check my threading.

Then the beater is put back on and the reed secured.

4. Lashing the warp onto the front apron rod.

I think tying the warp onto the apron rod is the more common practice, but I like to lash the warp to the front apron rod. I think it's easier to tension it this way. Weaver's preference. I have a photo tutorial here ⇢ How To Lash On a Warp.

The first time I warped this loom I didn't go behind the knee beam so that there was no room for my knees under the warp!

Photo from Warping the Glimakra: The 3 Duhs

I remembered this time.

Tips:
  • The lashing cord needs to be smooth and 9-10 times the width of the warp.
  • No knots in the cord (one continuous length).
 
Dressing the Glimakra B2F Step 5: Tying Up the Lamms & Treadles

Wednesday, May 22, 2024

Like Christmas in May

My dear friend and weaving enabler Goatldi (from New Life on the Farm New Beginnings blog), told me she was doing some clean up of her yarn stash - would I be interested in anything? I said, surprise me! Yesterday, all this arrived . . .

Colors and sizes that will enhance my stash!

ALSO, in the box I found this . . .


Some of her gorgeous homegrown Shetland roving. It is sooo soft. Just luscious. 

Now, I'm anxious to dust off one of my two spinning wheels. The bobbins for the Kromski are all full, but I rummaged around and found two empties for my Ashford Traditional. So I'm going to need to tune it up and give it a spin. I wonder if spinning is like riding a bicycle? Something one never forgets?


Related post

Sunday, May 19, 2024

Dressing the Glimakra B2F Step 3: Winding on the Warp

Continued from Dressing the Glimakra B2F Step 2: Loading the Raddle

With this step, I was in more familiar territory. I just need to adjust it to this particular loom.

1. Tensioning the warp

Should the warp be weighted, and if so, how? There are different schools of thought here.
  • No weights, tension by manually tugging on the warp after each rotation of the beam. (Chandler)
  • Applying resistance with weights or another mechanism such as a warping drum or another person. (Osterkamp). In fact, Peggy basically states the more tension during winding on, the better (although she also gives instructions for the no-tension method).
Once upon a time I used half-gallon milk jugs, which I don't get anymore because we have our own goat milk. But I did have some empty gallon vinegar jugs and used these plus a distilled water jug. 

For my personal notes: each jug weighs 8.5 pounds.

2. Winding on

The idea is for the warp to wind onto the warp beam the same width as in the raddle.

Detangle as needed by snapping the warp. 

Tangles at the raddle can result with broken threads; snapping the warp works them out.

Insert packing sticks at regularly spaced intervals to cover apron cords. This prevents the knots from making lumps in the warp.


Rolls of paper can be used instead, but the sticks came with my loom, so I use them.

Of course the weights have to be re-positioned as the warp is wound on. 

I left enough in front for threading, sleying, and tying onto the front apron rod. Then it was time to . . .

3. Remove the raddle


Now I'm ready to thread the heddles.

Notes and Observations
  • There is plenty of room for improvement, which I'll work on in the future. At least I've made a start.
  • The bunching of the warp bouts is a concern as it creates V shapes with the warp. Osterkamp recommends the following to prevent variations in tension due to the angle the warp is winding onto the beam
    1. Insert lease sticks into the threading cross and remove the choke ties.
    2. Then put an end stick into the threading end loop and spread the warp out to the proper width.
Dressing the Glimakra B2F Step 4: Threading, Sleying, Lashing On
 

Friday, May 17, 2024

Dressing the Glimakra B2F Step 2: Loading the Raddle

Continued from Dressing the Glimakra B2F Step 1: Measuring the Warp

First question: where to load the raddle? At the loom or on a table and then carry it to the loom?
Second question: where to place the raddle at the loom?

There are a variety of answers to these questions, all of which reflect the preferences of different weavers and the types of looms they have. My choices are my experiments, to be tweaked in the future as it suits me.

1. Set up the loom

Considering the size and weight of my raddle, plus the amount of room I have to work in, I opted to load the raddle at the back of the loom. Here is my set-up.


a. Support sticks rest on the front and back beams.

b. Lease sticks to secure the raddle lease (cross).

c. Raddle is as as close to the back beam as possible. Peggy Osterkamp recommends this as the best position to help ensure that the warp winds on at the same width as on the raddle.

d. End stick

Note: I later fine tuned the set-up because I found the lease and end sticks slid around too much as I worked with the warp. Here's what I did about it, and what I'll do next time . . .

With shoe laces, the end stick is tied to the back beam
and the lease sticks are tied to the gable of the loom.

One "problem" is my double back beam, as it's somewhat in the way. I considered removing it, but that would be another step, and I don't have a place to put it at the moment. I decided to try and work around it. I'll adjust if necessary. 


2. Insert lease sticks into the raddle cross.

Bouts spread out on lease sticks.

Lease sticks tied together to prevent warp from slipping off.

3. Insert end stick into the raddle end of the warp.


This is where it came in handy to have used different color choke ties for the upper and lower sides of the cross. Otherwise, I might have twisted some of the bouts when I put them on the end stick.

After the bouts are on the end stick, the choke ties are removed.


4. Distribute the raddle groups in the raddle.

I had 88 raddle groups of 4 threads each, so I counted out 44 raddle dents from center to begin laying them in, starting starting at one end and working to the other.

5. Attach the end stick to the back apron rod or transfer warp to apron rod.

Here, they are tied together with stout string, starting in the middle
of the warp and working outward with new ties every 3 or 4 inches.

I found tying the rods together to be tedious and time consuming. Next time, I'll try transferring the warp from the end stick to the apron rod. 

6. Remove the lease sticks.

7. Secure the raddle.

Ready for the next step

Options for raddle placement are as varied as there are weavers. Chandler puts her's on the breast beam, while Osterkamp recommends as close to the back beam as possible. I was able to tie mine onto the back of the loom.

My conclusion about the second back beam is to remove it, unless I'm going to use it. While it was only mildly inconvenient to have it on the loom, I think it would be easier to warp without it. 

Now, I'm ready to wind the warp onto the back beam.

Dressing the Glimakra B2F Step 4: Threading, Sleying, Lashing On

Wednesday, May 15, 2024

Dressing the Glimakra B2F Step 1: Measuring the Warp

Tucked away in my copy of Tying Up the Countermarch Loom by Joanne Hall, I found the notes I'd once  written about how to warp the Glimakra back-to-front (B2F). 47 steps! And none of it rings a bell. Eek! My first impulse was to go to YouTube, where I found a few videos, but those still left me with questions. Next, I read through my blog posts on warping back-to-front. My Warping the Glimakra: Winding It On post had some helpful notes, photos, and comments from readers. But it wasn't enough to take me through the process, so I pulled out Chandler's Learning to Weave and Osterkamp's first two volumes of her New Guide to Weaving series, and started reading.

The purpose of this series is to write a guide for myself. I want to detail the steps for next time and as many times as it takes afterward until it becomes second nature to me again. Maybe it will be helpful for someone else too. I will likely modify this as I try variations, so suggestions and tips are welcome!

Knot notes
  • (Osterkamp) Use a double half hitch at beginning and end of warp. After the warp is measured, cut the end of the loop and slip the tail off.
  • Keep all knots at threading lease end of the warp, as this is where the threads must later be cut apart for threading the heddles. I.e., the raddle end loop needs to remain intact for securing the warp onto the end stick.

1. Mark the warp path with a guide string and measure the warp. 

I decided to try Osterkamp's method of 2 leases (crosses).

At one end is the thread-by-thread lease for threading the heddles

At the other end is the raddle lease. It groups warp according to sett and raddle sections.

Raddle lease example: for this project, the sett is 8 e.p.i., and my raddle sections are ½ inch. So my raddle lease groups are four warp ends (threads) each. 

2. Keep track by counting the raddle groups.

My raddle groups were 4 ends each, so I chose to count them in groups
of 5, or 20 ends per group. There are 100 warp ends shown here.

Warping Board Tips: 
  • Don't allow warp ends to overlap on the pegs (creates uneven lengths)
  • Keep bouts (sections of warp) to no more than 1.5 to 2 inches in width (pegs tend to pull in as they fill with warp, creating uneven lengths).
Warp ends not overlapping. About 1.5 inches total width.

3. Secure crosses with choke ties. For a long warp, also secure 1 yard sections with ties.

Threading lease tied off
Tying Tips:
    • Use two ties per peg.
    • Don't catch the guide string in the ties.
    • Use different color ties to notate threading and raddle ends of the warp, also top and bottom of the warp.

4. The raddle is threaded first, so chain the warp starting at the threading cross end.
Dressing the Glimakra B2F Step 2: Loading the Raddle
Dressing the Glimakra B2F Step 4: Threading, Sleying, Lashing On
Dressing the Glimakra B2F Step 5: Tying Up the Lamms & Treadles

Monday, May 13, 2024

Step Three: Planning That First 8-shaft Project

Continued from here.

Once the Italian manner crackle sampler was in progress on my table loom, I turned my thoughts to the serious planning of a first project for my Glimakra. I've forgotten more than I remember about dressing  this loom, so I'm thinking:
  • Something simple
  • Something with 8 shafts
  • Something useful
What caught my eye, is a throw rug pattern I found in Mary Meigs Atwater's Recipe Book: Patterns for Handweavers. I bought my PDF copy on a USB drive from the Mary Meigs Atwater Weavers Guild. At $20 it's a real bargain. It includes the entire original Recipe Book (printable) plus extras such as fabric photos and wif files. You can follow that link to get a copy.

I was browsing the fabric photos and liked this one (series IV, No. 12)  . . . 

One of the many photo samples from the Atwater
 Guild's PDF Recipe Book by Mary Meigs Atwater.

It's labeled Dornik herringbone. 

Click to enlarge

Patterns include options for 4, 6, or 8 shafts. I'm going to use the 8-shaft pattern.

Click to enlarge

It looks pretty straightforward, doesn't it? I'll have to re-learn how to dress this particular loom back to front, which will take some time (but needs to be done).

For my yarns, I'm going to use 4-ply cotton, both for warp and weft. The variegated cone below caught my eye, and I was pleased to find that it coordinates with one of the curtain ideas I'm contemplating for the room.

Yarn for proposed throw rug warp on proposed window covering.

The window covering I have in mind is a quilted bedspread. It's just an inexpensive pre-printed store bought spread that I once used on our bed. I kept it to have extra blankets in case of company. I actually have two of them: one full size, the other queen size. I'm thinking these would make pretty but warm window coverings, which of course, is another project!

So the variegated yarn would be the warp. For the weft, I settled on a sage green.


It will work well with the warp, walls, and quilted bedspread.

It's been a slow-go to get to this, because I'm still going through the boxes that were stored in that room and sorting their contents. It's a job which may be ongoing for awhile considering our busy summer season. But at least I have a project planned, and I'm excited about that. I have this idea that if I can always have something to weave on one loom, I can be planning the next project for the other. While I truly enjoy every step of the process, sometimes I just feel like weaving! My goal is to have one loom in the weaving stage at all times.

It's supposed to rain all day tomorrow, so that may be a good time for measuring the warp and re-learning the step-by-step process of getting it on the loom. We'll see.