Wednesday, February 27, 2008

Honeycomb M's and O's

By Leigh

Please continue leaving your tips and techniques for sewing handwovens in the comment section of this post. Hopefully this weekend I can put them all in a separate post. I appreciate every one of them! In the meantime, here's a quick report on what I did with the little bit of red warp left on the loom.

While I was researching M's & O's, I downloaded an article from the Online Digital Archives found on this page (the sixth article down) entitled "Two Honeycomb Fabrics on M's And O's." I've had honeycomb in the back of my mind for awhile now, so after reading the article I decided to give this a try with the remainder of my red warp.

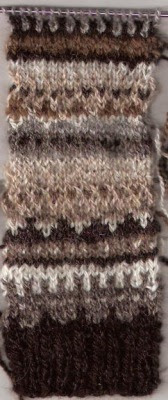
The article said that traditionally, the heavy outline weft is the same color as the warp. I didn't have anything like that in red, but I did find some of this in my stash:


It does have some dark red in it, so I decided to give it a try. After each M's & O's block, I threw a tabby shot of the novelty yarn. Here it is on the loom .....


... and here it is after washing and drying.......


I think it would look better with a more defining outline yarn, but I am intrigued enough to have come up with a few ideas for further exploration.


Related Posts:
M's & O's: The Basics
M's & O's - Weaving Observations

Sunday, February 24, 2008

How Do You Hem Your Handwovens?

By Leigh

In the comments to my "M's And O's Dishtowels" post, Bspinner asked how I hemmed my handspun dishtowels. I was very interested in how she did hers, and, being the sort of person who loves new ways and methods, thought I would ask you all the same. How do you hem a dishtowel? Or a handtowel? Or blankets? Or place mats and table runners? Or anything handwoven?

I have to admit that it took quite a few years before I could build up the nerve to actually cut my handwoven cloth, let alone sew it. In fact, I still have several lengths of yardage from years ago. These remain packed away in a trunk, because I couldn't bring myself to cut and sew them. It was quite an occasion when I finally did it. In fact, it wasn't all that long ago; it was when I made the log cabin necktie for my DH.

I admit it was several posts ago that Bspinner first asked this question. Hopefully it hasn't been forgotten by now but, being a visual person myself, I wanted to wait until I could get the last M's & O's dishtowel off the loom, so I could take photos of what I'm doing.

Probably most of you do something similar, but I would be interested in your feedback and comments. I'm always looking for either confirmation or better ways to do things.

My current method is to start by running a quick zig zag stitch over both ends of the fabric right after I take it off the loom. Then it is wet finished in whatever manner I intend for the finished item to be laundered. In the case of cotton dishtowels, I wash in cold water and laundry detergent.......

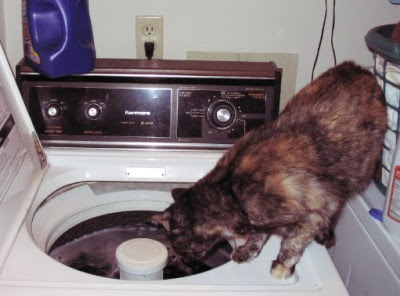
Curious Catzee, "helping" with the washing.
.... and then dry in the dryer on medium. If it's too wrinkly after that, then I iron it.

To prepare them to cut apart, I run two more zig zag rows on either side of the cutting line.

2 not-so-straight cutting lines.
I used white thread here so you could actually see the stitches. Usually I use a color that matches.

I'm not sure why I prefer a zig zag stitch. Perhaps because it offers a little "give" to the fabric. Does anyone like a straight stitch better?

Then I cut them apart and prepare to sew the hems.

I do a double fold hem, and I find that it's neater if I press the first fold and then pin for sewing.

Pressing the 1st fold of the hem.
I say "press" rather than "iron" because they aren't the same thing and I have found that which one I do makes a difference. Ironing is the act of sliding the hot iron back and forth over fabric to remove wrinkles. Pressing involves setting the hot iron straight down on the fabric, holding it there, and then lifting it up again. I found that when I ironed, I somehow pushed or stretched the cut edge of the fabric so that it ended up a tad wider than the rest of it. This didn't make for nice square corners!

Sewing the hem.
After folding and pinning, I either hem by hand (because I enjoy hand work) or use a zig zag stitch. I do prefer to pin them so that I can remove the pins as I get to them. (I've broken too many needles running over pins.)

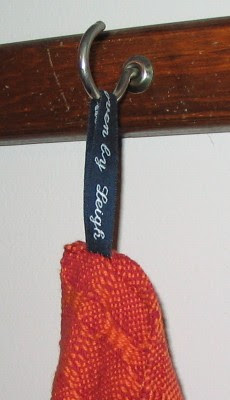
The label sewn into the hem is an idea I got from my friend Ann in England. Awhile back, I purchased 50 labels from Heirloom Woven Labels. However, I was rather dismayed at how long they turned out to be.....

Label for my handwovens.
Close up of the label as a loop for hanging.This has been okay for some projects, like my afghans, but the labels are a little too long for smaller projects. I thought Ann's idea was a clever way to both attach a label, as well as create a loop to hang the dishtowel up with.

So that's how I've been hemming my handwoven dishtowels. Now it's your turn. I'd love to know how you hem handwoven fabric, as well as any other tips, experiences, or ideas for sewing it. If I get a good response, I'll put all your ideas and suggestions into another post. (Click here for that post.)


Related Posts:
Hemming Handwoven Fabrics

Thursday, February 21, 2008

Five Red Warp Dishtowels

By Leigh

My 5 M's & O's dishtowels.
The last M's & O's dishtowel is off the loom, washed, and hemmed. Adding it to the other four, I now have a set of five M's & O's dishtowels.

Project particulars:
  • Structure - M's and O's
  • Draft - "M's & O's Three by Three Plaid," page 64 of
    A Handweaver's Pattern Book
    by Marguarite Porter Davison
  • Warp - 8/2 unmercerized cotton in red
  • Weft - 8/2 unmercerized cotton in a variety of colors
  • Sett - 20 e.p.i.
  • Picks per inch - 20
  • Number of warp ends - 380
  • Size on loom - 19 by 24 inches
  • Size after washing and drying - 15 by 22.5
I've really enjoyed the color play involved with these. In fact, it's given me an idea for my next weaving project.

© 21 Feb. 2008 by Leigh at http://leighsfiberjournal.blogspot.com

Related Posts:

Tuesday, February 19, 2008

I Don't Like Red Warp


Not a solid red anyways. It's not that I have anything against red. I like red. It's a good color. It's a useful color. But for these M's & O's dishtowels for the WNCF/HG's Winter Project, I've had a tough time finding weft colors in my stash that I have liked with it.

Initially I put on six yards of this red warp. That gave me plenty enough for a set of dishtowels, with plenty leftover to play with. But then I was stuck with finding weft to "go" with it. I limited myself to what I had available in my stash, and finally chose analogous colors. I had time to weave four dishtowels before Winter Project was due. Now, I'm pretty sure I can get at least one more dishtowel out of this warp, so I want a different color weft than the first four. Maybe I should just choose something weird to amuse myself. Like teal. Or pink.

Or, I could use several different colors for the weft. Several different yarns. However, one of the beauties of M's & O's, is that since it uses only one shuttle, it's very quick to weave. I'm into quick today.

So, after a little more rummaging around in my stash, I just chose the next color in the weft color sequence........

Saturday, February 16, 2008

What I Learned From My Swatch

Fair Isle swatch from my Shetland yarns.By Leigh

WARNING!
This post is loaded with math. Read at your own risk.

I have learned a lot from dissecting my Shetland Fair Isle swatch. And the funny thing is, the process is so logical and so simple, that I wonder why I didn't figure it out for myself.

The Fair Isle pattern is from Anne Field's The Ashford Book of Spinning. The actual sweater in the book is a lovely bulky pullover knitted at 4 stitches per inch. Since I want a cardigan at 6 stitches per inch, I will need a different sweater pattern, but I've always admired this pattern.

For my swatch, I had trouble following the black and white chart, so I colored it in. There are 16 rows in one repeat, using nine colors. To figure out how much of each color I would need, I frogged my swatch and measured each length of yarn in one of these pattern repeats.

The swatch was 3.5 inches wide, so I divided the inches of yarn I used for each color by 3.5 to find inches of yarn I would need to knit for one inch of the pattern. I could then multiply this by the size I wanted for the cardigan (both body and sleeve width), and multiply that by the number of repeats I would need for the length of each.

Formula style, here's what I did:

Inches used ÷ swatch width = Yarn for 1" width

Yarn for 1" width x Sweater circumference
= Inches needed for one pattern repeat.

Yarn needed for one pattern repeat x number of repeats in sweater length = amount of yarn needed for that cardigan piece.

This amount is in inches, so divide by 36 to get yardage.

Calculate yardage for each sweater piece and total these for approximate amount needed for cardigan. Round up generously.

So, using the bottom (yellow) color on the chart as an example:
15" yarn used ÷ 3.5" = 4.3 inches used in one inch
4.3" x 42" circumference = 180.6"
180.6" x 10 pattern repeats = 1806"
1806" ÷ 36" = 50.17 yards
Rounding up, I need 51 yards of that color for the body of the sweater.

Next I'll calculate the amount needed for the sleeves as well. Adding these two together will give me the approximate yardage I'll need of that color.

I'll do the same for each of the nine colors used in the pattern, and then figure out what I need for all the ribbed edgings. From there I can choose the Shetland colors based on the amounts I have of each.

Whew! Did I say this was logical and simple? Well, maybe not simple, but it is logical. Even so, I feel better having at least some idea of the amounts I need. At the moment I'm finishing spinning the leftover Shetland rovings, plus some extra of Nikki's fleece that Cathy sent. After that, perhaps I can actually get started on the sweater.


Related Posts:
Shetland Fair Isle Gazzintas - Do I have enough handspun???
Dissecting My Shetland Swatch - Calculating for bands & cuffs
Technically Not Fair Isle - Fair Isle knitting defined.
Shetland Sampler Cardigan Complete!

Wednesday, February 13, 2008

M's And O's Dishtowels

M's & O's dishtowels.By Leigh

Four M's and O's dishtowels done! Happily, I actually got the weaving finished in time to cut the entire length of fabric off the loom, and run it through the washer and dryer in time for Saturday's WNCF/HG meeting.

Both warp and weft are 8/2s unmercerized cottons, and I did intend to measure my fabric to see how much shrinkage I got after wet finishing. However, I was in such a hurry to get ready for Saturday's meeting, that I forgot to take before and after measurements. I did notice that since I used two different brands of unmercerized cotton (the red is one brand, the other colors another) the shrinkage was slightly different.

Yesterday I finally got them cut apart and hemmed, and I still have enough warp on the loom to either weave one more, or experiment a bit.

One thing that's fun about M's & O's, is what happens with wet finishing. Like huck lace, it is transformed. You can see this in the photo below.

Before & after wet finishing.On the left is before washing, on the right is after.

I really like the weight of this fabric for dishtowels. They are sturdy and not wimpy. The weaving size on the loom was approximately 19 by 24 inches. The finished size is 15 by 22.5 inches.

I chose the red warp as one of the parameters for my Winter Project. I wasn't too sure about what to do for the weft though. M's & O's requires the same size yarn for weft as warp, so after looking through my stash, I finally chose colors which were analogous to red.

Red warp & yellow weft.Yellow weft

Red warp & orange weft.Orange Weft

Red for both warp & weft.Red weft

Red warp & purple weft.Purple weft

The colors aren't very true here. This is probably due partly to my lighting, and partly to the fact that my digital camera is dying.

One last tid-bit; the M's & O's name. In the comments for my last post, Christine pointed out the O's. With a little lot of imagination, I found the M's too.


Christine also gave me a link to several free, pdf articles from Shuttle-Craft Bulletin, each featuring M's & O's. These are from the Online Digital Archive, and are a fantastic resource. If you are interested in downloading copies, click right here.


Related Posts:
Five Red Warp Dishtowels
M's & O's: The Basics
M's & O's - Weaving Observations

Sunday, February 10, 2008

M's & O's - Weaving Observations

I have to admit that finding that threading error really knocked the wind out of my sails at first. However, in a flashing "what the heck" moment, I decided to not abandon ship. I was very grateful for the encouraging comments I received on that post. They made me realize it wasn't so disastrous after all.

What I am weaving is dishtowels. The draft that I chose for these is from an old standby, Marguarite Davison's A Handweaver's Pattern Book. It's the "Three by Three Plaid" found on the bottom of page 64.

One thing that this draft does, is to illustrate the block theory I was trying to explain in my first M's & O's post. Hopefully, I understand this as well as I think I do.

The units are the smallest number of ends which make the weave structure unique. In the case of M's & O's, there are two, each containing 8 warp ends each:

M's & O's Block A
Unit A


M's & O's Block B
Unit B


These units can also be blocks, if they are threaded only once before threading the other, or they can be repeated, as this draft requires:

Block A consists of two units of A.


Block B also consists of two units of B.


These can all be put together into patterns, or motifs. You can click on either one for a closer look.


These two motifs alternate to make the overall pattern of the fabric, as you were able to see in this photo.....

Photo showing the overall M's & O's pattern.
...... (and yes, the threading error is the third motif from the left, center block. I only threaded twelve ends instead of sixteen, giving it a narrower appearance!)

As I've been weaving, I have observed two other things.

The first is what Valerie mentioned in the comments of that post; plain weave cannot be woven with the M's & O's threading. If you examine this close-up below, you'll see what I mean....

Close-up to show where plain weave fits into the weave structure.
In the top half, you can see how the two blocks weave up. One block weaves plain weave (goes over one, under one), the other block creates the texture with weft floats, which skip four warp ends each.

In the bottom half, you see what the "plain weave" tie-up produces. It is not a true plain weave because when you follow the weft across, you will see that every third warp thread is doubled.

The other thing I observed is that both sides of the M's & O's fabric are exactly the same. The back looks just like the front, unlike some of the twills I have woven, which are warp dominant on one side and weft dominant on the other. Click here for a photo example.

So I'm learning quite a bit. The only thing I don't know yet, is how M's & O's got it's name!

Related Posts:
M's & O's: The Basics
M's & O's Dishtowels

Friday, February 08, 2008

Arrrrrgh! Threading Error!


I'd only woven a couple of inches on my first M's & O's dish towel when I noticed a threading error! Can you spot it? Dilemma! I'm too close to a deadline and too far along to unweave. Oh well. More on this project later!

Tuesday, February 05, 2008

Dissecting My Shetland Swatch

By Leigh

In the last episode of my Shetland adventure, I puzzled over my swatch, and wondered how to know whether or not I had enough of any one color for the cuffs and bands. I received a lot of encouraging support in the comments to that post, and also some helpful suggestions.

Wool Enough
suggested the "Rule of Three," which was new to me. The formula is this:

Measurement x 3 = approximate yardage per row

So, for one cuff, I'd measure my wrist, which is 6.25 inches x 3 = 18.75 inches, (but I'll round it up to 19). Depending on how wide I want the cuffs, I will need 19 inches per row of ribbing per wrist. Based on the width knitted in the swatch (12 rows), I would need approximately 228 inches, or 6.3 yards of black yarn for each cuff. The hips, neckline, and front bands could be estimated the same way.

Then my spinning and knitting friend Mary, (who isn't interested in having a blog but really should because she is a fantastic lace designer and knitter) showed me some information from June Hemmons Hiatt's The Principles of Knitting - Methods and Techniques of Hand Knitting. What a fantastic resource this book is! On page 429, it describes a way to calculate yardage of each color needed for stranded knitting. This was not especially useful to me because 1) I had already knitted the swatch and 2) I plan to be a little fairly serendipitous in my exact color choices. However, it gave me the idea of how to get an approximate idea of the yarn I would need for each color in the pattern repeat, as well as how much I had used for the ribbing. For that, I decided that I needed to dissect my swatch.

Hiatt's technique calls for knotting the yarn for the swatch at 5 yard intervals and keeping track of how many 5 yard sections are used. Since my swatch is already knitted, all I needed to do was frog the swatch and measure the amount of each color yarn used in the 16 row pattern repeat. From that I could calculate yards per inch, and from that, calculate the approximate yardage I would need for the total width of each border band. Confused? Me too.

To find out how much yarn I had used for the ribbing on the swatch, I unraveled and measured it. I discovered that I had used approximately 4 yards for 9 rows on a 3.5 inch wide swatch. Dividing yardage (4) by width of ribbing (3.5) I calculate that I need 1.14 yards for each inch of ribbing. Multiplying that by my wrist measurement (6.25) equals approximately 7 yards needed.

The two calculations are fairly close. Since I am using a fairly fine yarn, I will use the larger of the two for my yardage estimates. At the moment I am finishing spinning the rest of the black, in order to see about how many total yards I will have. Then I'll be better able to tell if I have enough to finish all the bands on the sweater.

When it comes down to the actual knitting, I plan to take Weaver Annie's advice. I will knit all the pieces using small amounts of black in the pattern, and then knit all the edgings last! I can make narrower bands if I think I'm going to run out of yarn. As you can see, I definitely plan to play it safe with this one.


Related Posts:
Shetland Fair Isle Gazzintas
What I Learned From My Swatch
Shetland Sampler Cardigan Complete!

Saturday, February 02, 2008

M's and O's: The Basics

By Leigh

In preparation for warping my loom, here's what I've learned about M's & O's so far:

1. It is a block weave.

I have to admit that in my early days of weaving, the concept of blocks was not an easy one for me to grasp. It wasn't until I read the first chapter of Eight Shafts: A Place to Begin by Shelp and Wostenberg, that the concept began to make sense. The authors discussed blocks in terms of pattern development. The "unit" is the base, being the smallest number of warp ends needed to make a weave structure. "Blocks" are one or more repeats of the same unit. Repeated blocks can further be developed into "motifs."

In the case of M's & O's, only two, 8-thread blocks are required. Therefore, can be woven on four shafts.

M's & O's Block A
Block A - threaded from the right -
1 - 2 - 1 - 2 - 3 - 4 - 3 - 4


M's & O's Block B
Block B - threaded from the right -
1 - 3 - 1 - 3 - 2 - 4 - 2 - 4


When woven, these produce alternate areas of plain and weft-rep (ribbed) weave. These ribbed areas are actually 4-end floats.

The blocks can be repeated in an equal number to create checks, or they can be unequal to create plaids.

More blocks can be added for more shafts.

2. It is a linen weave.

So called because historically, it was a traditional weave for Scandinavian and Colonial American household linens.

In The Shuttle-Craft Book of American Handweaving, Mary Meigs Atwater states that it was commonly used for plain toweling; single repeats producing a fine, all-over figure. Larger patterns were used for more elaborate towels, as well as table linens.

3. It is a grouped thread weave.

Harriet Tidball, in The Weaver's Book, puts M's & O's in the "grouped thread class," so called because both warp and weft threads curve together into textured areas. This class also includes huck and spot Bronson, two other linen weaves. All these alternate areas of tabby with texture spots.

4. It is a balanced weave:
  • Yarns for warp and weft are the same in size.
  • It has the same number of weft shots per inch as warp ends.
  • The tie-up is balanced. Block A is woven alternating shafts 1-2 and 3-4. Block B alternates shafts 1-3 and 2-4. In other words, it is woven "on opposites".
  • The shafts are balanced, i.e. every shed has an equal number of shafts up and down.
5. It is a one shuttle weave.

Which is fine by me! All the faster to weave, especially as I have a deadline for this project. Traditionally, the weft is one color, the same as the warp. A one color weft is also fine by me, though I may not be wholly traditional with matching it to the warp.

In the meantime, my warp is measured, loaded into the raddle, and ready to be beamed. I'm hoping to make good progress on this project over the weekend.


Related Posts:
M's & O's - Weaving Observations
Honeycomb M's & O's
Multiple Tabby Weaves