Thursday, March 29, 2007

B2F Warping Progress – Still Tweaking

By Leigh

Ever since I switched from front to back, to back to front warping, I've been enjoying weaving a lot more. Even though I learned to weave 7 years ago, it has only been for the past year that I've had the time to really apply myself to it. I feel as though I spent 6 years dabbling and at last have the opportunity to become serious about it.

Each time I put on a new warp I look for ways to improve it. I realize that there are a lot of different ways to accomplish the same things, it's a matter of finding what works best for oneself and one's loom.

The question on my mind lately has been whether or not to leave the raddle in while weaving. I had been taking it out, but found some decided advantages to leaving it in; the first being a way to keep the lease sticks from creeping toward the heddles.

The first time I tried this, I tied the lease sticks together but found there wasn't enough give in the warp and several ends broke. The idea to use the rings isn't actually my own, I borrowed it from Charleen, which she uses during warping, and I thought to use during weaving. This worked better and allowed some give in my warp. No more bound and broken ends!

Everything was going well, or so I thought, until I read an Online discussion concerning where the warp passes through the heddle eye. It should be through the center, right? So I took a look and was alarmed when I discovered that it wasn't......

You can see the dip my warp makes as it travels over the raddle on it's way through the heddles, where it rubs under the top of the heddle eye. You can also see where my floating selvedge lies, which indicates the degree of the dip the warp takes. The raddle adds an additional ¾ inch to the height of the warp. More actually, as the raddle doesn't sit exactly on top of the back beam. So in between dishtowels I took the raddle out. And you know what? My warp still hugs the top of the heddle eyes. Oh well.

Speaking of floating selvedges, after a lot of experimenting, I have finally decided that I like to hang them off the back of the loom in a weighted film canister.

I've tried winding them on with the rest of my warp, but hanging them separately seems to work better for me. Especially as I often need a little give to them when I throw the shuttle and miss one of them somehow.

I use fishing weights inside the canister, and have discovered that these, with the help of a bent paper clip, are also good for the occasional loose warp thread .....

My other tweak involves measuring my progress. This worked better than simply measuring every time I advanced the warp and marking my place with a bit of thread, but this .....

..... works even better. It was Peg's suggestion; bias tape with marks I made on it (which you can't see). I pin it as I advance the warp, and unpin it before it winds onto the cloth beam. I had heard of using a cloth quilters tape measure, but never could find one. It hadn't occurred to me to make my own, so I appreciate this idea.

All in all, I feel like I'm making good progress; my weaving looks better and I'm enjoying it more. Maybe I'll make it past the novice stage one of these days after all.


Related Posts:
f2b Versus b2f - Beginning of a series
Evaluating My b2f Warp
B2F Vs. F2B - Why I Switched

Tuesday, March 27, 2007

Summer & Winter: Structure and Theory

By Leigh

Summer and Winter sampler detail.It seems that the longer I weave and the more seriously I take my weaving, I become less I am interested in instructions for projects, and more interested in understanding a particular type of weave in terms of structure and theory in order to use it creatively myself.

Even though the Online Guild's Summer and Winter workshop is coming to an end soon, I plan to continue working and learning on my own. I'm not sure I was actually ready to leave the lace weaves behind, but I needed to take advantage of what was being offered and Huck, Bronson, and Swedish Lace will be things to come back to in the future.

As a way of review, and to see how much I remember, here is what I have learned about Summer & Winter so far. This is all off the top of my head, so it will be a good test for myself to see exactly what I understand.

It is a supplementary weft weave with the extra weft threads woven on top of plain weave. The extra wefts are tied down with the warp ends on shafts 1 and 2 alternately. Hence it is called a 2-tie weave. Since the threading units are 4 ends each, this means that the weft floats are never longer (or shorter) than three warp ends.

Shafts 1 and 2 (usually) are reserved for the tie down ends. The remaining shafts are used for pattern ends. With a 4 shaft loom this means that there are 2 shafts available for patterns so that 2 blocks (or pattern units) can be utilized. The blocks can be repeated as many times as desired, so this is where design comes in.

Each block is four ends, and each includes the 1 shaft and the 2 shaft (the tie down shafts), which alternate with one of the pattern shafts. That means with 4 shafts, these are my 2 possibilities.....

Summer and Winter A and B blocks.Tabby is woven by alternating shafts 1 and 2, with the remaining shafts (in my case 3 and 4.)

Design is possible through placement and repetition of the blocks, tie-up, treadling, and yarn and color choices.

S&W uses 2 wefts, a tabby weft which is usually the same or similar to the warp, and a pattern weft which usually seems to be a little heavier than the tabby, though not necessarily.

S&W is reversible. Compare the 2 samples below.

Summer and Winter is reversible.  One side.
And the other side.They are front and back of the same sample.

S&W is traditionally woven with light and dark yarns, which evidently accounts for it's name. When I was a little girl, I remember my mother changing the draperies and bed spreads; dark in winter, light in summer. So I can imagine S&W rugs for example, being turned over with the change of season!

At the moment I am exploring different treadlings. And reading. I have managed to pull together quite a few resources on S&W. This simple weave seems to have a lot of possibilities, and I am anxious to discover them.


Related Posts:
Summer & Winter: A Basic Definition
Summer & Winter: Threading
Summer & Winter: Tie-Up
Summer & Winter: Treadling
Weaving Summer & Winter

Friday, March 23, 2007

Weaving Summer and Winter

I've got a busy weekend ahead and I won't be home much, but I've been so excited about this month's Online Guild workshop that I had to make a quick post to share what I've been doing on the loom. We have been weaving summer and winter. It's one I've not tried before and I am learning a lot.

I started with a sampler.

I learned the basics first ......

..... then experimented with various treadlings....

...... tried the tabby yarn for the pattern too ....

....... switched the pattern and tabby wefts ......
..... and then got fancy with a fun knitting yarn.

Those and a few more besides. Problem is, when I'm sampling like that I walk away and can't remember the concept of what I'm doing. So I warped the loom for more dishtowels and am working my way through the summer and winter basics and beyond, a dish towel each.

I'm using an 8/2 lime green cotton warp, which is also the tabby weft, and a 6/2 navy cotton for the pattern. I threaded in a simple Fibonacci sequence of 1, 2, 3, 4, 8, and repeat. Here's a shot of the first one on the loom.


At this point I am almost finished with the third dishtowel. I hope to have photos to compare soon.
© 2007 Leigh's Fiber Journal

Wednesday, March 21, 2007

Modular Knitting

On the knitting front, I am still diligently working on my Rare Breed Sweater. I am about 2/3 along with the second sleeve. However, since it (hopefully) won't look any different than the first sleeve, there isn't much to show for it.
In random bits of time, I am still slowly working through Iris Schreier's Modular Knits, which I started working on back here. I decided to work through all the exercises in the book along with a few projects, my ultimate goal being the Diamond Panel Vest on page 109.

My first project has been the Patchwork Eyeglass Case on page 22. I was a bit puzzled and stumped at first, until it occurred to me to check for errata for this book. I found a very handy list of corrections at Artyarns.

In experimenting, it seems to me that this technique is a perfect use of space dyed yarns. So I'm thinking about handpainted yarns for that vest.

My first patchwork square of variegated yarn:

Leigh's 1st modular knitted square.
And a completed eyeglass case:

Patchwork eyeglass case of modular knitted squares.
Not quite as elegant as the one in the book, but then I didn't knit mine out of silk. I used Bernat acrylic and polyester yarns. I wasn't too sure about the crochet edge of eyelash yarn, but was pleased that it hid any irregularities of my knitted edges.

Next up, knitting triangles.

Sunday, March 18, 2007

Angora Rabbit 5 - A Few Handspun Yarns

By Leigh

I reckon all that's left is to show you a few of my favorite handspun Angora yarns. Cathy asked in the comments about the halo and potential shedding of abused Angora, in garments. Sadly, the only knitted project I actually have from my Angora is a blend which I made before I knew about abusing the yarn.

That would be these yarns:

25% Angora, 25% Jacob, 50% Merino.
I had an unusually soft Jacob fleece which I separated by color and hand carded 50/50 with my Angora. The Angora was dyed with one of the Cushings blues for the gray parts and KoolAid Black Cherry for the dark parts. The white Jacob was blended with undyed white Angora. All these singles were then plied with Merino singles from commercially dyed tops.

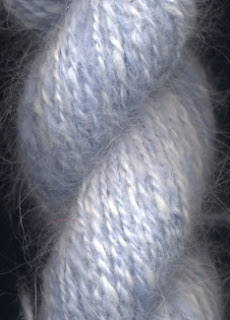
When I ran out of Jacob, the rest of the blue was eventually blended with white Angora; hand teasing them together. The yarn below was spun out of hand with that.

Hand blended Angora in blue & white.
After I took a class in spinning curly mohair at SAFF one year, I experimented with trying to spin a textured Angora yarn with the same technique.

'Curly' Angora Yarn.
I think it was visually successful, but since this was only a small sample, I'm not sure how it would knit up and wear.

But here's my favorite:

50/50 blend of grey Angora & white kid mohair.
This is a handcarded 50/50 blend of grey Angora and white kid mohair. Gorgeous! Between the color of the Angora and the luster of the kid mohair, it makes me think of polished sterling silver. On the 'someday' list in my mind, I will spin enough of this blend for a fancy cardigan.

Even though I have pounds of Angora fiber, I haven't done a lot with it. I admit that even though I am a project person by nature, rather than a sampler, I still tend to dabble and then move on to something new. Oh, I'm good at making plans, but too often life simply gets in the way and the plans and projects get postponed.

Of course, before my children left for university and were at home all the time, family was my priority. In those days, my fiber and textile pursuits were a way to treat myself after a day's work well done. I would spin or knit in the evening while as a family we read out loud. Our repeated favorites included the Little House on the Praire series, Ralph Moody's books, Sterling North's Rascal, and Watership Down. I admit that there wasn't a lot of time for weaving, which is probably why I still see myself as a novice weaver after 7 years. Even so, all those odd moments of relaxation yielded a lot of yarn, a lot of knitting, and a slow but steady amount of weaving.

Oddly, now that I have so much more time to myself I don't feel any more productive. Part of the problem I'm realizing is that I'm having a difficult time making the mental transition between fibers and textiles as relxation, and fibers and textiles as work. I enjoy weaving / spinning / knitting / dyeing so much that I have a hard time thinking of them as being productive. I often feel a little guilty throughout the day because I feel like I'm treating myself when I ought to be working instead! So my challenge for myself is to overcome this idea. I'm not exactly sure how to do it, but it's something I want to work on.


Related Posts:
Angora Rabbit 1 - My Bunnies
Angora Rabbit 2 - The Fiber
Angora Rabbit 3 - Spinning the Fiber
Angora Rabbit 4 - Finishing the Yarn

Thursday, March 15, 2007

Angora Rabbit 4 - Finishing the Yarn

Loosely spun Angora yarn with halo.By Leigh

One of the charming characteristics of Angora yarn is its tendency to “bloom.” No sooner is one's yarn finished than the fine, smooth fibers begin unspin and work their way out of the yarn. In the process, they create a soft fluff about the yarn known as “halo.” However, this also means that the fibers work their way out of the yarn completely and shed all over the place!

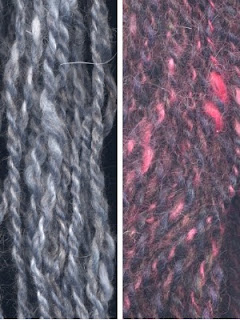
The more loosely spun the yarn is, as in this close-up of one of my first angora yarns (from Cricket) on the left, the more the yarn blooms and the easier it sheds. The halo is also developed as the yarn is handled or the garment is worn. Spinning a firmer yarn helps, but doesn't stop this.

This is true not only of 100% Angora yarns but of blends, such as the sleeve of this Angora / Jacob / Merino blend sweater (below), as well.

Halo on a handspun, handknit sweater sleeve.While many people love the soft halo effect, most folks don't like the shedding. The way to prevent this is to abuse the yarn. Sounds terrible, I know, but that's what they call it! Perhaps “wash and whack” would be a better way to say it.

The idea here is to take advantage of Angora's excellent felting quality by fulling the yarn in two steps.

Vigorously washing Angora yarn.Firstly in the washing. All that is required is warm water, a squirt of Dawn dishwashing liquid (or whatever you like to wash wool in), and a rough hand: squeeze the yarn vigorously.

In her video, Spinning Exotic Fibers & Novelty Yarns, Judith MacKenzie McCuin recommends using 2 pans of water, one hot and the other very cold. She works the yarn back and forth between the two, further shocking the fibers into felting.

Rinse thoroughly and squeeze as much water out as possible. I like to squeeze it in a towel.

The second step is the whacking:

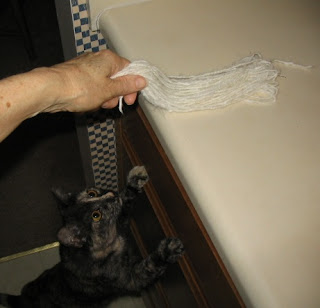
Catzee snoopervising the brisk whacking of the yarn.Hold the damp skein tightly in one hand and whack it firmly against a hard surface like a counter top. Whack hard! And loud! A bunch of times. Like cracking a whip. No wimpy whacking allowed. Then rotate the yarn and whack some more.

This step was not easy to get a picture of. I couldn't coordinate the whack, flash, and aperture opening(!) As you can see, Catzee was plainly curious. She would run off with every whack, but couldn't stay away for long as she just had to see what was going on.

Angora yarn drying loosely on a towel.After whacking I lay it loosely on a towel to dry. This textured yarn was spun from Rudy, using the "out of hand" spinning technique.

Next - a mini-gallery of some of my handspun Angora yarns.


Related Posts:
Angora Rabbit 1 - My Bunnies
Angora Rabbit 2 - The Fiber
Angora Rabbit 3 - Spinning the Fiber
Angora Rabbit 5 - A Few Handspun Yarns

Monday, March 12, 2007

Angora Rabbit 3 - Spinning the Fiber

By Leigh

Angora is considered a challenge to spin. It is slippery, flyaway, and sticks to everything. That is why it is often blended with wool, especially when first learning to spin it. It is a scrumptious addition to any fiber, though I would consider it a waste with something too coarse.

If you are spinning it for the first time, a fairly fine wool is a good choice to blend it with. The best choice is something which is the same length as the Angora you are working with, as longer fibers tend to be pull out first during the drafting process, leaving the shorter fibers to be spun at the end of the rolag or batt.

I've never woolcombed Angora, but for carding, fine carders like cotton carders or the finest carding cloth available for your drum carder works best (at least 125 tines per inch) works best.

Fricke Petite drum carder with brush attachment.
I also purchased a brush attachment for my drumcarder, a Fricke (now Strauch) Petite, as it helps keep the flyaway fibers under control.

Sharon mentioned experimenting with blending angora, and I did a lot of that too. I always found that my biggest difficulty was in getting an evenness of blend throughout the entire sample. For me, that meant weighing out the two fibers I wanted to blend, splitting and mixing up the batts, and running them through the drum carder for about 4 or 5 passes.

When it comes to spinning straight Angora, I don't do any of this. As in most things, I like to take the simplest approach. For me, that means simply spinning it by the handful, just as it is.

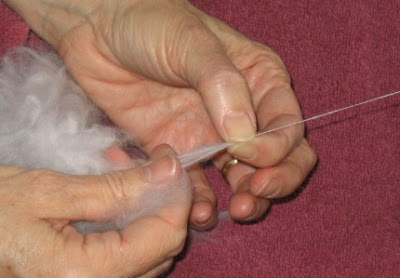
Teasing the Angora fibers to separate them for spinning.
First I "tease" the fibers by gently pulling them apart by hand. No clumps in the fiber should mean no lumps in the yarn!

A towel in my lap is always essential to keep the stray fibers off of my clothes. I've heard that silk is the best for this, but mostly I just use an old towel.

Drafting out of the hand to spin.
Like everything else, this takes practice, but once you get the hang of it, it is easy to draft from the mass of fibers. I usually use a large whorl and treadle slowly to keep the greatest amount of control. If I've teased it well and there are no short bits or VM, then it drafts well into a smooth, even single.

Drafting from a dryer sheet helps control flyaway fibers.
Kathy mentioned putting Angora in the freezer to help tame the flyawayness. I've never tried this, but of course, I don't have the luxury of a large freezer! I do find that dryer sheets work wonders for flyaway Angora fibers. It works to hold the web of fibers within a dryer sheet and draft out from that. I always kept dryer sheets around when I groomed and clipped my bunnies too. In fact, I would start by rubbing them down with one! Just rubbing my hands with a dryer sheet helps any time I'm handling the fluffy stuff.

One of the biggest challenges to spinning a 100% Angora yarn is the fact that it is so smooth and slippery. This has to do with the structure of the individual fibers. Sheep wool is easier to spin because the fibers are covered with microscopic scales (kind of like a snake's skin) called cuticle scales. These grab onto one another during the spinning process so that the fibers "stick" together to create the yarn.

The cuticle scales of Angora are smaller, smoother, and fewer in number than sheep's wool. On the one hand, this accounts for the superior softness of Angora, but on the other hand, it also accounts for it's tendency to unspin itself and shed from the yarn or garment. The soft "halo" effect which develops ("blooms") with handling, is a lovely, characteristic feature of Angora, but the shedding is not. The spinner can do two things to help counteract this, the first is by adding lots of twist. The tight twist will help trap the slippery fibers in the yarn.

Allowing the singles to twist back on themselves to check the yarn.The second thing has to do with the treatment of the yarn after spinning, which I'll have to put into another post.

Before I close though, I do want to respond to Valerie's comment that I spoke of my bunnies in the past tense. Sadly this is true. One by one they crossed the Rainbow Bridge, except for Miss Ivy. When we moved into smaller quarters in the city I found a country home for her with another spinner, where I felt she could be happier.

It's hard to not think of myself as a "Bunny Mom" anymore. I think that's one of the reasons why I chose what I did for my logo:

Rudy, my logo.
This is a caricature sketch of Rudy done by my daughter about 7 years ago. It's always been close to my heart, just like Rudy was.

Next - Technique for finishing handspun Angora yarn.


Related Posts:
Angora Rabbit 1 - My Bunnies
Angora Rabbit 2 - The Fiber
Angora Rabbit 4 - Finishing the Yarn
Angora Rabbit 5 - A Few Handspun Yarns

Saturday, March 10, 2007

Angora Rabbit 2 - The Fiber

By Leigh

Having four Angora rabbits gave me the opportunity to experiment with the different types of raw fiber. The wool can be bought commercially in either the raw form (right off the bunny) or as prepared tops. Raw Angora fiber is usually available in two forms: plucked or clipped. Which is better depends upon whom you ask.

Plucked Angora rabbit fiber. As you can see in the photo on the left, plucked angora is nice and neat.Plucking is the easiest way to sort the fibers by quality and length. It is also the most time consuming method of harvesting angora, and not all bunnies like it. It is the most expensive form of raw Angora to buy (or the most profitable to sell.)

In the beginning I tried plucking, but since I wasn't interested in trying to sell my Angora, and because my bunnies didn't like being plucked, I settled on a combination of combing and clipping my Angoras instead.

I would always start by combing out all the loose fibers. Combed Angora can be semi-orderly.

Combed Angora rabbit fiber.I found that if I was careful I could keep the combed fibers parallel and neat. For the most part however, I didn't worry about neatness.

Clipping is fastest way to get all the fiber off the rabbit, so that is usually what I did. After I had combed out as much loose fiber as possible, I would clip the rest.

Clipped Angora rabbit fiber.The biggest disadvantage to clipping is second cuts and matts, which are cut along with the good, spinnable fiber. Some believe that the blunt cut ends sacrifice some of the softness of the yarn, I can't say that I ever noticed a difference.

Since my Angora was mostly for personal use, I did not make any attempt to sort and grade it. I kept combings separate from clippings and discarded anything that was soiled, matted, or too short.

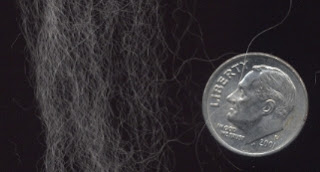
A few Angora fibers compared to a dime.Angora fibers are exceptionally fine, measuring 13 microns or less in diameter. While the down fibers are crimpy, they are much smoother than other types of wool. It is this smoothness which accounts for both its softness and difficulty to spin.

Of the two types of Angoras I had, French and English, the French wool contained the most amount of guard hair. The guard hair is straighter than the down, but not stiff like guard hair in other types of fiber animals. Angora guard hair is not removed before spinning.

Next - spinning Angora fiber.


Related Posts:
Angora Rabbit 1 - My Bunnies
Angora Rabbit 3 - Spinning the Fiber
Angora Rabbit 4 - Finishing the Yarn
Angora Rabbit 5 - A Few Handspun Yarns

Wednesday, March 07, 2007

Angora Rabbit 1 - My Bunnies

By Leigh

In my last spinning post, Charleen asked about my comment on spinning angora. Having kept angora rabbits for about 6 years and having collected a seemingly lifetime supply of angora fiber from those rabbits, I thought I'd tell you the method I eventually came to use.

When I first learned to spin I never considered angora. What I really wanted was sheep. Unfortunately, we didn't live on a farm and didn't expect to any time soon, so DH agreed to give rabbits a try. I started with just one (doesn't it always work that way ;) , but over the years was given three more.

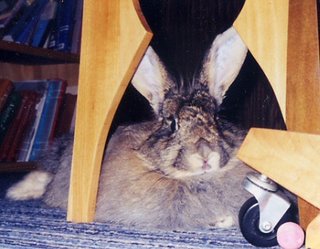
Rudy was my first.

Rudy

Rudy was a Ruby-eyed White French Angora. This is what albino angoras are called.

Baby Rudy and Baby Rascal.

He and Rascal were about the same age and got along very well together.

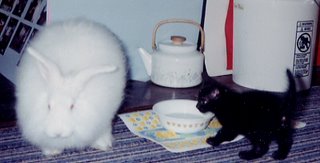
Rudy and Rascal playing Binky Ball.

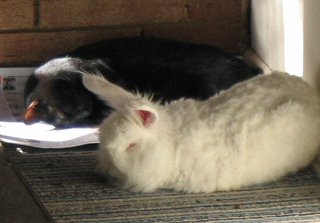
A curious thing about the Ruby-eyed Whites is that evidently they can't see very well. When Rudy would look at you, he would stare while slowly weaving his head back and forth. One theory is that they move their head in an attempt to focus on whatever they're trying to see.

Teenage buds.

Time for a snooze.

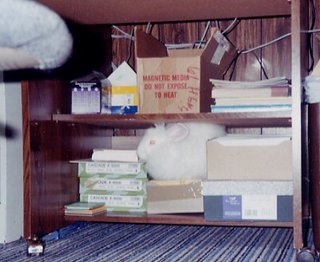
Rudy would have loved to have been a house rabbit. He loved to sit on my lap and be petted. He loved to follow me wherever I went, constantly nudging me and hopping circles around me.

Rudy playing 'Find the Bunny.'

He also loved to explore. And chew. At our house, 'my rabbit ate my homework' was a valid excuse. However, the very thing I got him for was the very thing that kept him in an outdoor hutch; his fluff. Actually this wasn't so bad. We didn't have air conditioning and angoras suffer more from the heat than from the cold. So he was more comfortable out of doors.

Cricket was later given to me by a breeder who needed to find a home for her.

Cricket

She was a gorgeous French Angora Agouti, who had been been a successful show bunny. She didn't get along with Rascal as well as Rudy did. In fact, she didn't like Rascal at all. He would have been happy to make friends, but the first time she saw him she started grunting loudly and charged him. He kept his distance after that. Of course, she lived in an outdoor hutch and only came in for grooming and clipping.

My last two bunnies were English Angoras. Smaller than the French Angoras, the English have long fiber on their faces and ears, making them a little harder to care for. Having less guard hair than the French, their wool is considered to be softer and finer. But that also meant that it matted more easily.

Rascal and Miss Ivy.
This is Miss Ivy. She was given to me along with a small grey buck we named Tibber. They were given to me one winter by a couple who had wanted to raise meat rabbits and had somehow gotten ahold of them. They were matted from nose to tail when I first got them. Unfortunately I don't have a picture of Tibber, which I really regret because he had the sweetest, most loving personality of all my rabbits. Miss Ivy and Tibber both lived outside too. I kept this small hutch available for safety whenever they were in the house for awhile.

Oh dear. I'm afraid I've spent more time reminiscing about my bunnies that talking about spinning angora. My apologies! Next ...... All about Angora fiber.


Related Posts:
Angora Rabbit 2 - The Fiber
Angora Rabbit 3 - Spinning the Fiber
Angora Rabbit 4 - Finishing the Yarn
Angora Rabbit 5 - A Few Handspun Yarns

Sunday, March 04, 2007

Huck Dish Towels Finished

I've spent this afternoon finishing up my second set of huck weave dish towels. (Kathy, these are all from The Best of Weaver's Huck Lace, so I think you'll be pleased with the book :) If you mouse-over the photos, you'll find out which weaves I used from the book.)

Lacy huck border, page 6, treadling E.
Huck boxes with 2 color weft, page 7, treadling F.All of your comments on measuring weaving length were much appreciated. Quite a few of you use cash register tape, which seems a very nifty trick. This time though, I decided to use Charleen's method of knotted string, though I did adapt it a bit.

Experimenting with a knotted measuring string.I secured one end of the string with a t-pin, and passed it under a few warp ends every time I advanced the warp. When I got to my knot, I threw a few shots of plain weave and started all over again. Happily, the lengths of my towels are quite consistent. A happy improvement from the first set.

Lattice huck, page 8, treadling J.What wasn't consistent, was the shrinkage after washing and drying them. The yellow weft did not seem to shrink as much as the green warp. It is most noticable in the detail below, which looks a bit sloppy.

More huck boxes, yellow (non-shrinking) weft only, pg. 7, treadling F.Of course, this means that the weft wasn't cotton, as I'd thought! I admit that I have a lot of mill ends and odd cones, some of which aren't labeled. Even so I thought I knew the fiber content of most of what I have. Obviously I don't. My guess is that the yellow is rayon. I've not heard of anyone using rayon for dishtowels before, so I'm not sure how well it will work with the cotton. Any guesses????? I'll have to let you know!!!

Ah well. Live and learn.

© 2007 Leigh's Fiber Journal

Friday, March 02, 2007

Finishing Up the Huck (For Now)

My goal for this weekend is to weave off the huck dish towel warp which is on my loom. The Online Guild is doing a Summer and Winter Weaving Workshop this month, and I want to participate in it. So it is with some reluctance, that I leave my huck and lace weaving experiments aside for the moment.

One of the huck dish towels on Leigh's loom.All these photos are of work still on the loom, so I have yet to discover how they look after finishing. The fabric washing is one of the delights of weaving huck; it transforms it!

Another treadling.I'm weaving from The Best of Weaver's Huck Lace. I used a dark green warp and golden yellow weft in the above two. In the one below, I used both yellow and green weft shots to see how the 'boxes' would look in one color.

I had actually intended to get a lot more weaving done this month, but February turned out to be a 'catch-up' month, and I've spent a lot of time at the computer.

One thing which needed to be done was an update to the Online Guild's public website. This is finished and will be uploaded soon.

The other thing was organizing a Study Group as a continuation of the Computer Design Workshop. We finally decided to do this with a private group blog, which was something new for me. It's proving to be an excellent format for this group however.

So, off I go to my loom. Even though my intentions are good, I think I work better with externally imposed goals. What would I do without them.

© 2007 Leigh's Fiber Journal