Saturday, April 28, 2007

Bowmont Fleece 3 - Spinning

By Leigh

One of the advantages of starting an online workshop late, is having the benefit of the experience of the other participants. The Bowmont Fleece Challenge has generated some very interesting discussions in the Online Guild forum, and until now, I've been able to sit back, read, and take it all in.

Since my sample had to be shipped overseas from the UK, it was already washed. Even so, I found the discussion about washing fine fleece to be very informative. I was able to jump in with my fleece assessment, and preparing the fleece for spinning. Challenge participants tried a variety of preparation methods: hand carders, woolcombs, and spinning straight from the staple. One common problem was neps and trying to avoid them, which is not uncommon with fine fleece.

Since I am working with 50 grams, I decided not to experiment like I would if I had a whole fleece to play with. I want as little waste as possible! My plan was to use my favorite spinning tool, my dog comb, to open the locks. I would spin straight from these without further preparation.

What I discovered was that my regular dog comb was too coarse to comb the fine locks. So I decided to try what is called a "flea comb," also available in the pet department.
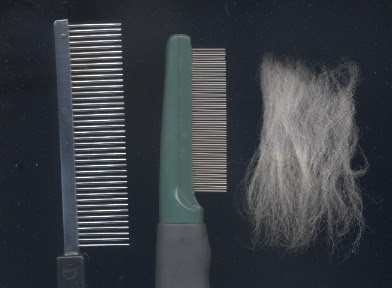
Dog combed Bowmont staple.This worked very well. It opens up the staple beautifully. (It also works great on shedding cats even if they don't have fleas, provided said cats will cooperate with being combed.)

Then on to the spinning.

Spinning a dog combed staple of Bowmont from the cut end.Spinning from the staple produced another interesting conversation amongst challenge participants; whether it is better to spin from the tip or the butt (cut) end. Of course, like everything else, there are those who have had success either way. I chose to spin from the butt of the staple for two reasons.

The first reason has to do with fiber length, as the longest fibers will draft out and spin first, leaving the shorter fibers behind to be spun last. This really isn't a factor with the Bowmont, as the quality of the fleece is consistent throughout the sample, no matter the fiber length, which varies very little anyway. It would be a factor if Bowmont was a dual coated fleece or had a lot of long guard hair. It would also be a factor if it was blended with another fiber of a different fiber length, for the same reason.

The second reason has to do with the physical structure of the individual fibers themselves. Wool fibers have microscopic scales. If you read my Angora rabbit posts, you probably remember me mentioning this then.

These scales are attached to the indivudual fibers like fish scales, the edges facing toward the tip. The fiber then can either be spun so as to smooth the scales down, or can be spun "against the grain" so to speak.

I must say that spinning them this way is wonderfully easy and smooth. The fiber has just enough lanolin left in it to make spinning a joy. Wanting to stretch my 50 grams as far as I can, I am spinning a finer yarn than I think I ever have before, except perhaps at a workshop.
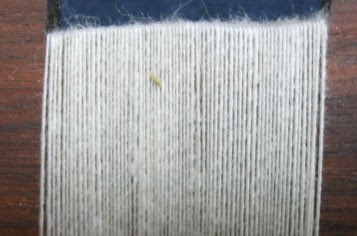
My Bowmont singles measure 66 WPI.My singles are measuring 66 WPI, and here is a short length plyed back on itself next to a dime.....

My finest yarn yet.For me this is fantastic! I am usually too impatient to spin like this, because it takes a loooooong time to fill a bobbin. But for the Bowmont, it's worth it.

Next - A problem.


Related Posts:
Bowmont Fleece 1 - The Breed
Bowmont Fleece 2 - Fiber Assessment
Bowmont Fleece 4 - A Problem
Bowmont Fleece 5 - A Comparison
Bowmont Fleece 6 - The Yarn
Tuesday, April 24, 2007

Bowmont Fleece 2 - Fiber Assessment

By Leigh

When I opened my package of washed fleece from Lesley Prior for the Bowmont Challenge, my first thought was "Wow! This stuff is heavenly!"

Coming from the UK, the fleece was already washed in compliance with overseas export regulations, so I can't give you an evaluation of the raw fleece, but here's my assessment for the washed.

1. Weight - 50 grams
2. Color - white. Tips white to cream.
3. Luster - moderate
4. Cleanliness - Very clean. No dirt, no grease. Scant amount of VM present.

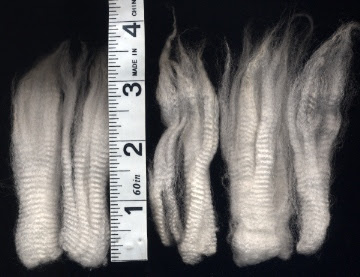
Bowmont locks


5. Length - 3 - 4 inches
6. Single coat fleece
7. Shape - rectangular
8. Integrity - locks are sound, not tender
9. Tips - sound not tender, not dirty nor discolored
10. Rare second cuts
11. Crimp - 12 per inch. No wave or curl.
12. Staples are open and finger draft easily. No cotting.
13. Fineness - exceptional! Definitely next-to-skin wearable, even for a baby.
14. Felting - easy. It only took a couple of minutes to make a small felt marble.

Since Bowmont is a Merino/Shetland cross, I would love to be able to compare it to fleece from both of those breeds. However, I've never worked with either Merino or Shetland in fleece form (either raw or washed), only as commercially prepared roving.

Another thing I am curious about would be weight before and after washing, as it would give me some idea of the grease content. I do know that Bowmont fleece does not have as high a lanolin content as Merino, but I am unsure about the lanolin in Shetland. Lots of things to be curious about!

At this point my plan is to spin it as a fine yarn, probably matching the crimp by spinning it at 12 twists per inch. I don't think this will take too long to accomplish as it is hard to keep my hands off it!

Next - Spinning the fleece.


Related Posts:
Bowmont Fleece 1 - The Breed
Bowmont Fleece 3 - Spinning
Bowmont Fleece 4 - A Problem
Bowmont Fleece 5 - A Comparison
Bowmont Fleece 6 - The Yarn

Saturday, April 21, 2007

Bowmont Fleece 1 - The Breed

Bowmont sheep and Cashmere goats grace the landscape.By Leigh

This month's Online Guild workshop is a Bowmont Fleece Challenge. When it was first scheduled last year, I was very interested and signed up. Having never heard of the Bowmont breed, I immediately went to Oklahoma State's Breeds of Livestock website to look it up. They didn't list it!

The breed is quite rare, though not in the sense of how one usually thinks of rare breeds, i.e. an old breed in danger of becoming extinct. Rather this is a fairly new breed, with approximately only 100 breeding ewes in the UK, many of which are not even being bred to Bowmont rams.

The breed was developed in the 1980s, when a team of geneticists and fiber biologists at the Macaulay Land Use Research Institute in Aberdeen, Scotland, decided to develop a breed which would be of economic benefit for hill farmers. Their goal was to produce a fleece of superior fineness, like Merino, but hardy enough to survive the conditions on the British Isles, unlike Merino. They chose British Shetland ewes and Saxon Merino rams. The offspring were then bred back with Merino, to produce a core stock of 75% Merino and 25% Shetland.

Bowmont ewes at pasture.For the next 15 years, the Macaulay Institute implemented a selective breeding program to improve fiber quality, developing the Bowmont breed of today. Unfortunately, the Institute's research farms were eventually closed, and the Bowmont flock was either sold or slaughtered.

Lesley and Roger Prior, of Devon Fine Fibres in the UK, were able to purchase a small flock of 16 ewes and two rams, in hopes of preserving this valuable new breed. Lesley is a member of the Online Guild, and made the fleece available for a guild fiber challenge. All the photos posted here are hers, and are used with her gracious permission.

Bowmont ramsBowmont Breed Characteristics:
* Adults weigh 40 - 45 kgs
* Average fleece is 2.5 - 4 kgs
* Fleece Color - white
* Micron count between 15 - 20 (fine Merino is usually 18 - 22)
* Lower lanolin content than Merino

For the challenge, I was able to purchase 50 grams of clean Bowmont fiber, plus 10 grams of Scottish Cashmere ( also from Lesley's flocks) for blending with the Bowmont. I will report on these in my next posts.

Next - Assessing the Bowmont fleece.


Related Posts:
Bowmont Fleece 2 - Fiber Assessment
Bowmont Fleece 3 - Spinning
Bowmont Fleece 4 - A Problem
Bowmont Fleece 5 - A Comparison
Bowmont Fleece 6 - The Yarn


Wednesday, April 18, 2007

Rare Breed Sweater - The Home Stretch

The home stretch ................ or at least I hope it is.

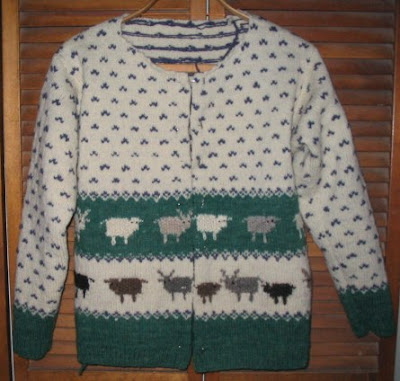
Over the weekend we had a chilly snap, so I worked on weaving in loose ends of yarn (of which there seemed a gazzillion) and sewing Rare Breed Sweater pieces together.

RBS getting sewn together.I have to admit that warm weather usually dampens my enthusiasm for large knitting projects, but the frosty mornings and brisk north wind all day were perfect for having a knitted sweater on my lap.

I have the fronts loosely pinned together with t-pins in the photo below, so you can get an idea of how it's looking.

All the pieces fit!  Yay!I was so relieved that all the pieces fitted perfectly, especially the sleeves!

What's needed now is the front and neck bands. I have to admit that I've been dragging my feet over this because I haven't completely settled on how I'm going to do this. I'm not sure of solid white bands in front because of the stripes of green. I'm not sure of trying some patterning, as I've never done this on sweater bands before. I will probably spend some time thinking about this.

Hopefully they will go better than the front bands on this sweater did. For some reason I had a heck of a time getting the pick-up right on that sweater! I can't tell you how many times I had to re-do it before I was satisfied. Even though I re-learned to knit about a decade ago, I'm so slow that I honestly can't say I've progressed to much more than an intermediate knitter.

And then there's finding buttons. Something sheepy I think? Decisions, decisions!!!!

Sunday, April 15, 2007

Summer & Winter: Polychrome Rug 2

Thank you, All, for your good wishes on my first year of blogging. I have a quick question about my new template, and would appreciate feedback. I use the Firefox web browser, but checked my new look in Internet Explorer 7 (since different browsers tend to do different things with the codes). I was dismayed to see that in IE7, the blue line at the top overlaps the bottom of my title and description. I couldn't figure out what to do in my template about this, especially as I found that the overlapping didn't occur in the preview window. Is anyone else seeing these overlapped?

Now, here's what I want to show you......

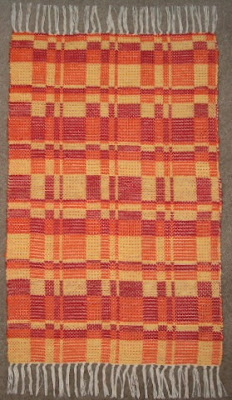
Leigh's 2nd polychrome rug.This is my second rug in polychrome, using the same threading as the first one. It measures 19 by 31 inches, plus 3 inch fringes on either end. Of course, I was silly enough to ignore the wise advice I have heard repeatedly, "Always put on more warp than you think you'll use," and had to tie on more to weave this one.

Marie asked about the rug filler I used. Yes, it does look like mop cotton!

This is what I used for pattern weft.Now, I did not purchase this, it came from the weaver from whom I bought my loom, who included all her weaving yarns too. I suspect the wrapper is exceptionally out of date; indeed, I wouldn't even know where to get this stuff.

A dime shot.It is a 4 ply worsted weight cotton yarn, similar to the sugar & cream type crochet cottons. It measures 12 WPI (if one thinks like a spinner) or 750 yards per pound (if one thinks like a weaver).

It does not make for an especially thick, nor sturdy floor rug. It would probably do best in low traffic areas or as a run-and-slide cat toy across a hardwood floor. I think it would be better suited for heavy blankets, or a throw across the back of a chair than for the floor. But what the heck, I just used what I had. In fact, I would never have purchased this color combination, I just challenged myself to use what I had. It took quite a bit of experimenting to come up with a color scheme that I liked, but once I got weaving, the spring-like Easter colors grew on me.

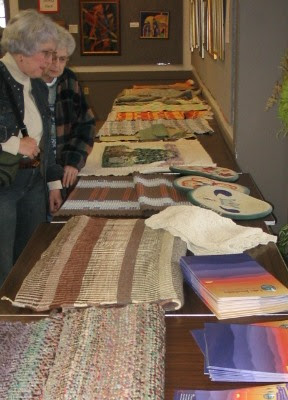
I took both my little rugs to the monthly WNCF/H Guild meeting where, in preparation for the program on rug hooking, the show-and-tell theme was "rugs."

Show & Tell rugs at the Western North Carolina Fibers/Handweavers Guild meeting.
Another view.Quite a few gorgeous rugs to admire, as you can see. Lots of good ideas to tuck away for future use. I can't say that I see myself as a rug weaver, but I do like the idea of creating items which are both useful and functional. So ........ maybe someday ........

© 2007 Leigh's Fiber Journal

Related Posts:
Summer & Winter: Polychrome Rug 1
Summer & Winter: Structure and Theory
My Fascination with Fibonacci
Gallery Photos: Rugs

Friday, April 13, 2007

My 1st Blogiversary

Today is my first blogiversary . I started my blog and made my first post exactly one year ago today. Not being a particularly sentimental sort of person, I would ordinarily let this event pass without mention, but since I started my blog with a specific goal in mind, it seems a good time to stop and evaluate how well I'm meeting it.

My original plan was to work my way through the lessons in Deb Chandler's Learning to Weave, focusing on weave structures that I hadn't tried before. The idea was to use my blog as a journal to record my progress. I started with the first weave I hadn't explored yet, log cabin.

Looking back, I see that I did not follow the book very closely. Rather, I have followed both inspiration and opportunity. Inspiration to try shadow weave flowed naturally from log cabin. Problems with warp tension led to learning a new warping technique. Opportunity enabled me to take advantage of Online Guild workshops to learn loom controlled lace weaves, and summer & winter with its variations. Not only have I woven lots of samplers this past year, but also dozens of scarves, dishtowels, yardage, and recently two small rugs.

Of course, being a spinner and knitter with a wide range of fiber and textile interests, I wanted to record those things too. This past year these have included exploring various forms of silk, a variety of other new-to-me spinning fibers, knitting several pairs of socks, knitting progress on my Samoyed lace scarf, and dabbling with modular knitting and woven crochet. Plus I've begun the journey of designing and knitting my Rare Breed Sweater.

Over the past year I've also done a little dyeing, made a number of greeting cards from my handwoven scraps, felted soaps, led a Computer Design Workshop for the Online Guild, attended SAFF, participated in a silent auction fund raiser for the Blue Ridge Handweaving Show, and re-joined the Western North Carolina Fibers/Handweavers Guild.

In starting my blog there were several things I needed to consider. One thing was to decide how I wanted to blog. How personal did I want to get? How far off topic did I want to stray? Did I want to include recipes and family photos? Did I want to include my other interests? From the beginning I determined that my blog would be exactly what its name said it was: a journal of my fiber and textile explorations.

One thing I realized early on was that blogging made me feel accountable to do what I said I was going to do. Even if no one ever read what I wrote, it was still out there for the world to see and hold me to! Many times I have been motivated to finish a project simply because I blogged about it.

Since I am a learner myself, I knew I couldn't consider this a teaching blog, yet I found that I tended to record what I look for when I'm searching the Internet: information. The reward of this has been receiving excellent feedback and suggestions from those more experienced than I, as well as sometimes helping and encouraging others who are learning as well. The exchange of ideas is stimulating! Questions from readers have made me think carefully about what I say and how I communicate. In trying to explain something in my own words, I realize how well I truly understand it.

During the year I found that I enjoyed blogging so much, that I started another one to show off my Dan's pyrographics, and later two cat blogs, one for Rascal and one for Catzee.

In evaluating my original goal, I can say that I have made progress, though I didn't specifically follow the lesson plan in Learning to Weave. Mostly I used this book as a resource, incorporating as many other resources into my studies as I could get my hands on. In looking over the Learning to Weave table of contents now, I see that the only lessons I have left to look at are the ones on double weave and honeycomb. So perhaps I've made better progress that I first thought!

To celebrate my first blogiversary, I've done a little tidying up and given my blog a new look. I haven't decided if I like the new template yet; it's not as reserved as I usually like to present myself. I will have to wait and see if I get used to it. Also, I'm including a little Leigh's Fiber Journal trivia:

* This is my 160th post.
* My first comment was from M.
* As of my last post I've received 738 comments.
* As of this posting I've had 18,978 visitors who have looked at 29,362 pages.

All in all, I have to say that I think it's been a fairly productive year. Even so, blogging does take a lot of time and I have to admit that I've sometimes wondered if it was worth it. Now, as I pause to reflect back over my first year of blogging, I can honestly say that I feel I've grown as a weaver, a writer, a computer user, and a fiber artist in general. And in humility. Not only are my successes out there for all the world to see, but my mistakes as well!

As a tool, blogging has been very helpful to me. I now have a written and pictorial record of what I've done and how I've done it. It has given me not only a sense of accomplishment, but of accountability as well. Best of all, I've made lots of new friends.

Tuesday, April 10, 2007

Summer & Winter: Polychrome Rug 1

Leigh's Polychrome RugI finished this little rug over the weekend. Annie Ham of The Netherlands, who led the Online Guild's Summer & Winter Weaving Workshop closed the month out with a handout of various treadling possibilities for summer & winter. The first was polychrome. After my polychrome sample dishtowel, I wanted to explore this a little further.

The idea to do a small rug came because April's meeting of the Western North Carolina Fibers/Handweavers Guild will feature a rug themed show-and-tell, since April's program is on rug hooking.

Here are my rug's particulars:

Warp - 10/4 cotton rug warp
Sett - 12 epi
Pattern weft - 4 ply crochet/rug filler cotton, alternating 3 colors.
Tabby weft - 6/2 cotton
Threading - 2 block S&W with repeating 1, 2, 3, 5, 8 Fib stripes
Treadling - as drawn in
Finished size - 20 by 32 inches plus 3 inch fringe

Ordinarily I wouldn't choose to use these colors; I just used what I found in my stash. I had to experiment a little, but am happy with the result!

What makes polychrome a little different from traditional summer and winter treadling is rather than alternating pattern and tabby shots, two weft picks (of different colors) are thrown and then the tabby shot. The resulting effect is a lot of fun to weave. One's mind goes on and on with endless possibilities!

Friday, April 06, 2007

Summer & Winter: 1st Dishtowels

By Leigh

After I completed my summer & winter sampler from the Online Guild weaving workshop, I decided that I needed to go back to the beginning and work more slowly through the workshop notes. Samplers are fun to weave and an excellent way to explore ideas and to test yarns, colors, setts, shrinkage, etc., but I find that if I really want understand a weave structure, then I need to spend some time working with it. It is not only my head which needs to understand it, but my hands and feet need to understand it as well. So I went back to my idea of weaving dishtowels as samplers.

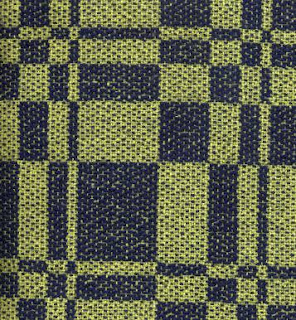
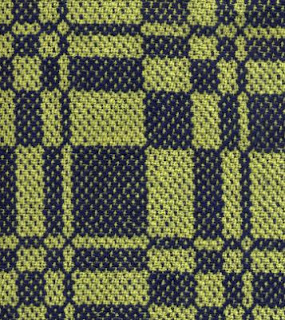
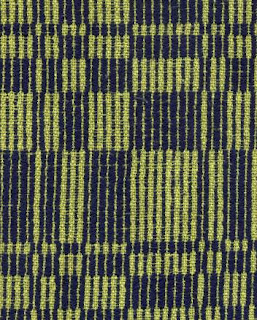
I warped my loom in 8/2 lime green cotton, set at 16 ends per inch; enough for 6 dishtowels. My tabby weft was the same as the warp, and my pattern weft was a navy 5/2 cotton. I threaded a simple repeating Fibonacci sequence (1, 2, 3, 5, 8) and treadled it the same way, aka "as drawn in." I previously shared the threading for two block summer and winter with you in this post.

Summer & winter 6 treadle tie-up.The tie-up I used is on the left. I believe that it is pretty standard for a four shaft, six treadle loom. The first two treadles on the left alternate to create the tabby weave. A tabby shot is thrown between each pattern shot.

With this tie-up, I wove through the four basic summer and winter treadling ways, and then tried two more for the last two towels.

First is the traditional way of treadling which close-up, makes the weft look something like bricks in a wall. (Can't see it from this photo I'm afraid.)

Traditional summer & winter treadling.The pattern is treadled by alternating the pattern shafts, 1-2-1-2. So one block is woven on treadles 3 and 4, the other on 5 and 6, each time with a tabby shot thrown between.

Next is the X's treadling, which requires paired pattern shafts, 2-1-1-2. So one block is woven on treadles 3 and 4 (4-3-3-4), the other on 5 and 6 (6-5-5-6), each time with a tabby shot thrown between.

X's summer & winter treadling.You can see the X's in that pattern above. I liked the look of that one.

Then I wove a towel in the O's treadling, which is also a paired treadling, except that it starts on the other pattern shaft. So it is treadled 1-2-2-1.

O's summer & winter treadling.One block in treadled 3-4-4-3, and the other, 5-6-6-5, with the tabby shots in between. You can see the O's in the above photo.

The thing about the X's and O's is that since summer and winter is a reversible weave, then no matter which of them one weaves, the other appears on the back side. While I like the X's pattern better, I found that the O's was easier to keep count of while I was weaving.

The one I really like, however, is the dukagång treadling, which weaves columns.

Dukagång summer & winter treadling.It can be woven two ways (on a four shaft loom) by choosing either the first pattern shaft or the second. Mine was woven by simply alternating the 3rd treadle with tabby, or the 5th treadle with tabby, depending upon which block I wanted to weave. I could have used the 4th and 6th treadles if I'd preferred. But I didn't.

The next towel I tried in polychrome, which is a variation of summer and winter which requires two pattern weft colors in addition to the tabby. Each color is shot, and then the tabby, so that the tabby shuttle is thrown every third pick.

Polychrone summer & winter treadling.At this point I hadn't figured out how to alternate for the blocks, so I wove stripes, but I really liked the effect and immediately started the mental planning for a polychrome project. In addition to the lime green tabby and navy blue weft, I added a dark gray 5/2 cotton for my second pattern weft and got the above result.

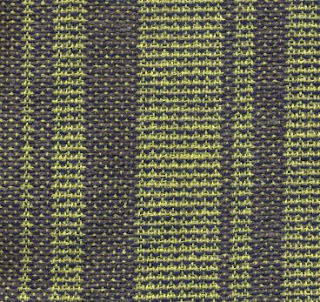
After this I had enough warp for one more dishtowel, so I switched the tabby and pattern wefts, using the lime green for the pattern shots, and the navy for the tabby. This resulted in a muted effect, below.

Swapping pattern & tabby wefts.These barely scratch the surface of what can be done with summer and winter, and I have the feeling that I may be spending a long time exploring the possibilities.


Related Posts:
Summer & Winter: Structure and Theory
Summer & Winter: 2nd Dishtowels
My Fascination with Fibonacci

Tuesday, April 03, 2007

Rare Breed Sweater - Sheep Faces

I've finished both sleeves for my Rare Breed Sweater. So all that's left is to sew the pieces together, knit the front and neck band, and add buttons.

First however, I decided to add a little detail to the sheep faces.

Not sure they all look like actual, for real sheep faces, but to quote a favorite line from a favorite movie, "That'll do Pig."

Sunday, April 01, 2007

B2F vs F2B: Why I Switched

By Leigh

Sharon made a comment in my last post about something I've observed too; that many weavers are staunchly defensive about their warping method! This is akin to another "controversy" which exists amongst spinners: Scotch tension versus double drive. It is oddly amusing that flame wars develop over these things, especially considering that when one examines a length of handwoven cloth, or a skein of handspun yarn, it is impossible to determine through observation alone what method of warping or type of wheel was used.

Well, I'm not going to go there. But I have truly appreciated the comments and questions I've received on the subject of looms and warping. As Peggy Osterkamp said in her introduction to Warping Your Own Loom & Tying On New Warps,
"I want to weave as well and efficiently as possible. I want to weave without the anxiety that a disaster can occur at any time. If problems occur, I want to know how to fix them."
That's me too. And that's why the discussion through blog comments is so helpful to me. I like to receive feedback and hear what others do in a similar situation. Questions make me think things through carefully. This is what helps me grow as a weaver. While I can't offer any definitive answers to all the world's weaving problems, I can tell you about my own journey, and why I switched from front to back, to back to front warping.

I highly recommend this book!When I learned to weave 7 years ago, I learned to warp front to back. At that time I didn't really care whether or not there were other ways to do things. It wasn't until I was given a copy of Peggy Osterkamp's 2nd book that I began to consider doing things differently. I read through it, and when I got to chapter 3 I read this.....
"In the first book in this series, I wrote that 98 percent of a person's time is spent actually realizing and enjoying the goal. It has always made sense to me to learn to enjoy the 98 percent -- in weaving and in life."
This gave me pause, as I realized that while I loved weaving, I didn't enjoying warping. So when I next dressed my loom, I started at the front of Peggy's book and worked my way step by step through to a big mess. Literally. I'm not sure whether it was the kitestick or the raddle that ultimately did me in, but I finally reached a point where I threw up my hands and said "forget it." Without another thought I went back to f2b warping.

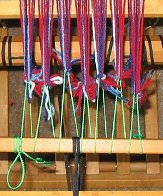
Lashing on to the front apron rodI did keep one thing from that experience however, lashing on. Tying all those knots onto the front apron rod always seemed like too much work to me, especially as adjusting the individual knots to even out the tension was particularly frustrating. Lashing on made it easier for me to adjust the tension, even after I'd started weaving the header!

That was about 5 years ago. That experience however, did make me more curious about why some weavers preferred the b2f method, so I started to ask them about it. It seemed that the top two reasons I heard was either because that was the method they first learned, or because it gave that particular weaver excellent tension. Now, we all know that a perfectly tensioned warp can also be achieved warping front to back too, but considering that tension continued to be a big problem for me, I decided to let this argument sway me and give b2f another go.

This time I researched the topic with all the resources I could get my hands on. I finally chose to try Deb Chandler's method from Learning To Weave. I think one of the reasons for my previous failure, was that I was trying too many new things at once. Deb's b2f method was more similar to how I was already warping.

That b2f warp, done last May, was a success. I've been working on fine tuning my process ever since. I have to admit however, that while better tension is the mark of it's ultimate success for me and increases my enjoyment of warping, another reason ultimately sold me on the process. I found that because the way my Schacht Mighty Wolf is constructed, I could see both warp and heddles better and thread the heddles more easily with my bifocals! Neither a very romantic nor powerful argument for most of you, but for me it meant no more cranking my neck to get that thread through the heddle eye!

Many of my tweaks are still in the experimental stage. I try new things for awhile, continue with them if they help, drop them if they don't:

The s-hook works better than either shoe laces or the metal rings.* Rings to hold lease sticks - yes, a keeper. Initially, these replaced shoe laces when I first used them to attach my warp to my milk jug weights. I have since replaced the rings as milk jug holders with s-hooks, an idea I got from your comments and visiting your blogs.

* Lease sticks left in warp - yes, this is a keeper. It's value is seen when a warp end breaks or when it's time to tie on a new warp. I don't always use my large clunky lease sticks; it depends upon the warp. I do like the holes in the ends of them however, especially in using the rings to hold them together.

* Leaving the raddle in while weaving - maybe. I'm still undecided about this. Marie's and Sara's comments about jack looms were very helpful to me and I want to research this more in the future.

* Bias Twill measuring tape - yes, another keeper. Actually getting bias tape instead of twill is pretty much par for my course, i.e. if I don't write it down, then I don't remember! (At least I remembered "tape" ;)

So, there you have it for the moment. As it is, I'm now very happy with back to front warping. Not only is it more comfortable for me with my particular loom, but I like that the warp only travels through the heddles and reed once. Not sure if this actually preserves the warp any better, but it is a factor. If any of you have other reasons why you prefer your warping method, I'd love to hear them.


Related Posts:
f2b Versus b2f - Beginning of a series
Evaluating My b2f Warp
B2F Warping - Still Tweaking
How To Lash On A Warp