Wednesday, October 31, 2007

Plying From a Center-Pull Ball

By Leigh

I will be the first to admit that I am an exceptionally poor judge of volume. I can never put away leftovers without dirtying at least two containers; the first one I choose is always either too big or too small. Along the same line, I have never been able to judge how much to fill two singles bobbins so that I don't have any leftovers after plying. Even weighing the unspun fiber doesn't help, as my spinning isn't entirely consistent. I'm sure I'm not alone in this plying problem, but it bugs me to no end to have bobbins cluttered up with leftover singles.

After struggling with this for several years, I finally decided that I needed to learn to ply from a center pull ball. There are several ways to make these, but I learned to do it with a ball winder. I use my ball winder for balling skeins of yarn off my swift too, so it is a useful tool to have around.

I wind the singles onto the winder directly from the bobbin. The yarn I am plying here is the white Shetland from the second batch from Cathy.

Before taking the ball off the winder, it is important to find the two ends. One comes from the inside of the ball, where it was secured in a notch on the core of the winder. The other is on the outside. I knot them before removing the yarn.


Next, it is ready to tie onto the leader yarn on the bobbin I plan to use for plying.

Securing the tied singles to the leader.

I secure the tied singles to the leader by first folding them over and through the leader loop. Then I pull the knot back through the loop created by the singles. When this is snugged up, I find that the singles are quite secure. After plying, it is easy to remove the yarn from the leader by pulling the knot back through the loop. No cutting needed.


I like to use one of my cabled yarns as a bobbin leader. Cabled yarns seem to withstand both directions of twisting than do ordinary yarns.

Getting started is a little tricky, and I have to admit that learning how to do this took some time and practice. The key to plying from a center pull ball is to keep both singles at the same tension during the plying. Otherwise, the looser single wraps itself around the tauter one. This is ok for certain designer yarns, but not okay for 'plain vanilla' type yarns.

This hand position works for me.You can see the hand position that works for me in the photo on the left. The actual position of the hand isn't critical; you may need to experiment a little to find what works for you. What's important is keeping the tension of the two singles the same.

When I first start plying, I treadle enough to get the twist started, then stop to make adjustments. One ply comes from the center of the ball, and the other unwinds off of the outside of the ball, but they do not unwind evenly! That means I may need to adjust my hand position or hand movements. Actually, I move the hand holding the ball very little, if at all during plying. I just keep an eye on the two singles as they unwind, and try to keep them the same length and tension.

The first few yards are where I experiment with the number of treadles I'll need to match the 2-ply on my sample card.


Comparing the twist to the sample yarn.

My sample card contains a short piece of freshly plied yarn off the bobbin. This shows me how the yarn wants to ply back on itself to balance the twist. To figure this out for plying, I count the number of treadles for a comfortable length of yarn, and then compare. The specific length isn't important as long as it is manageable for the spinner and remains consistent. If my 2-ply isn't perfect at first, I don't sweat it because the ends of a skein are often wasted anyway.


I like the sample card comparison method of determining the amount of twist needed, as it is more accurate with singles that have been sitting around on the bobbin. Sitting yarn tends to temporarily set its twist, so unless the twist is revived, it's hard to judge how much to ply it.

Once I establish a treadle count, I can get a rhythm going.

1st count the treadles to ply....
I count the number of treadles I need for the length of yarn I'm plying,

...then pinch and feed in.

pinch the point of twist, and let the plied yarn feed into onto the bobbin. As I feed in, the singles are pulled gently from the ball. If I need to, I stop treadling in order to reposition my hands to get an even tension.

One potential problem can be if the center of the ball pulls out like (click here) this. That doesn't happen often, mostly if the singles are very fine, or the fiber somewhat slippery. In that case, it's better to make smaller balls to work with.

Another thing I like about the center pull ball, is that it's easy to take a break.......

A handy way to take a break from plying.

The center of the ball fits nicely onto the tension knob (which isn't really used for anything anyway as this wheel is set up double drive.)

Plying from a center pull ball, like spinning itself, is an activity that is learned kinestetically. Descriptions and demonstrations may be helpful, but in the end one has to learn by doing it. It is something the hands have to learn as well as the mind. That requires experimentation and practice. These in turn require patience with oneself and one's efforts. Not easy for those of us with a streak of perfectionism! Still, to me it was worth it.

Monday, October 29, 2007

SAFF

Originally, I had hoped to entitle this post "Sheep To Shawl," because that's what I participated in at SAFF this year. The WNCF/H Guild hosted a Sheep to Shawl demonstration again, and this year was the first time I took part. My plan was to take photos of every step in the process, and post them in this blog post. Unfortunately, things didn't turn out that way, mostly because the crowds were so huge that good photographic opportunities were difficult (for this amateur photographer anyway.)

I started by trying to get a pic of the shearing demo, but due to the crowds I couldn't get close enough and at a good enough angle for a good shot. Then too, the area we had to spin and weave in, was long and narrow; the long part running from the public area to a door in back. That meant that it wasn't easy to set up the spinning wheels in any orderly fashion, especially as the ground wasn't level. We were set up in a crowded, hodge podge arrangement, and with the steady stream of curious onlookers, I never could figure out how to get some good shots.

I did have fun though. Besides the shearing demo, there was a fleece skirting demonstration. We had a good number of volunteers carding and spinning. We spun worsted weight singles, which were immediately wound off onto weaving bobbins. Our weaver used these as weft on a pre-warped loom, to weave a lovely shawl. No photos of that either, *sigh*.

What I can show you however, are the goodies that followed me home. Unfortunately, this won't be your typical fiber fair eye candy, as I had decided that fiber and yarn weren't at the top of my list. Consequently, my purchases are visually boring, but very useful.

Any type of fiber is usually a temptation for me, but I decided to close my eyes to all of it and focus on some items that I didn't want to have to mail order later, and pay shipping on. I used to do a lot of mail order shopping, but as shipping costs have gone up, my mail ordering has gone down. Fiberwise however, I couldn't resist this package of silk hankies.

A stack of silk hankies purchased at SAFF
I had so much fun knitting them, that I wanted to dye some of my own and do that again. Or maybe try weaving with them.

What I mainly wanted to focus on were dye supplies. I have done very little dyeing these past two years, but now with the prospect of moving to a larger place where I can have room to set up and get outdoors, I want to get back into dyeing.

Dye supplies
The tall bottle on the back right is supposed to be Synthrapol. It isn't. It's Retayne, which isn't the same thing. I just noticed this when I set up for the photo! Grrrr. Don't ya just love it when someone shelves an odd bottle without watching where they're putting it. *sigh*

The other items include a few Cushings dyes, a pound of alum, 4 ounces of cream of tartar, and a Procion Starter Set from Earth Guild. I got the Procion kit because I want to experiment painting some cotton warps. All my dye experience has been with wool and silk, so this will be something new for me.

RBS front with buttonsThe other thing I looked for and found, was buttons for my Rare Breed Sweater, which I was unable to find locally. This project has been set aside since last April, when I completed everything but the neck and front bands. I knitted the neck band last week, but had to wait until I got some buttons before I could knit the front bands.

I don't know why, but I always agonize over choosing buttons. I had something sheepy in mind, but wasn't able to find anything with this theme that I really liked. I know that buttons can either compliment or distract from a finished project, so I am usually hesitant when it comes to fancy buttons. Most of the time I opt for something plain, just to be safe. I really liked these however .....

Close-up of button


What do you think? Are they a good choice for this sweater? Knitting on the button bands will commence soon.

So that's it. That's the SAFF report. It was a fun day with beautiful weather and good friends. I thoroughly enjoyed myself.

Friday, October 26, 2007

Jack Loom Diagnostics

Several weeks ago, I mentioned that I was going to warp my jack loom again. I wanted to see if I could apply some of what I've been learning about looms.

When a weaver warps a loom, the goal is for the entire warp to be evenly tensioned across it's whole width. However, one of the problems with jack looms and warp tension, has to do with the way this type of loom makes the shed (opens the warp so that the shuttle can pass through). The jack loom is considered a rising shed loom, because to make a shed, one or more shafts lift the warp ends threaded through them. During weaving, that upward pulling on the warp increases the tension on those lifted warp ends. This means that the warp in the shafts which remain in the down position are temporarily at a lower tension. This can create problems for a weaver, including skipped warp ends.

To compensate for this, the warp on a resting jack loom should take a downward curving dip. I wasn't able to determine this by just looking at it, so I set up a diagnostic string, as described by Peggy Osterkamp in Warping Your Loom & Tying On New Warps. You can see mine below; it's red and weighted at the front and back of the loom with s-hooks.

Running a diagnostic string.
As you can see, my warp does indeed dip below this string.

The warp dips below the diagnostic string both with the raddle....
Then I wondered if my raddle had something to do with it, so I removed it and took another look......

...... as well as without.
Even without the raddle the warp dips down below the diagnostic string.

The purpose of the dip is to help compensate for the upward lifting of the warp as the shed is made. Both top and bottom of the shed should be the same distance from the diagnostic string, resolving the difference in tension between the two.

My conclusion? That Schacht did a good job of designing their looms!


Related posts:

Tuesday, October 23, 2007

Finishing the Unfinished Afghan

By Leigh

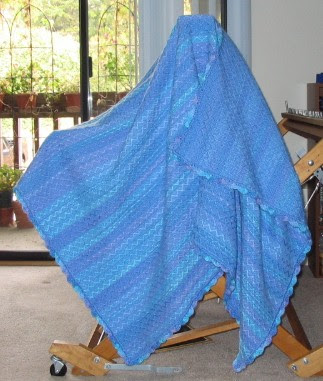
In August, I posted about finishing my (commercially) space dyed yarn afghan. (That post here.) Instead of fringing it, I decided that I wanted to crochet an edging all around. Finally, with cooler weather, I've gotten that done.

Completed space dyed yarn afghan.
I decided on a simple closed shell edge, to compliment the zig zag effect of the twill treadling.

Close-up of crochet shell edging.
1st row - American single crochet (double crochet in the UK) all around in solid blue (the same as the weft yarn).

2nd row - a shell row consisting of *5 American double crochets (UK trebles) in one stitch, skip 2 stitches, one US single, skip 2 more*, repeat from *.

For the shells, I used the space dyed warp yarn. I didn't figure out the corners till the last one, but oh well, who's gonna notice from a galloping horse?

Comparison of afghan front & back.
I think that as a Christmas gift, this will be appreciated by the recipient. However, as an experiment in space dyed yarns, I'm not satisfied with the results. I tried to measure the color changes in bouts, but the commercial dye job was too inconsistent, so that the color changes aren't even and the effect is too stripy. So I reckon that leaves me with dyeing my own warps, which is an adventure I'll save for another time.


Related Posts:
More Space Dyed Twill Weaving
Space Dyed Twill Afghan

Saturday, October 20, 2007

A Shetland Hodge Podge

At least that's what it seemed like when I went to fetch out the white Shetland fleece from this bag....

Bag of 3 types of Shetland fleece.....from Cathy last July. I've already posted about that intrigueing blackish/brown fleece here, so the next one on my mind was the white one, especially after my interesting discovery about those Shetland whites.

However, when I dumped the remaining fleece out of the bag, they were both dirty enough that I couldn't tell which was which.

What I did notice, was that quite a bit of the fleece looked like this.....

.... with thick, matted, yellow stained butts. I took a dog comb to them, and the combed out easy enough.

I decided to wash both fleeces together, and try to sort them out afterward. I was able to do so with a little help....

One fleece is quite white, while the other is white with cream tips and black and reddish fibers in it. The difference is subtle....

I will drumcard and spin these separately. More on that later.

© 2007 Leigh's Fiber Journal

Wednesday, October 17, 2007

What I Did With All Those Yarn Ends

Remember these?

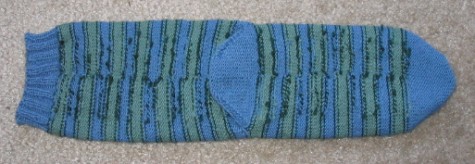
"Before" shot of my sock inside out
Well, this post is for Sharon, who was curious as to what I would do about all those yarn ends. Both Sharon and Marie mentioned allowing them to felt in with wear, but I wasn't entirely confident enough in my knitting to do that.

Bettina wondered if I couldn't have carried the yarn over the stripes without cutting. I actually tried that, but had tension problems that I wasn't happy with. However, since she has had success doing this, it is something to try again.

I had also tried to knit in the ends as I worked the color rows, but that didn't work well either.

So I ended up doing this.....

"After" shot of my sock inside out
.... which really wasn't too bad to do. I wove yarn ends in while Dan read aloud from one of the Ralph Moody series, and the time went quickly. Even so, I'm not too sure I'll attempt a multi-yarn sock again in the near future.

Sunday, October 14, 2007

How to Lash On a Warp

By Leigh

So here I am, warping my jack loom once again, after months of abandoning it for my new countermarche. Why am I doing this after all my praises for the countermarche system? Well, I am wanting to see if I can get a better warp, better shed, and better weaving, incorporating everything I've learned about looms lately.

Several weeks ago, I discussed the pros and cons of lashing versus tying a new warp onto the front apron rod. With this next warp, I'm going to use the lashing on method. I thought I might show you step by step how I do this. It can be done with either a b2f or f2b warp.

New warp trimmed evenly.

After the warp in wound on and threaded, I go to the front of the loom and trim the warp so that it is fairly even. I know that some weavers can measure their warps so that they are perfectly even, but I'm not one of those weavers.

Warp bundles knotted across the warp.

The warp is knotted in one inch groups. I use a slip knot to do this. I have read that this is not a good idea as the slip knot can slip, but I haven't had any problems with it. I reckon if I ever do, then I'll use a different knot.

Supporting the apron rod for lashing.Before I begin lashing, I do two things.

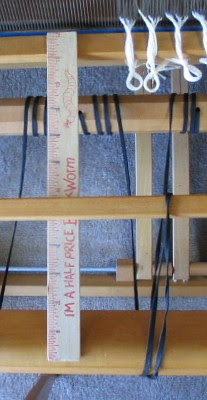
First I support the front apron rod as shown on the left, using two 12 inch rulers. I place one on each side of the warp, resting them between the breast beam and the beater. The front apron rod is laid across those two rulers. This supports it for lashing.

The second thing I do is to make sure that the apron cords are centered in relation to how they wind onto the cloth beam. On the left, you can see the cloth beam with the black apron cord wound around it (near the top of the photo). The cord then travels over the breast beam (at the bottom of the photo) and is looped over the apron rod (resting on top of the ruler in the photo's center.) The apron cord forms V shapes. I try to center each point (where the cord loops over the apron rod), in the middle of the V. The one pictured on the left (to the right of the ruler) isn't centered, so I moved it on the apron rod a bit to the left.

The lashing cord needs to be about 9 to 10 times the width of the warp. It also needs to be very smooth, so that it can slide easily through the warp bundles. Mine is a smooth braided cord. It is tied to the front apron rod with a double half hitch.

Lacing the lashing cord through the bundles & around the apron rod.Next, I lace the cord through each warp bundle. I go through the center of each bundle, threading the lace from the top down.

The lashing cord then goes under the apron rod, and then up and over it. (See photo at right.) The effect is that the lashing cord is being spiraled around the apron rod, through each group of warp ends. I aim to keep about three inches between the warp knots and the apron rod.

I continue threading the lashing cord through each group of warp ends. I pause occasionally, to tighten up the cord. Once it's laced through all the warp bundles, I tie it on the other side of the apron rod with another double half hitch.

The warp is lashed onto the front apron rod.

The next step is to begin to even out the tension across the warp. To do this, I go to the back of the loom and push down on the warp......

Starting to even out the warp tension.

... focusing especially on the sections that are tautest. Since the warp bundles can slide easily on the lashing cord, the tension begins to even itself out.

To test how even the tension is across the warp, I go to the front of the loom again, and check it behind the reed.....

Checking tension eveness.

I repeat this process until there are no obvious taut or loose sections. Then I can fine tune the tension from the front.

Making small tension adjustments.Since the lashing cord slips easily through the warp bundles, fine adjustments of the tension are fairly easy. The tension of indivudual bundles can be adjusted by either pulling on the cord, or by pressing down on the knots. Either way works.

I used to fret over getting the tension perfect. I felt quite inadequate because I wasn't always sure how even the tension was. Then I read "Lacing On" in Peggy Osterkamp's second volume. On page 65 she says,

"Don't agonize. If you can feel a tight or loose bundle, adjust it, but if you can't tell, then the tension must be even."

If I have any further doubts about the tension, then I use a two stick header. This always seems to even the entire thing out. It entails using two smooth sticks or dowel rods.

To make a two stick header, I first throw three shots without beating, then beat them all together. After about one inch of plain weave, I place a stick in each of the next two sheds.

A 2-stick header.

This evens it all out like a dream. Then I weave another inch of plain weave, and I'm ready to begin on my project.


Related Post:
Comparing Looms: Jack & Countermarche
Jack Loom Revisited

Tuesday, October 09, 2007

"Fiber In The Mountains" Show

The Western North Carolina Fibers/Handweavers Guild fiber show opened over the weekend. This show was the deadline I used for a couple of projects awhile back. I attended the opening reception and was very impressed with the entries. 59 guild members entered 104 items.

My photo taking was pretty sporadic, but here are a few that turned out. Remember my zig zag twill lap robe? You can see it in the display below.

Display including my lap robe.
This display features the small cushion I made from one of my S&W Fibonacci dishtowels:

Display including my little cushion.
I also have a couple of photos of entries by friends in my spinning group. The next two below are by Mary Nichols, who is a member of the Southern Highland Craft Guild. Mary is a weaver, spinner, and dyer, but her specialty is lace knitting. She can knit out of her head, what I have to painstakingly labor over (with a pattern) for just a few rows.

Mary Nichol's lace tam & scarf with detail.
This beaded scarf and tam is knitted from one of her handspun merino/silk blends. She does her own dyeing as well. You can see some of her gorgeous dyeing below...

Close up of Mary Nichol's beaded lace knitting.
This is a close-up of another of her beaded scarves, of handspun angora, merino, and silk.

The next scarf is handwoven by Eva Thatcher from her handspun, hand dyed silk.

Silk scarf handwoven by Eva Thatcher.
My close-up shot didn't turn out so well, but I love the interplay of color and texture. I'm definitely going to have to try some of these.

The show runs from October 6th to November 3rd.

© 2007 at Leigh's Fiber Journal

Related Posts:

Saturday, October 06, 2007

Jack Loom Revisited

Motif for color inspiration.After all the research I did when I first got my countermarche loom, I decided that I wanted to take another look at my jack loom to see how well I could apply some of the things I learned. To do that, I needed to warp it again.

The project I decided on for this warp is a set of eight placemats. I wanted to match the motif pictured on the left. Happily I have all the colors in my stash: red, orange, yellow, green, light blue, medium blue, lavender, and pink. I also have plenty of natural cotton, all of these in 8/2.

After doing my preliminary calculations, I measured a six yard warp and began to warp the loom, back to front.

One of the first ideas I was able to apply, was a way to support the apron rod as I loaded the raddle. Prior to this, it was quite a balancing act; one at which I was usually pretty unsuccessful.

I used two apron rods from my 59 inch wide Glimakra, running them from the front to back beams on my Schacht Mighty Wolf. Onto these, I balanced the Schacht apron rod, with the warp on it, ready to load into the raddle.

View of raddle from the back of my jack loom.
Nifty little clamp.To keep the apron rod from sliding around, I used the same handy dandy little clamps that I found for 68 cents at Advanced Auto Parts last spring.

Although not pictured above, I finally figured out to use elastic pony tail holders to secure the raddle groups instead of rubber bands. My rubber bands are pretty old and tended to break easily.

So far so good.

© 2007 Leigh's Fiber Journal

Related Posts:

Wednesday, October 03, 2007

An Interesting Shetland Fleece

This next Shetland fleece sample caught my eye as soon as I first saw it. It was sent to me by Cathy as a part of this batch.

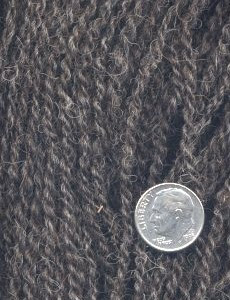
An iset colored Shetland fleece staple.It is an adult fleece, and is the coarsest to touch so far. It is a dual coated fleece, with the typical triangular shaped staples of such a fleece. The fiber length ranged from three to six inches, and this fleece was full of VM (vegetable matter.) As you can see, the crimp is too disorganized to count!

At first glance, the word "black" comes to mind to describe the color. Not unsurprisingly, the tips are sunbleached, anywhere from blond to brown. A closer examination however, shows white fibers mixed in throughout the fleece. The amount of white varied throughout the sample, but it was there nonetheless. In fact, it is the white fibers that contribute to it's coarseness. The bits with less white, are softer. This coloration got me curious about the various Shetland sheep colors.

Shetland sheep are recognized to have eleven distinct colors, and 30 color patterns, but I was at a loss to figure out which one this fleece was. After a chat with Tina from Marietta Shetlands, I determined that this fleece must be from a sheep which has what is called the iset pattern. This refers to a dark colored fleece with many white fibers giving it a bluish cast from a distance. I also learned from Tina, that Shetlands can change their color over the years! What a versatile breed for a spinner's flock, eh?

One thing that I had to deal with before spinning was all the VM. It was loaded with it. I know some spinners who refuse to deal with such a fleece, but the color was too lovely to not spin it. I was able to get a lot of it out with a vigorous shaking before washing. I knew from experience that more would come out in processing and spinning.
Now, I'm going to take a little side trip here, because I learned something when I washed my sample. Back in the day, when I first learned to spin, I read somewhere that fleece washing temperature must be kept very hot, to keep the lanolin melted. The rational was that if the temperature dropped too low, the lanolin would begin to re-solidify on the fiber.

Well, with this sample I set it to soaking in hot, hot water and a large squirt of Dawn dish liquid as usual. Then I went to do something else, got distracted, and forgot about the fleece. In fact, I forgot about it so completely that by the time I got back to it, the initial soaking water was barely lukewarm. This dismayed me because I'm not real keen on exposing wool fibers to an extreme temperature change (as in an immediate second very hot soak), as I want to avoid the possibility of felting. So I continued rinsing with cool water and spread it out on a towel to dry.

When I went back later to turn the fleece, I was delighted to discover that the it was wonderfully clean and not greasy! The fear of the grease reforming on the fibers is evidently unfounded. What a happy revelation. This will make my fleece washing much more relaxed in the future. (And speaking of lanolin, for a very interesting article on it, click here.)

The iset Shetland handspun yarn.Anyway, here's the yarn. It doesn't look bluish close up, but it is a lovely color of grey.

The particulars:
* Preparation - drumcarded to blend colors
* Spinning ratio - 8.5 to 1
* Singles - 28 WPI
* 2-ply - 14 WPI
* Washed weight - 50 grams
(I forgot to weight it before washing :o
* Yardage - almost 93

© 2007 Leigh's Fiber Journal

Monday, October 01, 2007

Summer Socks Finished!

Completed pair of my latest toe up socks.
This year's summer sock knitting has come to an end and just in time for cooler weather too. These are knitted from a 50/50 wool/nylon blend that I found in my stash. The brand name escapes me at the moment, probably because they weren't specifically sock yarns. I used US1 double pointed needles.

Toe up sock toes.
As you can see, my favorite toe-up sock toe fits me very well. This may have more to do with the shape of my toes than the pattern, but either way is fine with me.

Short row sock heel.
Also, the short row heel I'm not too sure about fits nicely too, when all is said and done. You can also see that I put my yarn changes on the bottom. Some may argue that this isn't the most comfortable option, but I like it because it puts the most unsightly part of the sock out of sight.

I did receive a lot of helpful comments and suggestions about sock heels in my last post. Thank you all! I definitely plan to try some of these out, though it may not be until next summer.

Now all I have left is to weave in the squillion or so yarn ends!

And here's my sock inside out!
© 2007 https://leighsfiberjournal.blogspot.com/