Continued from Dressing the Glimakra B2F Step 2: Loading the Raddle
With this step, I was in more familiar territory. I just need to adjust it to this particular loom.
1. Tensioning the warp
Should the warp be weighted, and if so, how? There are different schools of thought here.
- No weights, tension by manually tugging on the warp after each rotation of the beam. (Chandler)
- Applying resistance with weights or another mechanism such as a warping drum or another person. (Osterkamp). In fact, Peggy basically states the more tension during winding on, the better (although she also gives instructions for the no-tension method).
Once upon a time I used half-gallon milk jugs, which I don't get anymore because we have our own goat milk. But I did have some empty gallon vinegar jugs and used these plus a distilled water jug.
 |
| For my personal notes: each jug weighs 8.5 pounds. |
2. Winding on
 |
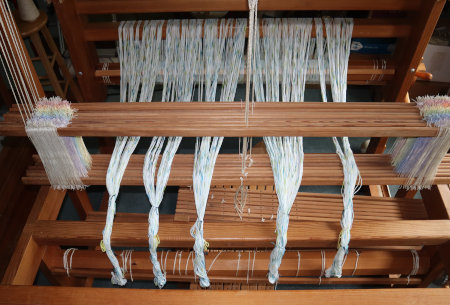
| The idea is for the warp to wind onto the warp beam the same width as in the raddle. |
Detangle as needed by snapping the warp.
 |
| Tangles at the raddle can result with broken threads; snapping the warp works them out. |
Insert packing sticks at regularly spaced intervals to cover apron cords. This prevents the knots from making lumps in the warp.
Rolls of paper can be used instead, but the sticks came with my loom, so I use them.
Of course the weights have to be re-positioned as the warp is wound on.
I left enough in front for threading, sleying, and tying onto the front apron rod. Then it was time to . . .
3. Remove the raddle
Now I'm ready to thread the heddles.
Notes and Observations
- There is plenty of room for improvement, which I'll work on in the future. At least I've made a start.
- The bunching of the warp bouts is a concern as it creates V shapes with the warp. Osterkamp recommends the following to prevent variations in tension due to the angle the warp is winding onto the beam
- Insert lease sticks into the threading cross and remove the choke ties.
- Then put an end stick into the threading end loop and spread the warp out to the proper width.
Dressing the Glimakra B2F Step 4: Threading, Sleying, Lashing On


4 comments:
Really nice presentation. I love that loom as it has a presence in a room. No question that this is a loom to do amazing weaving on. I do believe that one really needs to see one in person to get the full effect.
I am looking forward to the weaving process starting to show as this yarn is a fun one to work with in my mind. What will you use for weft?
Goatldi, thanks! It definitely dominates the room! The weft will be the same yarn, a 4-ply cotton in a solid sage green. The weave structure is a herringbone, and I'm hoping the variegated warp will give it a tweedy look.
Sage yum sounds perfect. I will be watching for the finished project.
It shouldn't be too long before I can give it a go!
Post a Comment