I can’t tell you how much I have appreciated the supportive and encouraging comments I received on my last post. It’s especially interesting to read when and why weavers choose one method of warping over another. This is helpful information!
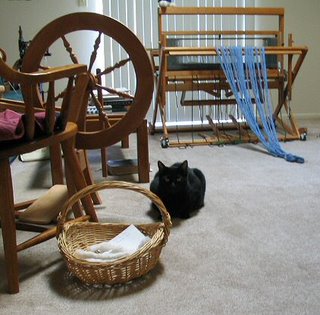
Ok, this is where I left off with my b2f warping a few days ago. ( I know, I know, this is actually a thinly veiled attempt to pass off another disgustingly cute kitty picture.) :-)
In doing my research I realized that there is no one single way to warp b2f. I
chose Chandler’s instructions, and occasionally refer to Osterkamp. For the
most part things have gone pretty well so far.
- Working with only one cross (the threading lease)
- Beaming the warp through the front instead of the back
- Using a counting thread while measuring the warp. I really liked this however. It seemed easier to count and keep track of groups of 12s rather than counting to 864.
- Using a raddle
- Placing packing sticks to separate the layers of apron cords as I wound them on. I didn't used to use anything to separate the layers of warp until I got to the the knots which tied onto the back apron rod.
- Putting lease sticks through the cross and hanging them from the back of the 4th shaft. I found this awkward at first, and the sticks seemed to be in my way. But I am adjusting and really like not having to reach all the way through from the back of the loom to the reed, to try and find the next ends to thread. (A lot of fun with my bifocals!)
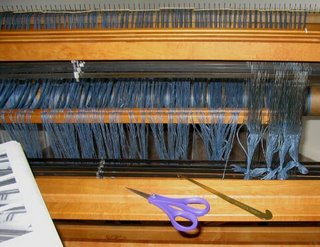
- Sitting at the front of my loom to thread the heddles. As mentioned above it's easier with the warp closer to me. Plus, I found that my empty beater makes a convenient little shelf for my book, scissors, and threading hook.
- Weighting the warp with a heavy box on the floor as I wound on.
- Bracing my knee against the loom and pulled each group of ends as hard as I could
- Giving the group an additional jerk before moving on to the next group.
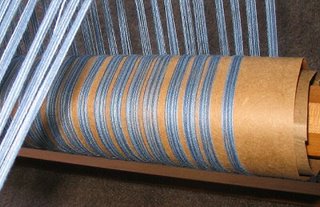
I understand now that the “valleys” between these groups create uneven spots
and hence potential differences in tension across the width of the warp. The
only things I can think of are to try and keep the warp spread out in the
raddle better (next time). Or perhaps my raddle spaces are too far apart(?)
They are ½ inch and I am using 16/2s cotton sett at 24 epi.
Progress will probably be a bit slow, as I've only begun to thread the
heddles. But I am motivated, so hopefully it won’t be too long before I
can see how well I’ve done and start weaving.
Next, b2f Warping Progress
© 27 May 2006 at
http://leighsfiberjournal.blogspot.com
Related Posts:
f2b Versus b2f - Beginning of this series
b2f, Warp Sleyed
b2f Log Cabin Weaving - finished fabric from this series
Evaluating My b2f Warp
B2F Warping - Still Tweaking
B2F Vs. F2B - Why I Switched


3 comments:
Leigh, When I warp back to front, I put the raddle in the beater, where the reed usually goes. The warp then travels over the lease sticks before going over the back beam to wind on the warp beam. My raddle has 1" segments, and I've woven at 36 epi w/ it. So I don't think your 1/2" raddle spacing is the difficulty.
My raddle has 1/2" spaces too, but when I do b2f, I hang the warp off the back of the loom. my raddle is a home made one that would not fit in my beater. To tension, I make 3/4 of a turn and grab the warp in one inch bunches and using the weight of my body, pull each bunch downward. I usually also start on the left for one turn, then the right for the next. There is an entry at my blog showing what this looks like here
http://onethreadtwothread.blogspot.com/2006/03/step-three-or-warping-loom.html
In the first photo, you can actually see the bunches that I just finished pulling. With this method, There might occasionally be a bit of space between the warp on the back beam, but for the most part, everything is evenly spread.
I forgot to say that if you can take the front beam off, do so and you will not have to reach as much. It looks like you have a jack type loom and I put blocks under my harnesses to raise them when I am threading so that I don't have to stoop as much.
Post a Comment