Friday, August 30, 2024

Natural Dyeing: Hardy Hibiscus (With Alum Mordant)


Also known as rose mallow, rose of Sharon, or althea. There are a variety of species in the genus. Mine are apparently hibiscus syriacus, and we have quite a few in the yard. Ours range from pale to dark pink and lavender. I have one solid white one. Some commercial hybrids come in red. The dark pink and red ones are said to be the best for dyeing.

Both of the natural dyeing books I'm referencing (Wild Color and A Dyer's Garden) give instructions for dyeing with hardy hibiscus, so I picked up tidbits from each.

Collecting the dyestuff

This was a bit of a challenge because I wanted 8 ounces but didn't have enough blooming at any one time to collect enough. One book says the flowers don't freeze or dry well, the other said they can dried. Rita Buchanan suggests picking every day or two and storing in the fridge in a plastic bag. This is what I ended up doing. By the time I had 8 ounces, the ones on the bottom were going bad so I had to discard them. I should have weighed what was left, but didn't think of it at the time. 

Preparing the dyepot


  • Pour boiling water over the flowers
  • Simmer flowers for about 30 minutes.
  • Strain

Dyeing the fiber


Jenny Dean's book shows color samples of hardy hibiscus dyed both with amd without a mordant. For this batch, I used alum mordanted fiber.

I had previously soaked some fiber and had it ready for the dyepot. This time, I didn't wait for the bath water to cool, but added the wet fiber to it while hot.
  • Add the wet fiber
  • Heat to a simmer
  • Simmer 30 to 60 minutes
  • Let steep overnight as it cools (can be left longer for deeper color)
Note: when first checked on the pot after putting it on the heat, it was at a rolling boil. I turned it down and left it in the dyebath for close to an hour.

The Results

Right out of the dyepot, still damp.

Nowhere near the lavender shades in the dye books!

Here it is after being washed, rinsed, and dried.


Analysis

I appeared to have good color in the dyepot, so what happened? Several things come to mind.
  • I was light on the dyestuff because some of the flowers had spoiled. Did I have too few flowers? Possible solution would be to collect fewer flowers and dye smaller quantities of wool. 
  • Did some of the spoiled flowers get in the dyebath and affect results?
  • Did the active boiling have anything to do with it?
  • Was it my water (dyed with city tap water)
  • Something else?
  • On the other hand, here's a quote from Rita Buchanan, A Dyer's Garden page 81.
"Dark hibiscus flowers give fascinating, impressive, but unpredictable colors . . . Every time I use this plant, I get different colors—lilac, purple, mauve, green, gray, brown, black—but they're all interesting and attractive."

In light of that, if I had been going for a light gray, I'd be pleased with the results. It is a lovely color. As it was, however, I was disappointed because I wanted something different. Maybe calling it silver-gray will take the edge off the disappointment. 😉

Definitely, more experimenting is in order.

Tuesday, August 27, 2024

Loom Wrestling

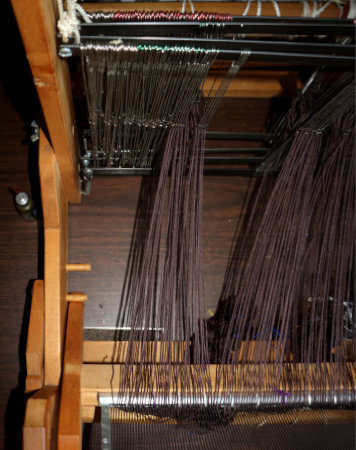
At the end of the day, when all I want to do is to sit down, listen to an audiobook, and weave a bit, loom wrestling is a bit of a put off. But sometimes it must be done. In the case of getting my table loom dressed to start weaving my rag rug, the problem was the extra heddles.


Using the full width of a reed meant the extra heddles were in the way. The warp needs to travel straight back from front to back beams. The extra heddles become an obstacle that push the warp to the side and mess up the tension. The solution is to remove them from the heddle bars. 

I find removing heddles super easy on my Glimakra, but the table loom is another matter. Each shaft consists of an upper and lower heddle bar, held in place by a screw.

Top heddle bar

Bottom heddle bar

Okay, so just remove the screws, remove the heddles, and replace the screws. Piece of cake, right? Except that the screws were pretty much frozen in place. Thankfully, not rusted, but considering the loom is circa 1960s, it's not inconceivable that they are stuck. 

I tried oiling them, but that didn't work. So I oiled again and left to sit overnight. Still stuck. 


It finally occurred to me to try loosening the screw from the back. I grasped the metal tab with pliers and wiggled it one way and the other until the screw loosened. Then I could unscrew it with a screwdriver. Once the extra heddles were removed, I had to put the heddle shafts back together again. This would have been easier if I had three hands, but eventually I got it. 

So, after a bit of loom wrestling, I finally got it warped. And the warp is tensioned and hemstitched.


I'm finally ready to weave.

Saturday, August 24, 2024

Natural Dyeing: Pear Leaves, Part 2


After the first experiment dyeing with pear leaves, there were several things that I was curious about. 
  1. Exhaust dyeing
  2. Afterbath (copper)
  3. Will the leaves release more color in subsequent dyepots as Dean suggests in her book?
I have several pear trees, so this information might be good to know for future reference. 

I started by dividing the leftover dye water into two pots, amounts about equal. One, I used for the exhaust dyeing experiment, the other for the afterbath experiment. I used half the amount of alum mordanted fiber for each experiment, thoroughly soaked in water before adding to the dyepot. 

To compare results, here is the sample from the original pear leaf dyepot.

original dye color

1. Exhaust dyeing

This is simply reusing the same dyepot after some / most of the color has been taken up in the original dye job. I used 4 ounces of mordanted fiber for this experiment, but followed simmering and soaking times roughly the same as the original dye lot.

exhaust bath dye color

2. Copper afterbath

Or maybe it's afterdip. I dissolved  a rounded half-teaspoon of copper sulfate into the other half of the original dyebath and added 4 ounces of fiber from the original dye lot.

original dyed fiber with copper afterbath

Here's a comparison of the original dyed fiber and my first two experiments.

Left: copper afterbath. Middle: original dye color. Right: exhaust dyed fiber.

3. Re-using the pear leaves

This idea came from  Jenny Dean's book. In her general instructions for extracting color from plant leaves (page 48) she states,

"The leaves reserved from the first color extraction can be simmered again."

That roused my curiosity and I decided to try this with the pear leaves from the original dye bath. I followed the same procedure, but used half as much fiber in the dye pot. Here's what I got . . .

color from re-used pear leaves

It's very similar to the exhaust dyed sample, but I think it's a clearer yellow, i.e. a little less gold. From my reading I'm understanding that different pigments in the dyestuffs are released at different times and temperatures. I don't know if this would consistently be true for pear leaves, but it's an interesting tidbit to keep in mind for future reference.

I'm not sure if the camera and computer do the difference justice, but here are the similar samples side by side.

Left: exhaust bath fiber. Right: re-used leaves dyed fiber.
In hand, the exhaust dyed have a more golden nuance.

So, lots of color from pear leaves. Further experiments could include different mordants and afterbaths. For these, I need to get iron to try for mordanting and dipping. 

In addition to the leaves, the bark is said to yield a pinkish-purple color. I'll have to try that one too, if I can figure out how to harvest bark without hurting the tree. 

Thursday, August 22, 2024

Natural Dyeing: Pear Leaves, Part 1


After two dyeing projects that took repeated simmering and steeping to extract the color, I was ready for something a little simpler. I reckon natural dyeing is a summer project for me, when fresh plant material is widely available. I'm trying to take advantage of seasonal resources while I can. The directions for using pear leaves came from Jenny Dean's Wild Color.

Her recipe calls for at least equal weight of leaves to fiber. More, for stronger color. Color can be extracted by either cold soaking or simmering. I will have to try the cold method sometime, but for now, I'm thinking I'd get stronger color with heat, so that's what I opted to do. 

Day 1: Making the dyebath


  • Dyebath amounts should be at least 1:1 for leaves to fiber. I used:
    • 12 ounces pear leaves for 8 ounces fiber
    • 2 gallons water
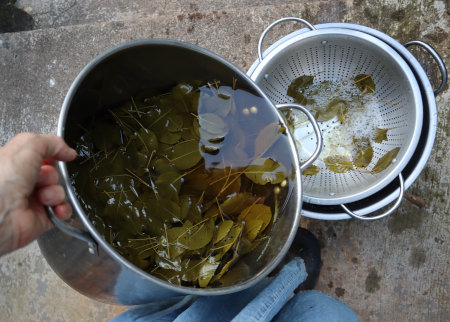
  • Pour boiling water over the leaves and let sit. 
  • Or, place leaves in several gallons of water, bring to a boil, and simmer for an hour or two. 
  • Let steep overnight until cool.
Note: the leaves smelled like cooking spinach while they simmered. 

Day 2: Dye day

  • Strain out the leaves (and save for another dyeing experiment).
  • Add thoroughly wetted, mordanted fiber to the pot. (I used alum and cream of tartar.)
  • Simmer for 30 to 60 minutes or so, until desired color is reached.
  • Let steep overnight until cool.

Day 3
  • Remove the fiber
  • Wash with mild dish detergent and rinse until the water is clear.
  • Squeeze out excess water (or run through the spin-only cycle in the washing machine) and lay out to dry. 

The bark of the pear tree can also be used for dyeing and gives pinkish/purplish colors. I'll have to give that a try sometime in the future. Next, however, I wanted to experiment a bit with this dyebath and see what other colors I could get.


Related posts

Monday, August 19, 2024

Bathroom Rag Rug: Draft & Calculations For Warping

I got the brown rug warp I decided on and then started on my calculations for warping my table loom. My 10-dent reed is 23.25 inches wide, so at most I could thread 230 warp ends, with two dents left over for floating selvedges. I had to figure out how to fit the threading draft to this, to make sure the pattern look on the rug looks symmetrical. 

The Recipe Book gives this for the threading: 

Read right to left

Motif
This is one complete motif. Fortunately, the Recipe Book PDF includes WIF files, so I was able to have a drawdown draft without having to work it out myself.

Two repeats of the motif would be 212 warp ends. Subtract that from 230, and I have 18 extra dents, 9 on each side. Should I leave them empty and make a narrower rug? Add a border? Or, widen the edge blocks to compensate for draw-in, which always makes the motif narrower on the sides. I decided to simply repeat the beginning and ending threading, to "fatten" the blocks on the edges. 

With that decided, the warp was measured and the reed sleyed, so the next step will be threading the heddles. 

Here's the draft straight from the Recipe Book WIF file, tweaked for color, but without the extra threading on the selvedges. Tabby shots will square up the blocks.

You can click to enlarge.

In other weaving news, Dan has informed me that the next phase of his project will be dustless. So I can take the dust covers off my floor loom and resume weaving on the lap robe. Weaving on it is a relaxing way to spend a 30-minute break, so I'm glad to start working on it again. 

Saturday, August 17, 2024

Natural Dyeing: Black-Eyed Susans, Part 2


Day 4: Dyeing the fiber


  • Dye day!
  • Soak 8 ounces of mordanted fiber in water for about an hour or so
  • Strain the flowers out of the dyepot
  • Add wet fiber
  • Heat to simmering
  • Let simmer one hour
  • Cool overnight
Day 6

I didn't mess with it until the following Monday. Long soaks for best color are recommended for Rudbeckia anyway. 
  • Hold breath
  • Remove the fibers from the pot
  • Behold the results

Not what I was hoping for. Not even terribly interesting for a dye experiment. Some sheep breeds have similar colors naturally. The hoped for color with black-eyed susans is olive green, and tan is pretty much a "fail" color. Here is a comparison of results from Buchanan's A Dyer's Garden and Dean's Wild Color, along with mine. 


So what happened? A common explanation is a weak dyebath, except mine was twice the weight of flowers to fiber. Another explanation is not enough time simmering and soaking. Considering how many days I gave this, I'm not sure that's it either.
  • Was it from the mishap making the dyebath?
  • Using late season flowers? I picked the second flush of flowers, did that make a difference?
  • The variety of flower?
  • Growing conditions?
  • Not enough rain?
  • My soil?
  • My water?
But because the results weren't terribly impressive to me, I decided not to see what an exhaust bath would give me. Instead, I decided to try an afterbath of copper solution. Our soil is copper deficient, so I keep copper sulfate powder to add to my mineral supplement for my goats. It's also sold as a soil amendment for copper deficient soils. 
  • Mix 1/4 amount of copper in hot water
    • Standard amount for 1/2 pound fiber is 1 tablespoon copper
    • 1/4 amount is therefore 3/4 tsp copper
  • Stir copper solution into dyebath
  • Return damp fiber to dyebath
  • Simmer for 15 to 30 minutes or until the color changes
  • Let cool overnight
Day 7
  • Remove fiber
  • Wash with a little dishwashing liquid and rinse until water is clear.
  • Let dry
Here is a side-by-side comparison of my two experiments.

Left: original experiment, mordant only.
Right: Same fiber with copper afterbath.

I was thinking the copper might make the fiber greener, but it just seemed to make it darker.

Another afterdip could be an iron solution, which I didn't try. It can be made with rusty nails and vinegar, or with ferrous sulfate purchased from the gardening department (as an amendment for iron poor soils). I have neither of these and was done experimenting with black-eyed susans anyway. Both copper and iron can be used as mordants too, for different color results. And that raises a question.

Will I try dyeing with black-eyed susans again? 

I'm ready to move on at this point, but perhaps next summer, when the flowers can be harvested earlier in the season. The plant (without the flowers) is said to yield a different color. Do I want to experiment more? It was a lengthy project, so I honestly don't know. Is there another way to get green? Of course there is, so it's a matter of whether I'm determined to see if I can do it, or is it worth it? Right now, no. In the future, who knows?

Thursday, August 15, 2024

Natural Dyeing: Black-Eyed Susans, Part 1

The dyeing bug has bitten. It was my successful pokeberry dyeing experiment that did it. In pouring over my several natural dyeing books, I realized that I have a lot of free dyestuffs growing on our property, and that I'd better get a move-on because fresh plants work best but our growing season is getting late in its offerings. I've missed out on some things, but I still have a lot to experiment with. 

One thing I wanted to try was black-eyed susans. 

Black-eyed Susans, Rudbeckia species

According to the books, different parts of the plant give different colors. I decided to focus on the flowers, which are said to make an olive green with a sufficiently strong dye bath. That means a high ratio of dyestuff to fiber and giving it long simmering and soaking times. A weak dyebath is said to yield tan. From reading others experiences, however, this all isn't a guarantee, so I'll just have to give it a go and see what I get. The first step (part 1) is to make the dyebath. 

Day 1: Making the dyebath (Days 1 - 4)

  • Dyebath amounts:
    • 1 pound flowers (for half-pound of fiber)
    • 1.5 - 2 gallons boiling water
  • Pour the boiling water over the flowers and let steep overnight.
Note: my actual steep time was about 24 hours.

Day 2

  • Bring to a full boil
  • Boil (not simmer) for one or two hours
  • Let cool overnight
Confession! The pot was boiling nicely when I went outside to do some things. When I came back in, almost all of the water had boiled out! Fortunately, it didn't burn, and I immediately poured in two more kettlesful of boiling water. Now I'm uncertain about the color, but I'm going ahead to experiment. Hopefully, I'll still get something nice!

Day 3
  • Bring back to a boil
  • Simmer for several hours
  • Cool overnight

Day 4


  • Strain out the flowers
  • Ready to dye.

Monday, August 12, 2024

Natural Dyeing: Alum Mordant For Animal Fibers

Alum = potassium aluminum sulfate
Cream of tartar = tartaric acid
Animal fibers include wool, silk, angora, cashmere, mohair, llama, alpaca, etc.

Alum is fairly easy to find, as it has a number of common uses: as soil conditioner for acid loving plants, in water treatment, for pickle making. 

Cream of tartar is commonly used as a cooking additive: for homemade baking powder, to stabilize egg whites in meringues, in winemaking, even as a natural cleaner.

In natural dyeing alum is used as a mordant. The purpose of a mordant is to fix the color to the fiber. With alum, the cream of tartar assists in the take-up of the alum in animal (protein) fibers. 

In researching, I find I have three books on the topic and four different recipes.

Jenny Dean (Wild Color)

  • 8% alum per weight of fiber
  • 7% cream of tartar per weight of fiber
So, for 1 pound fiber or yarn that comes to 
    • 1.28 oz alum
    • 1.12 oz cream of tartar

  • 1 pound wool
  • 4 oz. alum
  • 1 oz. cream of tartar

Rita Buchanan (A Weaver's Garden)

Quick recipe
  • 1 pound wool
  • 4 tbsp alum
  • 4 tsp cream of tartar
Technical recipe
  • 14% alum per weight of fiber
  • 4% cream of tartar per weight of fiber
For one pound of wool that comes to:
      • 2.24 oz alum
      • 0.64 oz cream of tartar

Quite a bit of variation! But which is correct? Which is best?

Since I lost my notes from my previous natural dyeing experiments, I opted for the easiest recipe - Rita's quick recipe so I wouldn't have to figure out percentages. For my records, here's what I did

Procedure
  • Thoroughly wet the fiber. Soak in clean cool water for an hour or two
  • Measure chemicals into a glass jar and mix with boiling water until dissolved.
  • Add to 4 gallons of cold water; mix well.
  • Add wet fiber
  • Heat slowly to a simmer and simmer one hour.
  • Allow to cool.
  • Remove fiber.
  • Rinse and either dye immediately or dry for later use.

Re-using the mordant bath

I found this in Rita Buchanan's A Dyer's Garden (which I like better than A Weaver's Garden, except it appears to be out of print. It's still available, but who in their right mind is going to pay that kind of price???) Anyway . . .

Because the fiber or yarn doesn't absorb all of the chemicals from the mordant bath, it's possible to re-use them by topping them off with additional chemicals.
  • Use 1/3 the amount called for in the original recipe
  • Follow all the procedure steps above.

Discarding the exhausted mordant bath

Potassium aluminum sulfate is commonly used as a soil conditioner for acid loving plants such as blueberries or azaleas. The spent mordant bath can be used to water any acid loving plant. 

Friday, August 09, 2024

Bathroom Rag Rug: Ready To Start?

My husband Dan has a big indoor construction project going on, It invades my loom room, so to keep dust off my Glimakra and the lap robe I'm weaving, I covered it with old sheets. For the time being, working on the lap robe is on hold. I've got spinning and dyeing projects in the works too, but I really want to be weaving too. Thankfully, I think I'm ready to get started on the project I have planned for my table loom - the t-shirt rag rug

In hunting back through my blog posts, I see I haven't mentioned this project since last May, "The Hold-Up is Brown T-Shirts." After initially finding half-a-dozen brown t-shirts at the thrift store, I've found very few that didn't have side seams. I estimated I need ten extra-large. I check the thrift stores when I'm out and have added several more to the pile. I think I now have enough to get started!

Pictures of how to make t-shirt yarn in this post.

I've never woven a rag rug before, so I wondered about sett. It can't be calculated the same as plain weave or twill, because the weft is so much thicker than the warp. Rag Rug Handbook by Janet Meany and Paula Pfaff tells me that sett for rag rugs is commonly 10, 12, or 15 ends per inch. My 10-dent reed is my longest, almost the full 24-inch width of my table loom. So I decided it was a good choice. For length, I'm aiming for 36 inches plus fringe.

Warp color. Hmm. I have natural color cotton warp in my stash, but the t-shirt yarn colors are so dark and bright. I'm considering buying brown rug warp because I think the natural would tend to mute the visual affect of the colors. 

Quick calculations for a 23" by 36" rug with fringe suggest I'd need 460 yards to warp the loom. A half-pound tube of brown rug warp contains 840 yards, so one tube will do. While I wait on that, I'll finish up the last few t-shirts for the weft yarn. Hopefully, weaving will commence next week. 

Sunday, August 04, 2024

Lap Robe: Weaving at Last

Between canning tomato sauce, mozzarella making, and my pokeberry dye experiments, time at the loom has been pretty slim. But at last I got the lap robe warp tied on, wound on, tensioned, and hemstitched.  Then weaving commenced. 

The first thing I noticed was how the softness of the yarn affected the beat. The sett is 8 ends per inch and for the throw rug, I ended up with 16 picks per inch. The weft for the lap robe is softer and a bit finer, so it flattened the angle of the herringbone pattern even more. This is pretty arbitrary, actually, but as I looked at it I saw it would be easy to treadle a diamond pattern instead of the herringbone. 


The treadling sequence is straightforward. 
1 - 2 - 3 - 4 - 5 - 6 - 7 - 8 - repeat

If I treadle that twice and then reverse,
7 - 6 - 5 - 4 - 3 - 2 - 1 - 8 - repeat

then I get an easy diamond pattern.


I like it.

The color stripes weren't planned, this is just the way the warp measured out. 


Having sections of 2, 3, or 4 warp ends the same color combination makes for a definite stripey look. If each was different, it would be less stripey and more . . . hodge-podge? Blended? Chaotic? Indistinct? Maybe even muddy.

What's fascinating to me is how two simple changes—yarn color and simple treadling changes—can create two different looks. The throw rug makes me think of the African Savanna. The lap robe makes me think of the American Southwest. 

Weaving will be a matter of plodding away as I have time, usually a half-hour here and a half-hour there. Finished length will probably be longer than a lap robe and more like an afghan, but that's okay too. It's all okay, really. 

Thursday, August 01, 2024

Non-fading Pokeberry Dye Part 2

Continued from Part 1

My dyed but not yet rinsed pokeberry fiber was left to oxidize for several days to set the color. Carol Leigh recommended a couple of hours, but one dyer observed that the longer it sits, the better the dye adheres to the fiber. (See "recipe resources" in part 1) That statement was noteworthy, I thought, and worth a see-for-myself experiment, so I wasn't in a hurry to rinse the fleece.

Day 8

  • Soak in several rinse waters to remove excess dye (do not use soap or anything alkaline at this point).

  • Rinsing with rainwater from one of our rainwater collection tanks.
  • Once the rinse water is clear, squeeze out excess water and let dry thoroughly

Notes:
  • Actual amount of time between dyeing and rinsing was 7 days. 
  • Fresh pokeberry dye is still sensitive to pH, so to keep vibrant color, soap or detergent, which lean toward the basic range of the pH scale, are not used at this point.
  • It's also sensitive to sunlight, so keep out of sunlight. 

As to the dyepot, the color hadn't completely exhausted and there was still a lot of color in the bath. 


I couldn't bring myself to discard it, so I mordanted more fiber and popped it into the exhaust bath and proceeded with the same steps as before. The exception was that I used 4-ounces of fiber instead of 8. Doing this accomplishes two things. One is "waste not want not" as I can get more dyed fiber. 

The second, is a chance to experiment with the mordant bath. My thinking was that the vinegar is diluted anyway, so the percentage of acetic acid in the bath could be adjusted simply by adding more of a weaker product, right? That way I could simply adjust the amount of common vinegar to get the same results. I couldn't find a formula to calculate this precisely, so I ball-parked it.

Exhaust bath #1

For this experiment, the amounts for the mordant bath were:
  • 4 ounces washed fiber
  • 1.5 gallons water
  • 1 quart 5% acetic acid (household vinegar)
I followed the same instructions to mordant and dye the fiber.


Obviously, there was still a lot of color in the dyebath!

Exhaust bath #2
  • Used same acid mordant bath, adding another pint of 5% vinegar
  • 4 ounces of fiber
  • Added a second pint to the dyebath too.

Exhaust bath #3
  • Started with a fresh mordant bath of 1 quart 5% vinegar to 1 gallon water
  • 4 ounces of fiber
  • no additions to the dyebath

As you can see, I got a lot more color out of the dyepot. Possibly, I could have tried one more because the dyepot water still wasn't clear. But this is where I decided I was finished. 

Here are all the samples side by side.


I got a lot of color from that dyepot! 

Would I try pokeberry dyeing again? Absolutely. Apparently, color depends on temperature, so that would be fund to experiment with. Likely, I'll collect another batch of pokeberries to freeze for more dyeing fun next year.