Friday, June 29, 2007

Warping the Glimakra: Winding It On

By Leigh

For my first warp on the Glimakra, I decided to follow the steps on the set-up video. It used a back to front one cross method, which is what I've been using on my Schacht. However, it did a few things differently and I wanted to try these. For my first project, I wanted to weave a blanket for the WNCF/H Guild's service project, Project Linus. Until now, I hadn't had a loom able to weave the minimum 35 inch blanket width.

Of course on the set-up video, the loom is being warped for the first time, so the shafts are placed up on top of the countermarche, getting them out of the way for warping. Since my loom had already been woven on, the shafts were still tied to the lamms. After a little internal debate, I untied the lamms and put the shafts on top of the countermarche. I wasn't sure if this needed to be done for every new warp, but it let me follow along with the video more easily.

My warp is spread out on the loom.
As you can see in the above photo, two long support sticks are placed on either side of the loom, resting on the front and back beams. The lease sticks and raddle rest nicely on these, making it easy to work with the warp and wind it on.

The raddle Dan made me for my Schacht isn't wide enough for this loom, but happily, I discovered that the top piece of my triangle loom worked very well, having enough length plus 1/2 inch spaces between the nails. After securing the warp with the lease sticks, I spread it out in the raddle.

Closeup showing the arrangement of the sticks and raddle.The one cross b2f method I had been using was from Deb Chandler's Learning to Weave. It uses a threading cross only. In the Glimakra video, the cross is a raddle cross. No threading cross is used. The heddles are later threaded directly from the lease sticks.

In Chandler's method, an extra (lease) stick is placed in the the back loop of the warp (the end without the threading cross). This stick is then tied to the back apron rod. In the Glimakra video, the warp is actually transferred to the apron rod. On the left you can see that an extra (warp) stick has been placed in the cross with the lease sticks. This stick enables transfer of the warp to the apron rod.

The first step was to lay out the back apron cord and the warp, making sure both were centered. The warp was positioned so that it was divided into equal parts, each part to be placed between the corresponding apron cords.

Getting the warp ready to transfer to the apron rod.
One thing that was different with the way my loom is set up, is that the apron cords are not continuous lengths of cord looped over the apron sticks. The previous owner had cut the apron cords into equal lengths, and tied these onto the apron sticks from the warp and cloth beam. You can get an idea of this in the above photo.

Had these been looped over the apron stick as one long cord, I would have been able to transfer the loops of the cord onto my arm. However, since I was dealing with individual lengths of cord, I had to remove them from the stick in order to transfer the warp.
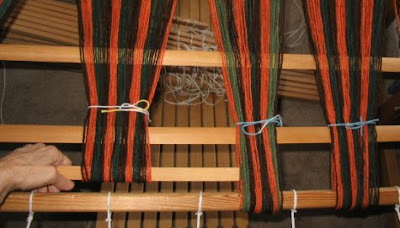
Transferring the warp to the apron rod, one section at a time.
I took my own photos, so you can't see that this is really a 2-hand task. I found that after deciding where the groups of warp needed to be placed on the apron rod, it was easiest to tie them onto bundles. Starting in the middle, I removed the apron cords from the apron rod until I got to the place for warp bundle I wanted to transfer. After I put the bundle onto the apron rod, I pulled the temporary stick out, replaced the apron cord and then moved on to the next bundle. I did this in two halves, working from center outward, since my warp is so wide.

Spreading out the transferred warp.
After all the bundles of warp were transferred from the temporary stick to the apron rod and the cords replaced, I spread the warp out between the apron cords. The lease sticks remain in the warp to hold the cross.

Since my warp is so wide, and I don't have enough 1/2 gallon milk jugs / weights, I tensioned the warp myself as I wound it on. I did have help . . .
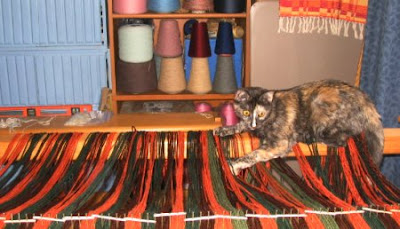
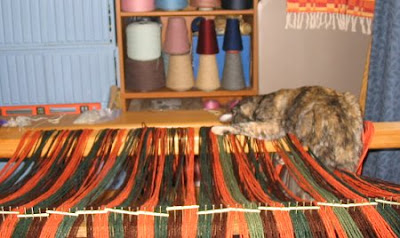
Catzee couldn't resist all that yarn!
She responded to 'NO' in typical cat fashion - by ignoring me.
. . . but as you can see, it wasn't the useful kind.

I found that by using Peggy Osterkamp's "firewood method" (picture here), I could put my full body weight into it. Hopefully I have it tensioned evenly!

The loom also came with warp separator sticks. The previous owner's husband made this very handy storage container for them . . .

Nifty warp stick holder.
The sticks are flexible enough to remove easily from the container through the long oblong opening.

After I finished winding on, the breast beam and knee beam were removed. The bench fits nicely inside the loom and I'm ready to take the shafts down from on top of the countermarche and start threading the heddles.

The warp is ready for the next step.

Tuesday, June 26, 2007

Shetland Update - Nikki

Raw Shetland lamb staple.I reckon I'd better get a quick Shetland spinning update in here before I get too far behind. I'm spinning faster than I'm posting.

Nikki's is a grey lamb fleece . I'm a little partial to greys and exceptionally partial to lamb fleece, so this one was attractive to me from the git-go.

The color is lovely. The raw staple on the left shows the white base and grey mid-section. The tips were sunbleached brown, though that is difficult to see in the scan.

Fiber length in my sample ranged from about 2 and 3/4 to 4 inches. The crimp was pretty consistent throughout, measuring 6 to 7 crimps per inch. The tips were wispy and wavy, and measured about 4 per inch.

The staples were open with no cotting, and sound with no breaks of tenderness. Very inviting to spin.

It washed up beautifully. I used two very, very hot soaks in Dawn dish liquid, followed by three rinses. I put a glug of white vinegar into the second rinse.

Washed staples.I drum carded the entire sample to blend the colors well. I used my dog comb to open up the staples before putting them through the carder. Some of the brown tips combed off, so they didn't effect the final color as much as I'd hoped.

Finished yarn from Nikki, grey Shetland lamb.My goal is to spin all of my Shetland samples about the same size for a knitting project next winter. You might remember that Korny, my first Shetland sample was spun to about 16 WPI. My singles averaged 28 WPI. Nikki however, is crimpier (6 to 7 per inch as compared with Korny's 4 to 6) and gives me a much loftier and more elastic yarn. To try and compensate, I spun my grey singles at 30 WPI. This looked pretty good on the bobbin when twisted back on itself, but after being washed, my Nikki yarn measures 12 WPI! It is a much loftier (and softer) yarn!

Comparing handspun skeins from 3 different fleece samples.You can see the effect of elasticity when comparing the three Shetland skeins on the left. After plying, all were wound off the bobbin onto the same niddy-noddy, but after washing, you can see the difference in elasticity.

The moral of this story can be summed up in one word, "Sample!" What is interesting is that there is so much variation within the Shetland breed, not only in color, but in fiber characteristics. While this makes it more interesting for a handspinner, it also makes it more challenging. So I'm not sure how all these will knit up into one project. Perhaps they won't. Figuring all that out will probably be a challenge in itself.

© 2007 Leigh's Fiber Journal

Sunday, June 24, 2007

Adjusting the Loom With Texsolv

By Leigh

Before I could warp the loom, I wanted to make sure that everything was properly adjusted and that all parts were true and square. The loom had disassembled easily for moving, but I knew I'd need to do some fine tuning for my weaving to go smoothly. All adjustments are done with the Texsolv System. I had heard of Texsolv heddles before, but didn't know that there was more to it than that.

On the left is a scan comparing one of the Texsolv heddles to one of the flat steel heddles from my Schacht loom. I've read several discussions about these heddles on various email lists, though I confess that I didn't pay much attention as I didn't have them.

What I didn't realize is that Texsolv is an entire system of knotless, heat treated polyester cords that attach everything on the loom: the shafts to the jacks and lamms, apron sticks to the warp and cloth beams, and treadle tie-up.

The cords are actually more like a chain rather than a smooth cord; something like a series of linked button holes. These serve two functions. The first is that a loop can be make by pulling the cord through one of it's own chain holes. Very convenient for tying shaft sticks to the overhead jacks, for example.


To attach the cords to other parts of the loom, such as the treadles, anchor pegs are used. The knob on the peg is pushed through one of the chain holes, and the legs on the peg are pushed into the appropriate hole as below.


Many adjustments are made simply by trying the anchor peg in another chain hole. As long as I don't have to fumble around too much or drop too many anchor pegs, I should be able to handle this. Next I can actually start warping the loom.

For a little more information on the Texolv System, there is an excellent article here.

Next, winding on the warp.


Related Posts:
Warping the Glimakra:
.....Winding on the warp
.....Threading
.....Tying Up the Treadles
.....The 3 Duhs
.....Adjusting the Shed
Color Coding Texsolv Heddles

Thursday, June 21, 2007

Why A Countermarche?

By Leigh

Cathy mentioned in the comments of my last post that she was curious as to why I chose a countermarche loom. I guess the short answer would be,

"It was there, I was there, and the price was right."

Of course there's a little more to it because I probably wouldn't have pursued the ad if it had been a jack loom, and definitely wouldn't have pursued it if it had been a counterbalance loom.

When I first started weaving I didn't know that there were different kinds of looms. My introduction to weaving was at a one day workshop, where we were able to try variety of floor and table looms; all jack. That workshop not only confirmed that I loved weaving, but also gave me an idea of the make and model of loom I wanted, especially since I had back aches at the time. The Schacht Wolf loom was the most comfortable for me to work at, so it was what I looked for.

I eventually found a used Mighty Wolf, which came with two reeds, a bench, and lots of yarn. It had belonged to the seller's deceased aunt, and I was told that it was thought to be a '4 Now - 4 Later'. That was deciding factor for me, as I knew I would someday want more than four shafts. Needless to say I was very disappointed when I later figured out that this was not a '4 Now - 4 Later' model, just a basic four shaft loom. Ah well. I put it to good use nonetheless.

I first read about loom types in a Woodland Woolworks catalogue. I immediately dismissed counterbalanced looms, since the shafts work best in pairs and therefore seem limited in regards to unbalanced weaves. I already had a jack loom and could verify that they take a lot of leg work to weave, and yes they are noisy to operate. But I lingered over the description of the countermarche looms. Phrases like "wide even shed," and good for "using delicate materials and when weaving narrow on a wide loom" really got my attention.

A little more research and I found new phrases I liked; "quiet, smooth treadling" and "better tension" were added to my list of things to admire. My only mental set-back came when I discovered that CM looms are much trickier to tie-up (for nonweavers, this basically means connecting the shafts to the treadles, which determines the pattern on the cloth). Several weavers had told me that it was just too much work to get down on the floor and struggle with tying up a countermarche loom.

Of course, everyone has their personal preferences. It is human nature to prefer what we have good success with, whether warping back to front versus front to back, or Scotch tension versus double drive spinning wheels. Since I thought a new loom was a long time down the road, I pretty much set the whole thing on the back burner and pressed on with weaving on what I had. It was when I read the ad that I knew I was ready and willing to own a countermarche loom.

Now that I have it, I've been doing more research because I want to understand how it works and how it is different from my jack loom. Interestingly, in my reading I am discovering that some of the weaving problems I have been having are probably due to the design of the jack loom itself.

When creating a shed (the opening that the shuttle passes through), the jack loom uses what is referred to as rising shed action. This means that as the treadles are depressed, their attached shafts are lifted to make the shed. The result is that the lifted warp threads are stretched tighter than those that remain unlifted. This creates an unevenness of the warp tension that can result in skipped warp threads, poor shed, and poor selvedges. These are things I've been battling for as long as I've been weaving! I used to try and fix skipped threads by increasing the warp tension, but as I would crank the tension tighter, my shed would get narrower.

Another problem this uneven tension creates is difficulties weaving weft dominant fabrics (which is why jack looms are not usually recommended for rug weaving). I always thought that I was not beating hard enough because I could never get the weft well packed in when certain shafts were lifted. Now I understand that it probably wasn't just me.

Even so I would not have traded my jack loom for all the world. And if I had started with a countermarche loom, I'm sure I would have thrown in the towel a long time ago.

I cannot honestly tell you if and how well the countermarche loom will correct the weaving problems I've had. I'll just have to wait, weave, and see. In the mean time, if you are interested, there is an excellent article on the different types of looms at Fiberarts.org, read it here.


Related posts:
Comparing Looms: Jack & Countermarche


Tuesday, June 19, 2007

Comparing Looms: Jack & Countermarche

By Leigh

To help myself get over the feeling of being overwhelmed with my new loom, I first took some time to explore the differences between it and my old one. Both the Glimakra Standard countermarche and the Schacht Mighty Wolf jack loom weave cloth, but it amazes me that there can be so many differences between the two.

The most obvious difference is size. While the Schacht fits comfortably into a corner in my living room, the Glimakra takes up an entire room.

Another obvious difference is the way the beater is attached:

Beaters on the jack loom (left) & the countermarche (right).
The beater holds the reed and serves to pack the newly placed weft into place.

On my Schacht loom on the left, the beater is hinged at the bottom. The advantage of this is that it stays put during weaving, whether forward or back.

On the Glimakra on the right, you can see that the beater hangs from the top (reed has been removed). It rests in the beater cradle and can easily be lifted off and removed from the loom for warping. The cradle has three notches, so that the beater can be advanced as the weaving progresses. The advantage to this is not having to advance the warp quite as often. The bar itself is quite solid and heavy, but the frame is still easy to move.

One thing I did with the help of the video, was to check to make sure the that beater bar is parallel to the breast beam. It was off by about half an inch after being moved. It was very easy to adjust by loosening the nut and bolt on top of the cradle, sliding the cradle until I was satisfied with the measurement, then tightening them again.

One thing I noticed from the video, is that since the beater swings, it has to be held back to throw and catch the shuttle. That will take some getting used to. Evidentially, it is possible to gain such a rhythm as to let the beater do all the work; the weaver simply throws the shuttle between swings and keeps the beater moving. Of course, that's them and this is me.

The other obvious difference is the system by which the treadles move the shafts. On my jack loom, it is a beautifully simple thing:

Jacks, lamms, & treadles on the jack loom.
In this photo you can see the jacks, the lamms, and the treadles.

The jacks are the diagonal bars which are partially hidden by that bar under the cloth on the cloth beam. The jacks are attached to pivots which enable them to push the shafts up when the treadles are pushed down.

The lamms are the horizontal sticks below the jacks with the strings hanging from them. On this loom, I have four shafts, each having it's own lamm and it's own set of jacks. By choosing which lamm strings to attach to the treadles, I can determine which shafts raise which treadle. It's possible for a weaver to tie-up all sorts of combinations, anywhere from 1 to 3 shafts at a time. By depressing the treadles in a prescribed order, the jacks push up the attached shafts, and my weaving pattern appears almost magically on my cloth (assuming I haven't made any mistakes.)

Now, here are the lamms on the countermarche loom:

Countermarche lamms & treadles.
A countermarche loom has two sets of lamms, an upper and a lower. This loom has 8 shafts, so there are 8 upper lamms and 8 lower lamms. Both sets have strings (cords actually) hanging from them. One set raises its attached shafts, while the other set lowers its attached shafts. The tail in the lower right hand corner of the photo is optional and nonfunctional in regards to weaving, except that what it's attached to likes to attack strings and yarn.

Obviously the tie-up system is a bit more complicated than on a jack loom. I'll be learning about the tie-up when I put my first warp on this loom. (Have I mentioned yet that I feel a bit overwhelmed???)

The jacks on a countermarche loom are overhead, right behind the beater:

Countermarche jacks.
You can scroll back up to the first photo to get a view from the under side. The shafts are attached to the jacks on either end, while the cord running down the middle attaches the jacks to the lower lamms.

Close up of the lamm tie up on the countermarche.
The upper lamms are attached indirectly to the jacks by being attached to the lower lamms with a separate cord. But who can see that from the forest of strings hangning there. Well, I'm at the point where the more I try to explain this, the more confusing it sounds. I reckon I'd better quit while I'm ahead.


Related posts:
Why A Countermarche?
Jack Loom Revisited
Jack Loom Diagnostics
Skeleton Tie-Ups for Countermarche Looms
Skeleton Tie-Ups for Jack Looms