Once the heddles and reed were threaded, I felt that I was in more familiar territory and proceeded to lash the warp onto the front apron rod as usual. That night, for some light bedtime reading, I turned to chapter 6 in Peggy Osterkamp’s Warping Your Loom and Tying On New Warps, “Weaving.”
There I discovered two new (for me) ideas, one revolutionary, and one downright shocking.
Idea #1 - Using a 2-stick heading
 This idea involved weaving about an inch of plain weave and then inserting a first stick in the one shed and then a second stick in the next shed. The attraction here was that it is supposed to even out irregularities in the warp tension. Since I’ve had an ongoing battle with tension (and indeed, it was the primary factor to convince me to try b2f warping) I decided to give this a try. After all, if I didn’t like whatever happened, I could always unweave and take it out.
So I started with my usual 3 unbeaten shots, beat, and continued in plain weave. I had two leftover warp separator sticks which were just the right length. I carefully positioned the first, beat and changed sheds, and positioned the second. I continued weaving and as promised, all the potential trouble spots had evened out beautifully! I was delighted. “This idea is a keeper,” I thought.
Idea #2 - Making a smooth base on the cloth beam
This one involves cutting off the knots and retying the warp to the front apron rod after the 2-stick heading is in place. (WHAT!!!!!!!!!!!!?????????!!!!!!!!!!!!). I had to stop reading because I didn’t think I could handle that. The 2-stick heading was one thing, but idea #2 would be irreversible once that warp was cut. I could envision my beautifully tensioned 5 yard warp lost forever.
Admittedly the idea of a smooth cloth beam is appealing. After all, anyone who has ever forgotten to wind paper on as they wound on their freshly woven fabric, knows how those knots can displace the weave structure and permanently mar one’s cloth (gee, ask me how I know about that. ;)
I finally decided, what the heck. If I’m trying new things I might as well try this too. So here’s what I did (after a lot of hemming and hawing and procrastinating ) :

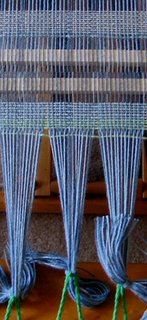
Even though I had good success with cutting my tie fabric, I decided to tape the header cloth “just in case.” This will be yardage, so I don’t need the fringe. If I had wanted fringe however, I would simply untie the slip knots I used to prepare the warp for lashing onto the apron rod.
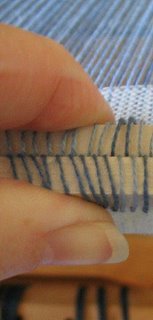
The taped edge is folded to the underside:

The taped edge is folded to the underside:

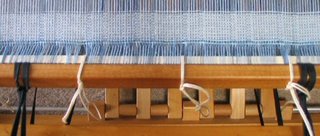
Then the sticks are tied to the front apron rod using a strong, doubled carpet warp. The ties are spaced about every 3 inches or so across the rod:


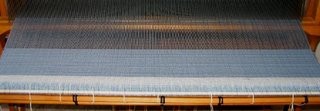
Taking into account the lens distortion of my camera, I’m pleased with my first five inches. Now I can relax and enjoy weaving!
Next ...... Weaving Progress
Related Posts:
f2b Versus b2f - Beginning of this series
b2f Log Cabin Weaving - finished fabric from this series
Evaluating My b2f Warp
B2F Warping - Still Tweaking
B2F Vs. F2B - Why I Switched
Next ...... Weaving Progress
© 4 June 2006 at http://leighsfiberjournal.blogspot.com
Related Posts:
f2b Versus b2f - Beginning of this series
b2f Log Cabin Weaving - finished fabric from this series
Evaluating My b2f Warp
B2F Warping - Still Tweaking
B2F Vs. F2B - Why I Switched

4 comments:
Instead of tape, I've heard of weavers putting a bead of super glue across the warp.
I haven't tried it, but find the idea intriguing.
Your fresh warp looks wonderful. I don't think there is anything as satisfying and inviting as a freshly tied on warp!
Weave on!!
Looks great! You must have nerves of steel! Then again, I felt that way before I cut my first steek. You just have to fortify yourself and do it.
Brave indeed! I may give this trick a try when I feel equally brave.
I've just been reading Peggy's book and the idea sounded like one that would solve many problems altho scarey to contemplate (like steeks in knitting). I am so glad I "watched" you do it and have proof it can work. Thanks for posting this
Post a Comment