Wednesday, May 10, 2006

Silk Caps & What To Do With Them

Being silly.
Well, surely not that.

I found the caps (or bells) to be a very different preparation from the silk brick, which is combed. The caps are made directly from cocoons, which are stretched over a mold. One cocoon after another is layered on top of the others, creating a multi-layer silk cap.

Separating layers.
I tried separating the layers in two different ways. First by finding the edge of one layer as shown here and pulling it off. I also tried to separate layers by pulling them apart from the top of the cap. I was less successful with the second method.
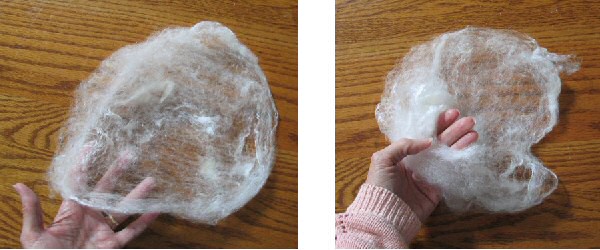
Making it spin ready.
Then I started a hole in the center of the layer.
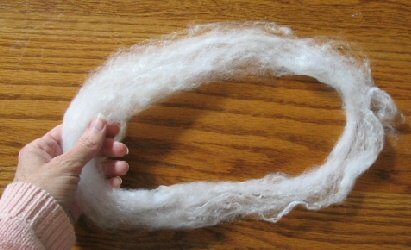
Predrafting
And started to stretch it out into a ring.
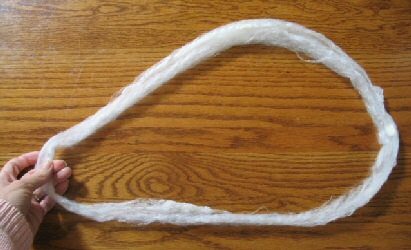
More predrafting
And stretched.

Silk birds nest
And finally wound it into a neat little birds nest.
This preparation spins up into a wonderfully textured yarn.

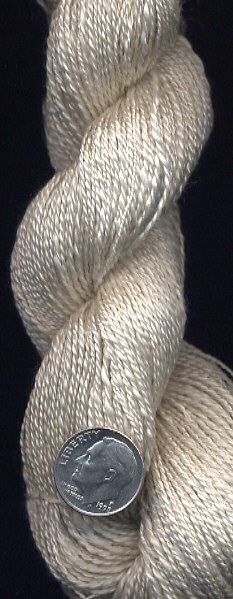
Yarn from silk caps.
The particulars:
* Total weight 16 gms
* WPI vary
* Yardage, >44
* Spinning ratio 12:1
* Spun worsted
* Plied back on itself
* Contained lots of neps

The challenge:
* The length of the fibers! I’m not sure what that was exactly, but I’ve read that cocoon fibers can be a mile or more in length. I found that I needed to keep a very long drafting triangle and held my hands 12 to 18 inches apart during drafting. I learned to pre-draft to close to the size I wanted to spin, so that very little drafting during spinning was necessary.

Painted silk caps.
After I finished the caps in my silk goody package, I rooted around in my stash for some painted caps I was given a long time ago.

Yarn from painted silk caps.
The Particulars:
* Total weight 16 gms
* WPI vary
* Yardage, >51
* Spinning ratio 12:1
* Spun worsted
* Plied back on itself

The Challenges:
* I’d have to say none as I’d had plenty of practice on the first set of caps. I did find that the dye made the fibers a little stiffer to work with, but this was not a problem.

Related Posts:
Homemade Silk Caps - how to
Knitting With Silk Hankies - Do-able with caps too
My Flickr photos - All my silk photos

Monday, May 08, 2006

Spinning Silk Brick

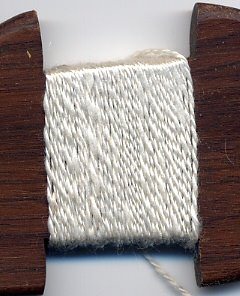
I finally have something to show for the Online Guild’s silk workshop. Our silk sample packs contained so many different types of silk fibers (see "Silk Goody Package, April 21st) that it was difficult to choose where to start. We received 2 samples of of silk brick, A1 and B2. Both are mulberry silk, but the A1 is the best grade while the B2 is the lesser. This yarn was spun from my sample of B2 silk brick.

The particulars:
* Total weight about 28 grams
* Fiber length was 4 to 6 inches
* Contained a few rare neps
* Spinning ratio 16:1
* Spun worsted method
* 2-ply
* 38 WPI
* Yardage, >206

The challenges:
* Fibers catching on rough hands - I found help for this with a hand cream my DD had given me for my birthday awhile back. It is a shea butter, cocoa butter, and glycerin formula by Time & Again. It contains no mineral oil nor petroleum jelly and did wonders for my hands. A "must have" product!

* Fly-away fibers - I didn’t have any problems at first, but about halfway through my sample the fine fibers began to stick to everything. I had heard of the silk scarf trick (spinning with a silk scarf in one’s lap) but had no silk scarf! Peg discovered that a polyester scarf worked as well, and I did find that I had one of these. With that on my lap the fibers behaved very nicely.

* Runaway twist - IOW, not letting the twist run into the fiber supply. I’m more comfortable spinning shorter fibers so the 4 to 6 inche silk fibers required some concentration on my part. This is largely why I chose to spin the B2 sample first. I wanted plenty of practice before spinning the better quality silk! You can see from the slubs in my yarn that this was indeed a challenge. The trick being, of course, to keep the point of twist firmly pinched. Even so, it is a strong yarn and I am quite happy with it.

I confess that this is not the first time I’ve spun silk. When I was a fairly new spinner I was invited to join the Blue Ridge Spinners, a handspinning group which meets monthly at the Folk Art Center in Asheville, NC. They really took me under their wing and provided help, encouragement, and many wonderful fiber experiences, including silk. However, it’s been a long time between then and now! Usually I spin wool and/or angora, so this workshop is a welcome experience for me.

More samples to follow soon.

Friday, May 05, 2006

Log Cabin Project

By Leigh

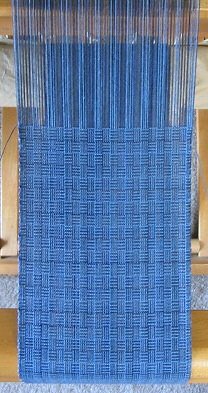
Having explored a number of ideas and woven quite a few log cabin samples, I decided to finish my study with at least one project or two. With the Online Guild’s silk spinning workshop going on this month, I wanted something on the loom for awhile so I could concentrate on spinning. So this seemed a good time to complete my study with a project on the loom.

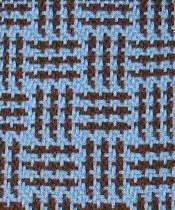
This is 16/2s cotton, sett 30 epi, a narrow piece of only 192 ends. The dark is variegated navy, dark blue, and dark gray. I don’t know if you can tell it from the photograph, but the close up effect is more three dimensional to me that 2 solid color yarns. I still haven’t decided yet how well I like it! What will it be? Click here to find out.


Related Posts:
Log Cabin Necktie

Wednesday, May 03, 2006

Alpaca Plied at Last

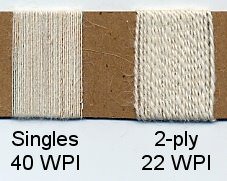
I should be ashamed at how long these alpaca singles were on the bobbins. Almost eight months. But I need the bobbins for a workshop and so here is the skein of plied yarn.

Singles and 2-ply from Suri alpaca top.

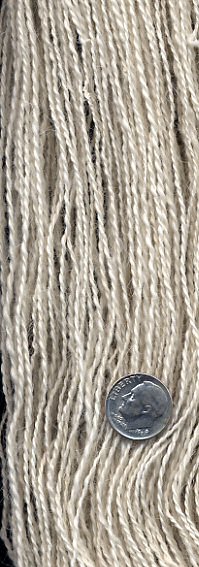
Skein of Suri alpaca yarn.For me at 40 WPI, this is fine spinning. When I was a new spinner, drafting out thick and slubby yarns, I determined to learn to spin fine smooth yarns. Gradually I gained control of the fibers instead of them controlling me and my yarns became finer and finer. But….. to my dismay it took a long time to spin finer yarns! My impatient nature wanted quicker results. I wasn’t interested in projects that took too long. My imagination would move on to other things before my hands had finished their work.

And then came the knitting (I rarely use my handspun for weaving.) Finer yarns and smaller needles also proved to be frustratingly slow. I felt something of a quandary. Aren’t fine yarns the mark of a good spinner? Don’t they prove that I’m no longer a beginner?

Finally it dawned on me to accept myself and my preferences and simply spin and knit what I liked, no apologies. I know that statement seems like a no-brainer, but it was sort of an epiphany for me. I had to give myself permission to not worry about what other people thought.

Actually, this was only a small part of a larger area of growth for me. But during the less tangible aspects of my personal growth, it turned out to be a good illustration for me to hold to. And it still is. Patience on the other hand, is something I'm still working on. :)

Monday, May 01, 2006

A Fortunate Mistake

Ann and I had been comparing pictures of our log cabin twills when she commented to me that mine looked different from hers. And it was. Hmm, I wondered, why was that. Several factors came to mind: yarn, sett, or number of “logs”. But I wasn’t sure any of these were the correct answer.

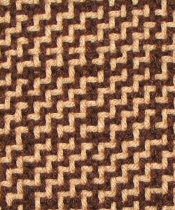
The "real" Log Cabin Twill.After contemplating for a while, it finally occurred to me to go and put my granny glasses on and take a closer look at the draft. Looking more carefully, I realized that the stripes of color on it were not one end each as I first thought, but two. Ahh, so that was it!

I immediately set out to weave another sample, this time following the draft to the letter. As you can see, the effect is different. The cleverness of doubling the end colors is that it preserves the log cabin look, where as mine were single ends of color, resulting in a totally different effect. My warp order was the same as traditional log cabin, but the twill structure revealed an step-like appearance which had fascinated me as I wove it.

My first interp of Ann's draft.Of course, all this only validates the adage that we, as fiber and textile artists, don’t make mistakes, we simply create design elements. I suppose that the transition between the two depends upon how well we can transform that mistake into a desirable outcome. For myself, I only wish all my design elements turned out so well.