By
LeighThis is actually a
duplicate post. However, it is very on topic for this blog and besides, several of you have asked about it! This room was one of the things I loved when I first saw the house. It is a sun room, but I immediately envisioned it as my weaving and fiber studio.
There is a set of French doors off of the living room.

These lead to a sun room, which will become my studio.

After thoroughly cleaning
the kitchen, I decided to tackle this room next. I figured that this way, I could move a little of my stash and equipment with each trip to the house.

Here is a 360 degree look at this room. The windows on the immediate left look toward the back of the house.

One thing you can see in the above photo is the beadboard ceiling. The walls however, are smooth.
The circle on the wall in the corner is a stove pipe flue cover, leading to a chimney outside the corner of this room. Obviously a wood or coal burning stove once stood in this corner. I say coal, because one of the outbuildings has a room with coal all over the floor.

As you can see, there are lots of windows and lots of natural light, making this the perfect choice for my weaving studio!

The front windows look out at the front yard and across the street.

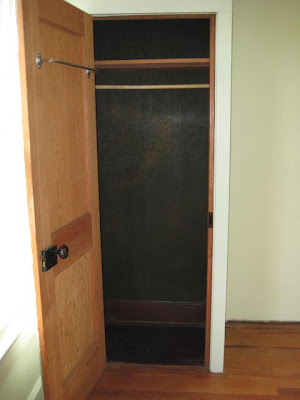
There is a closet in the corner. The other door leads out onto the screened in front porch. This is the only solid wall I have in this room.

The wood floors are in fair shape, and will be much improved with sanding and refinishing.

This closet was added as an afterthought to this room. Possibly to make it a third bedroom. For my purposes, I think I would prefer shelving here. The interior of the closet offers a peek into what the room was like before it was painted.

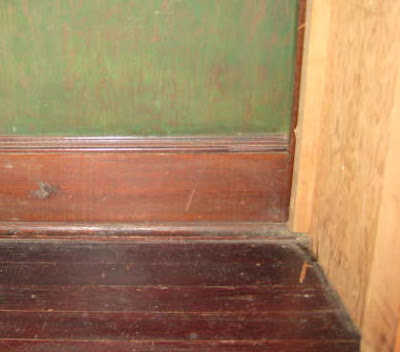
The baseboards were originally unpainted. The closet floor is darker than the rest of the room. Possibly it was stained or painted at one time and had been sanded after the closet was added(???)

When I removed the switch plate to wash the walls, I discovered the original wood of the wall, which had been painted twice; once a darker green, and later a lighter green. These same colors were used in several other rooms as well.
The double-hung windows are likely original to the house.....

These operate with weights and pulleys; you can see the pulley rope on this one seems to be in fairly good condition. The ropes on some of the other windows are broken, and some of the windows are painted shut.
This room presents several challenges for me. The first is that there isn't much wall space, and I have a lot of stash, books, and equipment! DH says I could put shelving in front of the windows, but I am loathe to block any of that light.
Because of those windows however, and the orientation of the house (of which the front faces west), this room gets a lot of late afternoon sun. This in turn heats the room up considerably. While this will be welcome during winter months, it has the potential to be unbearable during the summer. I have this problem at our apartment, but I couldn't do anything about it! Now I can and I plan to plant a deciduous shade tree in the front yard this fall!
The last challenge is the size of the room. It measures 9' 3.5" by 19'11". It is the width I am concerned about, because of the size of my loom. My Glimakra Standard measures about six feet in width, so obviously the "getting around" room will be somewhat restricted. Depth-wise, my loom is about five and a half feet, not counting the bench. Even so, this is the perfect room for my studio!
Related Posts:
A Life Detour......Unveiling My Studio Set-Up
 These are my Lucy Neatby Chequerboard Socks. This is the project I didn't pack away during moving, so that I would have at least some fiber in my hands to help me keep my sanity in the midst of the chaos of boxes everywhere and not being able to find anything.
 The checks are stretched so tight before and after the heel, so as to pull them all out of shape. I'm not happy with how this looks and am not sure what to do about it.


