Monday, May 29, 2006

Dyed Silk Noil/Alpaca Yarn

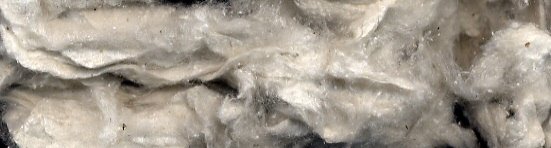
Clean silk noils, ready to use.


The second sample of silk noil in my pack was labeled “Clean Noil.”
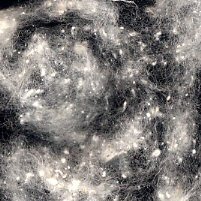
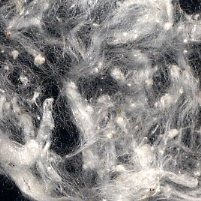
Close-up shot of teased fiber.


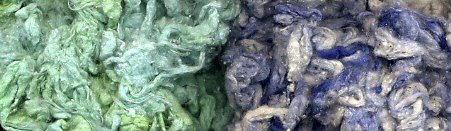
I decided to dye this. At first I tried the exhaust dyestock from the Easter egg dyes, but though the water was bright with color, the blue in particular refused to impart any of it to the fiber. So I sprinkled each batch with dye powder and this is what I ended up with:

Dyed noils.


I had first thought to spin it as is, but the fiber length was less than ¼ inch, so I blended it with handfuls of alpaca fleece.

The yarn:
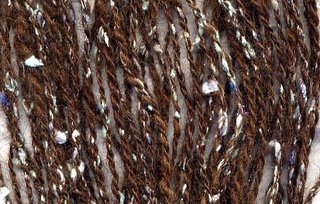
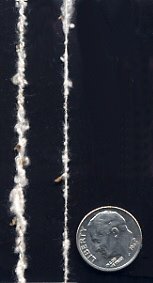
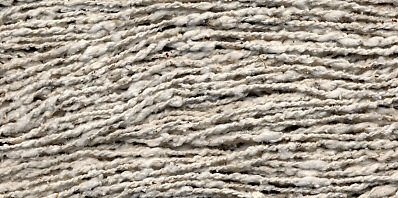
Alpaca/silk noil blend yarn.


2-ply measures 10 WPI after washing and abusing. Unfortunately the green noils look washed out in these images. The yarn spoke to me of knitting, so here is a swatch, front (left) and back which I also liked (right). So reverse stockinette is a possibility.
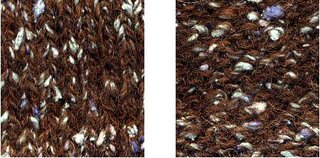
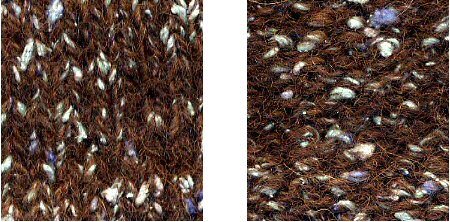
Knitted swatch, front and back.


The hand is a bit harsher than I like, but I’m musing the possibilities. I don’t mind this kind of yarn for outer wear. And since I still have 2 large handfuls of the dyed noil to do something with, I guess I’ll reach a decision eventually.

Related Posts:
Mulberry Silk Noil - handcarding & spinning
Spinning Tussah Silk Noil - scouring & spinning
Silk Fiber Fusion - using dyed silk noils

Saturday, May 27, 2006

b2f Part 2

By Leigh

I can’t tell you how much I have appreciated the supportive and encouraging comments I received on my last post. It’s especially interesting to read when and why weavers choose one method of warping over another. This is helpful information!

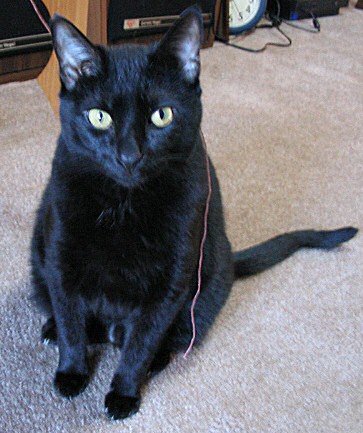
Ok, this is where I left off with my b2f warping a few days ago. ( I know, I know, this is actually a thinly veiled attempt to pass off another disgustingly cute kitty picture.) :-)

Rascal keeping an eye on the photographer.

In doing my research I realized that there is no one single way to warp b2f. I chose Chandler’s instructions, and occasionally refer to Osterkamp. For the most part things have gone pretty well so far.

Some things have been familiar to me:
  • Working with only one cross (the threading lease)
  • Beaming the warp through the front instead of the back

Some things have been new:
  • Using a counting thread while measuring the warp. I really liked this however. It seemed easier to count and keep track of groups of 12s rather than counting to 864.
  • Using a raddle
  • Placing packing sticks to separate the layers of apron cords as I wound them on. I didn't used to use anything to separate the layers of warp until I got to the the knots which tied onto the back apron rod.
  • Putting lease sticks through the cross and hanging them from the back of the 4th shaft. I found this awkward at first, and the sticks seemed to be in my way. But I am adjusting and really like not having to reach all the way through from the back of the loom to the reed, to try and find the next ends to thread. (A lot of fun with my bifocals!)
  • Sitting at the front of my loom to thread the heddles. As mentioned above it's easier with the warp closer to me. Plus, I found that my empty beater makes a convenient little shelf for my book, scissors, and threading hook.

I paid particular attention to tensioning, utilizing several methods:
  • Weighting the warp with a heavy box on the floor as I wound on.
  • Bracing my knee against the loom and pulled each group of ends as hard as I could
  • Giving the group an additional jerk before moving on to the next group.

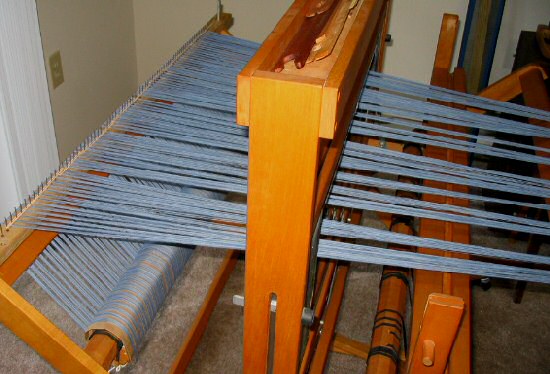
The thing that was my biggest concern however was the way the warp wound onto the warp beam. Instead of a neatly behaved warp in a solid layer, I had “clumps” of ends with spaces between the raddle spaces, as you can see:

This is not how I wanted my warp to look as it wound on.

I understand now that the “valleys” between these groups create uneven spots and hence potential differences in tension across the width of the warp. The only things I can think of are to try and keep the warp spread out in the raddle better (next time). Or perhaps my raddle spaces are too far apart(?) They are ½ inch and I am using 16/2s cotton sett at 24 epi.

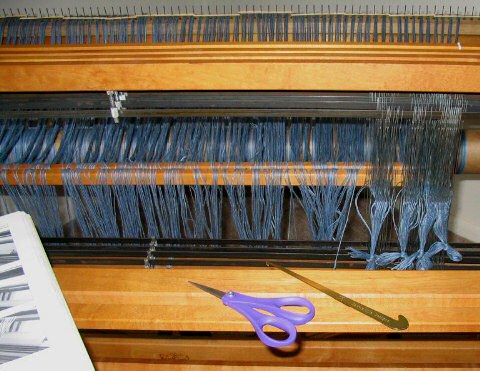
So here’s were I am at the moment. You can see the warp ends spread across the lease sticks and hanging about heddle eye height behind the 4th shaft:

Warp ends spread across the lease sticks and hanging about heddle eye height behind the 4th shaft.

Progress will probably be a bit slow, as I've only begun to thread the heddles. But I am motivated, so hopefully it won’t be too long before I can see how well I’ve done and start weaving.

Next, b2f Warping Progress


Related Posts:
f2b Versus b2f - Beginning of this series
b2f, Warp Sleyed
b2f Log Cabin Weaving - finished fabric from this series
Evaluating My b2f Warp
B2F Warping - Still Tweaking
B2F Vs. F2B - Why I Switched

Thursday, May 25, 2006

Mulberry Silk Noil

Mulbery silk noil, grade A.
On the spinning front, I’ve started working with silk noil. We received three different types in our silk packs. I liked the grade A mulberry noil best, and so decided to work with it first.

Close-up of teased mulberry noil.Noil is considered a waste product from the silk industry. The fibers are actually the short threads the caterpillar first spins to anchor itself for the process of cocoon spinning. The noils are little bits of broken cocoon, pupae shell, and any other odds and ends leftover from the cocoon spinning process. 

There are quite a few possibilities of what I can do with my silk noil. Some I want to dye, some I plan to blend, and I would also like to try my hand at silk fusion paper making. But the mulberry noil I decided to spin on its own.
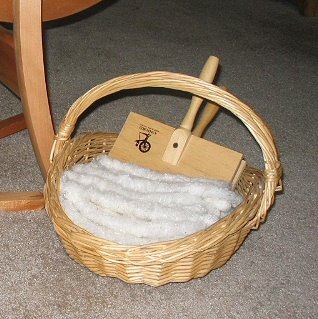
Basket of handcarded noil rolags.
The ½ to 1 inch fibers were easily and quickly carded into rolags on my cotton hand carders. I spun it long draw with lots of twist. You can see from my control card how textured it is. I’m not sure how well I like those little pieces of cocoon and whatnot in the yarn. I picked the biggest ones out, but there were too many to get them all.


Close-up of control card.
Here are the particulars:

* Weight, 28 grams
* Fiber length was ½ to 1 inch
* Abundant bits & noils
* Spinning ratio 10:1
* Spun woolen method
* Singles, 20 WPI
* 2-ply, 16 WPI
* Yardage, >89

The challenges:

* Dealing with all the noily bits took a little getting used to. The fiber alone tends to spin out sewing thread fine, while the noils create relatively giant slubs. I had to take care during spinning to maintain the integrity of the yarn.

* Treadling and drafting speed. I had to experiment a bit with this and finally settled on a fairly slow speed to both treadle and draft. This enable me to get the twist I needed but still control the noily parts of the fiber.

* Too much whiteness! I wanted to spin it as-is since I’ve never worked with silk noil before, but my eyes really long for color in the process. I will dye some next and so spin it with some color.

And of course, the yarn:

Handspun mulberry silk noil yarn.
Related Posts:
Dyed Silk Noil/Alpaca Yarn - blending acid dyed noil & alpaca
Spinning Tussah Silk Noil - scouring & spinning
Silk Fiber Fusion - using dyed silk noils
Tuesday, May 23, 2006

f2b versus b2f

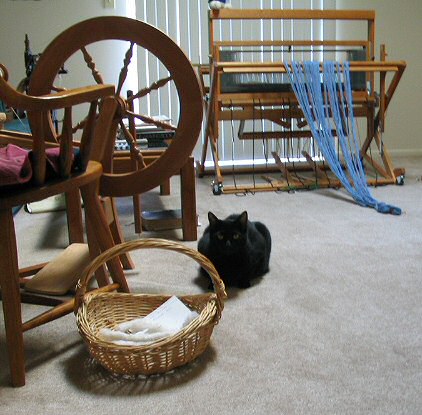
The chained warp for my next log cabin project.By Leigh

Fiber folks are normally a congenial lot: friendly, helpful, generous, easy going. But there are a few controversies which sometimes seem to have a definite Jekyll and Hyde effect on us.

One of them is the Scotch tension vs. double drive debate. I resigned my participation from this one a long time ago, having set up my Ashford Traddy with Scotch tension and my Kromski Minstrel in double drive.

The other debate seems to be over which is the best way to warp one’s loom: front to back, or back to front. So far I’ve merely been a bystander. I learned f2b and except for one dismal attempt to learn b2f four years ago, have remained a f2b warper.

Until now. I’m not sure whether it was the lure of “more even tension,” or the appeal to my professional studentism. Or perhaps it was the twinges of guilt I felt when my husband would ask “Whatever happened to the thing I made for your loom,” referring to my raddle. So when fellow Online Guild member and former f2b warper Diana suggested it as another possible self study, it sounded good to me. And with 5 plus yards to put on the loom, now seemed like the perfect time to give this method another try.

So I’ve done my homework. In addition to Deb Chandler’s Learning to Weave, I’ve dug out Peggy Osterkamp’s Warping Your Loom & Tying on New Warps, checked out the OLG’s online resources, downloaded a how-to pdf file from Interweave Press, and took a close look at the contraption on Charleen’s Fiberblog.

I ended up choosing the Chandler method, mostly because it seemed most similar to what I’m already used to. I also have Osterkamp handy and am referring to it frequently. Here is my progress so far:

Beginning to wind on my warp.

One of the things I’m realizing is that though I had previously thought I was doing a good job tensioning my warp, I really wasn’t. Some warps wove off beautifully, and some didn’t. But I couldn’t put my finger on what the problem was. (This is one of the unfortunate consequences of being largely self-taught.) In going back over the material now, I’m understanding things that I didn’t grasp before. I’m not sure if it’s like that for everyone, but I find that my brain can only process so much information before I have to put it to use. After that I can go back over the same information and pick up more details, which in turn I put into practice, and so on. Each time I go back over the material, I experientially understand more and more of it. Head knowledge is good, but experience transforms it into reality!

So I’m paying more attention to details I hadn’t noticed before, while still giving myself room to make mistakes and continue to learn. Hopefully this will be a lesson well learned, but the proof will be in the weaving of course.

Always willing to help.Next........b2f Part 2


Related Posts:
b2f Log Cabin Weaving - finished fabric from this series

Monday, May 22, 2006

Dyed Silk TW Yarn

Here is my little basket of throwster's waste rolags:

Rolags from the dyed silk throwster's waste.


I really hadn’t planned to get a photo with the cat in it, but darn if he didn’t just come, plop himself down, and pose charmingly as soon as I got the camera out. This is Rascal BTW. He knows better than to look at the camera because of the flash.


Here’s the yarn:

Dyed silk throwster's waste yarn.

My control yarns and the particulars:

A single and a 2-ply sample for checking my spinning.* Weight, 17 grams
* Fiber length, 1 - 3 inches
* Spinning ratio 10:1
* Spun woolen method
* Singles, 26 WPI
* 2 ply, 16 WPI
* Yardage, > 45

I used to use a counting stick to keep my spinning consistent, but later switched to a control card. I find it easy to compare the size of the singles and check the twist all in one stop. I do count treadles, but I like to let the yarn ply back on itself every now and then just to make sure I’m still happy with it.

The challenges:

* Actually none during spinning. During carding however, I found the stuff to be very fine and flyaway. I used to rub my angora bunnies down with dryer sheets to keep this under control during grooming, or hold handfuls of angora fiber in a dryer sheet for spinning. I couldn’t figure out a way to use a dryer sheet during carding however, so I just lived with it. It behaved quite nicely during spinning.

* The color - odd how color affects us, but I really had to live with it awhile before I decided I was beginning to like it. I honestly considered Mary’s suggestion, about plying it with something more neutral, but decided to be daring and ply it on itself.

Next, I think I’ll see what I can do with my three packs of silk noils.

Related Posts:
Silk Throwster's Waste - about & how to spin
Dyeing & Carding Throwster's Waste - tutorials