Sunday, May 21, 2006

Birthday Socks & Birthday Card

The dyed TW yarn is spun and plied but still on the bobbin. I hope to have that ready to show by tomorrow or the next day. However, since I’m a mulit-project person, here is what I do have to show. A pair of birthday socks for my stepmom:

Bulky cuff-down socks.


I hope she likes them. Her request was for a neutral color, definitely not anything wild. While the colors in these are neutral, they’re not exactly super conservative.

I had just moved here when I went looking for yarn for them. At the time I didn’t know where the LYS is, but I did find a Hobby Lobby. Their only sock yarns were pretty colorful, but I did spot this acrylic sport weight knitting yarn, which I liked. It’s knit up into a quick, cottony, comfy sock, not too wild but definitely unique. I’m not sure how well acrylic wears for socks, but according to Fiona Morris, the key to good wear is in the knitting more than in the yarn. The pattern is Lucy Neatby’s "Simply Splendid Socks" from Cool Socks Warm Feet.

And here is the birthday card I made for her:

Birthday card featuring an inset of one of my handwoven samples.


I like these DIY trifold cards. They come with a little plastic pocket, perfect for slipping in a sample of weaving, handcrafted paper, knitting, or whatever. I weave a lot of sample strips for design boards, so these are perfect for this purpose.

Now all that’s left is getting this posted in the mail. Am I taking a risk showing off a birthday gift before it’s been given? Fortunately my stepmom doesn’t use computers!

© 2006 Leigh's Fiber Journal

Related Posts:
Gallery Photos: Greeting Cards
Gallery Photos: Socks
Making Christmas Cards - tutorial on making greeting cards
Q & A: Trifold Aperture Card Blanks

Friday, May 19, 2006

Dyeing & Carding Throwster’s Waste

My dyeing project didn’t turn out the way I had originally hoped. I wanted to blend several colors and had a number of ideas on how to do that. But, having made two long distance moves in 6 months and still not being able to find all my dyes and supplies proved to be a detriment. So I ended up choosing the simplest possible method: Easter egg dyes.

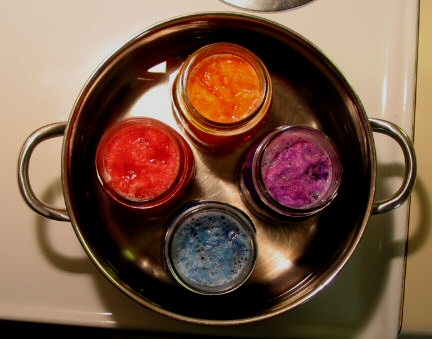
I chose four colors because four pint canning jars was all I could find. The 4-in-1 pot method worked well for the small amounts I wanted to dye.

Easy Easter egg dye dyeing.


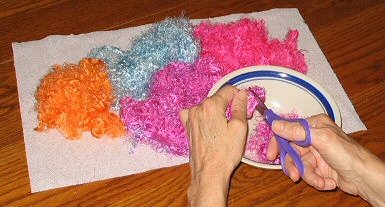
After it dried, I cut the long strands into smaller pieces. I just took a guess as to how long to make them and cut off 1 to 2 inch size pieces. After working with them however, I would recommend 2 inches to be a good size.

Cutting the throwster's waste into more manageable pieces.


Next came carding. I used my cotton hand carders. When I first charged the card it looked like this:

Cotton carder loaded with dyed throwster's waste.


After about a bazillion passes, it begins to look like this:

It takes awhile, but the fibers eventually break down.


You can see the silk strands beginning to break down.

And the rolags look like this:

I wonder how this stuff will spin up.


I suppose I could have carded them until all the strands were completely broken down, but I wanted to leave at least some of them visible in the yarn for both visual and tactile texture.


I still have quite a bit left to card so it may take me awhile to finish it all.

While I’m doing that, I can contemplate whether or not I really like this color. Being a soft, muted color sort of person who occasionally goes in for jewel tones, this is a little too bubblegumish for my taste. However, I’ll reserve judgment until the yarn is spun, because after all, I can always overdye it! :)

To see the yarn this made, click here.

Related Posts:
Silk Throwster's Waste - about, & how to spin
Dyed Silk TW Yarn - how the dyed waste spun up

Wednesday, May 17, 2006

Silk Throwster’s Waste

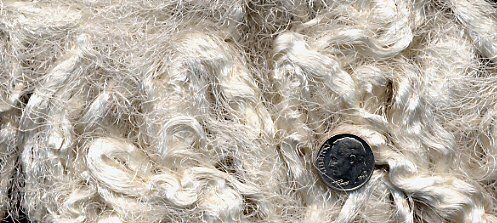
By the handful.
This is intriguing stuff, is it not?

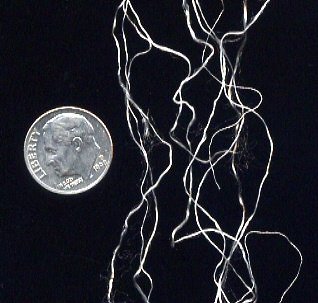
Just a few strands.
It is throwster’s waste, leftover from commercial silk processing. The technical jargon for reeling silk from cocoons is “throwing,” where the silk fibers from many cocoons are reeled together with twist added to prepare them for weaving. However, there is some waste to that process, and this is it!

I had a total of about 29 grams of throwster’s waste in my silk pack, so I decided to try a couple of things with it. It was already degummed, so I could start experimenting with it right away.

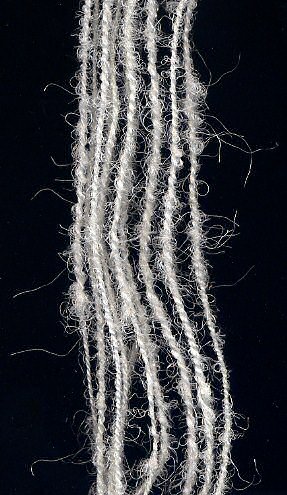
First, I wanted to try and spin some of it by the handful, like I do curly kid mohair yarn. The result wasn’t very curly of course, more like a bulky eyelash type yarn, especially after it was plied back on itself.

How I drafted the stuff.The particulars:
* Weight, about 10 grams
* Fiber length, several inches to several feet
* Spinning ratio 8.5:1
* Spinning technique, see photo at left
* Singles, 22 WPI
* 2 ply, 10 WPI
* Yardage, >13

TW yarn sample number 1.The challenges:
* The length of the fibers - after every couple of yards or so the fibers would begin to tangle on themselves. This didn't make it impossible to spin this way, just slow. Next time I would cut it into more manageable pieces.
* Keeping the yarn consistent. This would resolve itself with practice. I would have liked to have plied the single with silk thread, but had several “bare” spots that I didn’t like.


The rest of my throwster’s waste will find it’s way into the dyepot in preparation for a different yarn.

Related Posts:
Dyeing & Carding Throwster's Waste - Tutorials
Dyed Silk TW Yarn - How the dyed TW spun up

Monday, May 15, 2006

Log Cabin Necktie

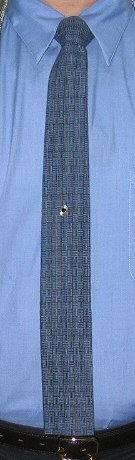
Log Cabin Necktie.Over the weekend I finished the first of my log cabin projects, a necktie for my husband. This is the fabric you saw on the loom in my “Log Cabin Project” entry for May 5th. I wove the fabric with 16/2s cotton, sett at 30 epi in order to get a fairly firm fabric for a necktie. I used McCall’s pattern 9469.

This is the first time I’ve sewn with my handwoven, and I had to deal with several concerns. My first was that I couldn’t weave fabric wide enough to cut the tie on the bias, as the pattern called for. My second concern was building up the nerve to put the scissors to it!

Regarding the fabric width, I decided to press on and cut out the pieces lengthwise. I know this goes against conventional sewing wisdom, but in weighing out the possibility of no tie versus a tie not cut on the bias, I went with making the tie the best I could.

Detail of tie fabric.Regarding working up the nerve to cut into my handwoven fabric for the first time, well I relied on the support of several of my weaving friends! I was relieved to discover that it didn’t immediately unravel, but with careful handling behaved nicely until I could stabilize the edges with a straight stitch around the pieces.

The only other thing I decided not to do in regards to the pattern instructions, was to sew right sides together and turn through a small opening left in the seam. I didn't want to put any extra pull or wear on my fabric, so I simply folded the edges and hand sewed the seam.

Dan was pleased to be presented with a tie made to his specifications in a pattern and colors he likes, and I’m just happy that it turned out so well!


Related Posts:

Friday, May 12, 2006

Homemade Silk Caps

The next step was to try making my own silk caps.

Cut silk moth cocoons.
To get started I had to make a choice. I could either use the cocoons a la natural and remove the little dead wormies myself, or I could use the cut cocoons. I decided to use the cut cocoons.

First they had to be degummed. The recipe from Jane, the workshop’s tutor, called for 50% soap flakes and 25% washing soda per weight of silk. I couldn’t find soap flakes, so I substituted Ivory dishwashing liquid, as described in A Silk Worker's Notebook by Cheryl Kolander.

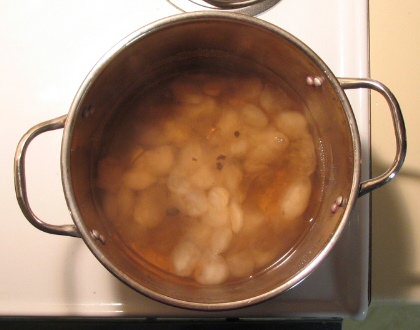
Degumming pot.
Looks yummy, doesn’t it? I let them simmer for over an hour and then rinsed them in cool water.

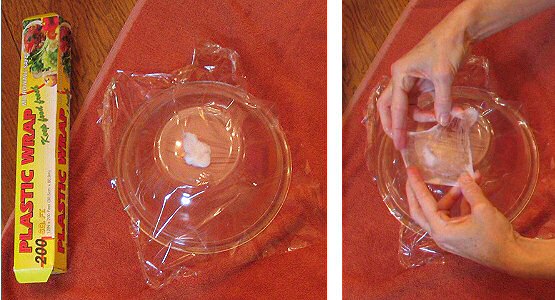
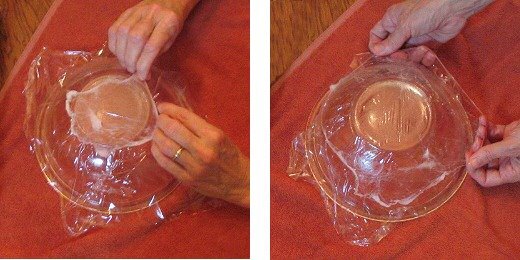
Starting the layers.
My inverted pyrex bowl is covered with plastic wrap. What looks like a soggy cotton ball is actually a wet cocoon. They are worked one at a time, stretching them over the bowl, which serves as a mold. (To see an enlarged version of any of these pix, simply click on them.)

Stretching them over the mold isn't as hard as it looks.
It is an amazing process, actually. Some of the cocoons stretched into beautiful ethereal layers, pulling nicely over the surface of the bowl. Some wouldn’t cooperate at all! I had about a dozen cocoons which ended up torn to shreds.

Building the layers until all the cocoons are used up.
Eventually I started to get the hang of it. I wasn’t able to get all of the cocoons stretched completely over the bowl, but most of them found their places as some semblance of a layer. I used about 60 cocoons in this cap.

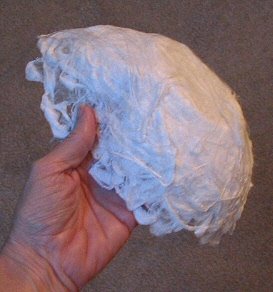
My first ever homemade silk cap.
After it dried I gently took it off the bowl. The plastic wrap made it easy to remove. All that’s left now is to spin it!

If you find all this of interest, then you might want to visit www.wormspit.com. It will tell you everything you ever wanted to know about silk moths, plus some things to do with silk and silk moth cocoons.

Related Posts:
Silk Caps & What to do With Them