By Leigh
I have to admit that I didn't get many fibery things done over the weekend. No knitting progress on my Shetland Sampler Cardigan. On the weaving front though, I did start to measure a new warp to replace the yucky one I cut off my loom .
Actually, the entire week ahead looks to be busy with holiday traditions and their preparations. I may not get much blogging done.
Our holiday tradition in December is Christmas, though we've made some changes this year. We went "green" with our Christmas tree (see Catzee's report on that right here.) Some things are long outgrown (see Rascal's report on one of those things here.)
We've also declined to get caught up in the shopping frenzy. Christmas as a retail holiday just doesn't cut if for us. This year we put a spending limit of $5 per gift. Rather, we choose to celebrate Christmas as a birthday, with the focus on the gift that can't be bought.
So, at this time of reflection as the year draws to a close, I want to thank you, all my readers, for visiting and commenting. You are such an encouragement to me. And I want to wish you the very best of whatever holiday and tradition you choose to celebrate. Or not celebrate.
And last but not least, Catzee and Rascal want to share their holiday greetings with you. Just click on their pictures below.
Monday, December 22, 2008
Friday, December 19, 2008
SSC Shoulders
By Leigh
Progress!
Progress!
Front and sleeve steeks are sewed and cut, and the shoulder seams are finished.
I used the "knit and bind-off technique"on the shoulders
Front and back of shoulder are placed on needles one size smaller than those used for body of knitting. Using a needle of the larger size, the front and back shoulder stitches are knitted together. Right needle through both, then knit together.
After two stitches, bind off one and continue until seam is complete.
Someone else can probably explain that better than I, but hopefully you get the idea.
Here's a view of the inside of the finished shoulder seam....
And here's what it looks like from the outside.....
I didn't plan it to look this way, but I'm not dissatisfied. At least both shoulders turned out the same!
One thing I didn't do was shoulder shaping, as I don't have a clue of how to do that in the round.
Related Posts:
Sewing & Cutting the Steeks
Shetland Sampler Cardigan Complete!
One thing I didn't do was shoulder shaping, as I don't have a clue of how to do that in the round.
© 19 Dec. 2008 at http://leighsfiberjournal.blogspot.com
Related Posts:
Sewing & Cutting the Steeks
Shetland Sampler Cardigan Complete!
Tuesday, December 16, 2008
Abandoned Warp
By Leigh
I have abandoned this project. In less than six inches of weaving I've already had five warp ends break. That's going on one repair per inch! With an intended project length of about 48 inches (times two), that is not acceptable.
This was to be a Pine Tree Table Runner in summer & winter. I adapted the draft from Carol Strickler's A Weaver's Book of 8-Shaft Patterns (#549 page 155).
I bought the warp as a mill end, about 7 or 8 years ago at Holly Bee in Valdese, North Carolina (back in the days when they had a shop and sold weaving yarns). It's an 8/2 unmercerized cotton, and I think I paid only a dollar or two for it. It would be okay weft, but it is too weak to be warp. And there's only so much frustration a body can endure.
Posted 16 Dec. 2008 at http://leighsfiberjournal.blogspot.com
Related Posts:
Summer & Winter: A Basic Definition
Summer & Winter: Structure & Theory
Saturday, December 13, 2008
More Weaving Software That Can Run On Linux
By Leigh
I've already blogged about ArahWeave and WeaveDesign. The other day, Laritza passed this one on to me; another weaving program that runs on WINE. It 's freeware, it's from Brunold Software, and it's called DB-WEAVE.
I was doubtful at first, because the initial blurb states that it is for designing dobby loom patterns, but as I read on, I was delighted to discover that it also has a tie-up mode.
I got it up and running in WINE in no time. Like a lot of freeware, the help files are pretty much nonexistent.
[UPDATE 14 Dec 08 - Many thanks to Frida, for alerting me to a pdf manual for DB-Weave. You can find it here.]
To explore the program, I inputted a draft from Shelp & Wostenberg's Eight Shafts: A Place to Begin.
You can click on almost any photo to enlarge.
I have figured out that the red lines indicate the basic threading and treadling units. The drawdown highlights the intersection of these in red at the bottom right hand corner.
I found "Options" under the "Extras" menu.
These can be set as your default settings, or for individual drafts. You can see that "Sizes" sets the number of shafts, treadles, epi, and ppi. "Grid" overlays a grid on the draft, making it easy to keep your place. "Settings" allows you to choose single or multiple treadle modes (which I need for skeleton tie-ups and treadling!), and rising or sinking shafts. "Symbols" is for how the grid squares are filled in, and "View" lets you choose how draft is viewed on the screen.
The fun part is playing with the "Threading," "Treadling," and "Tie-Up" menus. (Click on any photo for a closer look-see.)
Threading options include mirroring, normal or straight rising and falling, 2 choirs (above), 3 choirs, fixed, user defined, and copied from treadling.
The Treadling menu includes mirror, normal rising and falling, crossed, fixed, and copy from threading (above, aka "tromp as writ" or "as drawn in."
Tie-up menu allows invert, roll (up, down, left, or right), and slope (increase [above] or decrease), or make central symmetric.
The draft view (above) can be with or without the drawdown. In addition, there is also.....
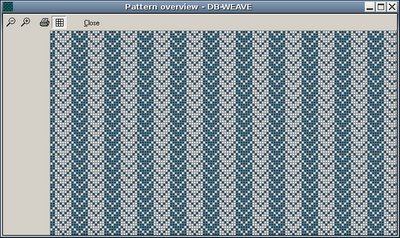
And overview.
Another feature I like is the undo and redo buttons! I don't have those with WeaveDesign. DB-Weave also imports and exports wif files (the standard format for most weaving software.)
Under the "Extras" menu, I also found .....
Another feature I like is the undo and redo buttons! I don't have those with WeaveDesign. DB-Weave also imports and exports wif files (the standard format for most weaving software.)
Under the "Extras" menu, I also found .....
... pegplan mode. There's also a "weave" option in that menu which apparently tells the computer to talk to the loom. However, I don't have a dobby loom, nor are my computer and my Glimakra on speaking terms, so someone else will have to tell us all about that.
"Extras" also lets the weaver change the warp/weft ratio, and base setting for the program (choice of American, Scandanavian, or German/Swiss). Language options are English or German.
I haven't figured it all out yet, but I do find this program easy to experiment and play around with. I'm sure some of the menu options are dobby features. To me, it's the easiest free weaving software I've worked with so far. So for the moment, it's the one I'm going to stick with.
Related Posts:
Hurray for Hardy! Hurray for Wine! - WeaveDesign
Weaving Software for Linux - ArahWeave Part 1
ArahWeave Continued - ArahWeave Part 2
"Extras" also lets the weaver change the warp/weft ratio, and base setting for the program (choice of American, Scandanavian, or German/Swiss). Language options are English or German.
I haven't figured it all out yet, but I do find this program easy to experiment and play around with. I'm sure some of the menu options are dobby features. To me, it's the easiest free weaving software I've worked with so far. So for the moment, it's the one I'm going to stick with.
© 13 Dec. 2008 at http://leighsfiberjournal.blogspot.com
Related Posts:
Hurray for Hardy! Hurray for Wine! - WeaveDesign
Weaving Software for Linux - ArahWeave Part 1
ArahWeave Continued - ArahWeave Part 2
Wednesday, December 10, 2008
Sewing & Cutting The Steeks
By Leigh
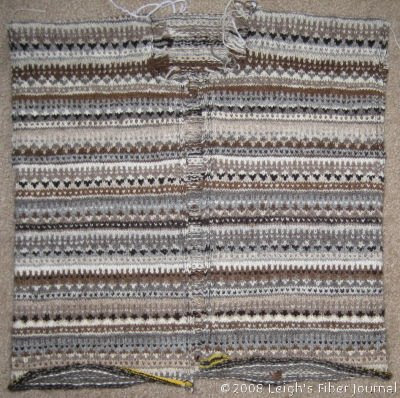
Do I need a drumroll for this? Here are photos of sewing and cutting the neck and front steeks of my Fair Isle Shetland Sampler Cardigan.
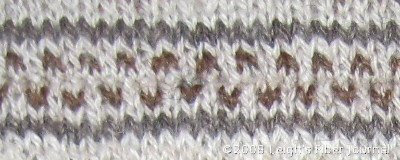
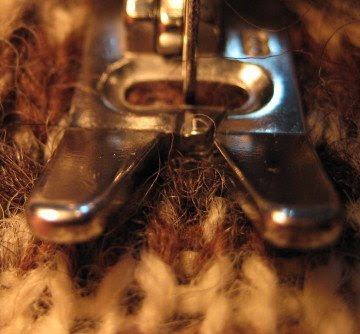
The first thing I did was to test stitch tension on my sewing machine with a small knitted swatch. When I was satisfied with that, I sewed the actual steeks.
Do I need a drumroll for this? Here are photos of sewing and cutting the neck and front steeks of my Fair Isle Shetland Sampler Cardigan.
The first thing I did was to test stitch tension on my sewing machine with a small knitted swatch. When I was satisfied with that, I sewed the actual steeks.
I followed the instructions in Peg Arnoldussen's Essential Techniques for Serious Knitters (see my review in this post). The stitch is straight and small. I think I set my machine at about 20 stitches per inch.
My front steeks were six stitches wide. For these I sewed three rows of machine stitches on each side. For the wound neck steek (which I actually did first), one row of machine stitches went down the center of the edge stitches, and another along the outside of the edge.
Then came the cutting between the stitched lines. It actually wasn't as scary as I thought it would be. I just reminded myself that this is only fabric after all.
Here is the left upper front of the cardigan. You can see how both steeks turned out. I'll repeat this process the sleeve openings and my Siamese Sleeves.
The next step is to block this piece. Then I'll sew and cut the armhole steeks, stitch the shoulder seams, and then I can begin on the bands!
Related Posts:
Spinning & Knitting Update
Steeking So Far
Wound Neck Steek
Shetland Sampler Cardigan Complete!
The next step is to block this piece. Then I'll sew and cut the armhole steeks, stitch the shoulder seams, and then I can begin on the bands!
© 10 Dec. 2008 at http://leighsfiberjournal.blogspot.com
Related Posts:
Spinning & Knitting Update
Steeking So Far
Wound Neck Steek
Shetland Sampler Cardigan Complete!
Saturday, December 06, 2008
What's On My Wheel? Pol-paca
By Leigh
Okay, so technically there isn't any such thing as "pol-paca," but it does seem the easiest way to describe the Polwarth and Alpaca blend that I'm spinning. Here is one of the finished skeins...
I'm spinning an eyeball 50/50 blend of the Polwarth (a gift from a friend a long while back) and Huacaya Alpaca (the same that I used for my Teddy Bear Shawl).
You may remember the next two photos from an earlier post. In the next one, the Polwarth is on the left, the alpaca is on the right.
Staple length is 4 to 5 inches for both. You can read my complete assessment of the Polwarth in this post.
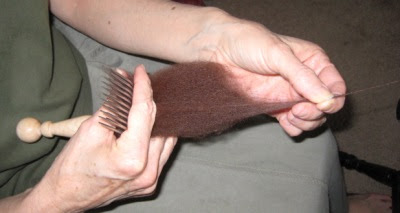
I am blending the two fibers the same way I blend colors on woolcombs as seen in this post.
I find it faster to simply spin it off the comb rather than to diz it into top.
My plan is to use this to weave fabric for a winter jacket or coat. I don't have the details figured out yet, but I do think about it while I spin. Since I want the coat to be solid color, I'm thinking that the interest will have to be in the weave of the cloth, as well as the garment design.
I've only got three skeins finished so far, and while I don't know the exact yardage I'll need, I know it will be a lot. So this will be my spinning project for this winter. Hopefully by spring, I'll be ready to move on to the serious planning stage.
Posted 6 Dec. 2008 at http://leighsfiberjournal.blogspot.com
Related Posts:
Color Blending on Woolcombs
Next Spinning Project - Polwarth
Polwarth - Experimenting With Preparations
Thursday, December 04, 2008
Photo Meme
By Leigh
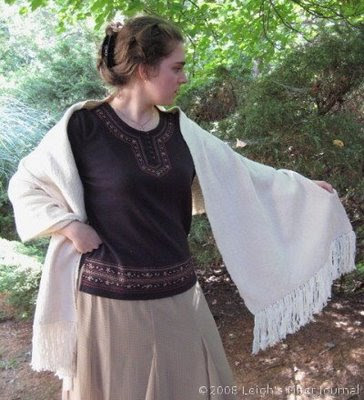
Plain Weave Shawl
Wraps: Shawls, Stoles, & Ruanas
Okay folks, we have Sharon to blame for this post ;) (just kidding). She tagged me for a photo meme. The directions are:
*Go to your sixth picture folder and pick your sixth picture.
*Pray you remember the details.
*Tag five others.
My 6th photo in my 6th photo folder would be this one....
This is my daughter, modeling the shawl in this post for a photo for my Etsy Shop (a lost cause) and my Fiber Gallery (seen here). It was one of many that didn't make the cut (as I am by no means anywhere close to being what might pass as a professional photographer). Which one did I end up using? This one....
© 4 Dec. 2008 at http://leighsfiberjournal.blogspot.com
Related Posts:Plain Weave Shawl
Wraps: Shawls, Stoles, & Ruanas
Tuesday, December 02, 2008
Countermarche Tie-Up Tip: Lamms
I don't know about you, but for me, anything to lessen my confusion
helps to lessen my mistakes. When I
first got
my countermarche loom, dealing with two sets of lamms, both rising and sinking
was
very confusing. It took me at least two full days to tie up the treadles the first time.
Gradually I've worked out a system that helps me figure out which lamms to
attach the ties to.
Most modern threading drafts are for rising shed (jack) looms, which can be adapted to countermarche looms, where shafts either rise or sink. So, since longer lift & smaller sink, I concentrate on the treadle ties attached to the longer, lower lamms first.
1. The first thing I do is to pull off all old ties so that I can see what I'm doing and know what's tied up for the new draft. I'm often tempted to just move the existing ties around, but this can get confusing.
2. Next I use anchor pegs in the upper (shorter, smaller) lamm holes to mark the tie-up draft. This serves two purposes:
a. It gives me the pattern for the tie placement on the lower, longer lamms. I put ties in the corresponding holes in the lower lamm.
b. When adding the ties to the upper lamm, I simply fill in everything that doesn't have an anchor peg in it.
3. I double check the tie-up when I drop the treadle tie down in front of the each corresponding lower lamm. Each tie should have an empty lamm hole directly beneath it.
One benefit of placing the ties on the lower lamms first, is that I don't have dangling ties from the upper lamms to deal with. I find these distracting.
When I tie up the treadles, I use Dorothy's idea of placing them on a box first, to get a height to aim for. Then I start with the ties near the back of the loom, which need to be tightest.
Posted 22 Oct. 2008 at
http://leighsfiberjournal.blogspot.com
Ikat/Painted Warp Bookmarks Done
By Leigh
And here they are....
A sampling of them anyway. I was able to get ten, 8.5 inch bookmarks (plus fringe) from a three yard warp with only 18 inches of loom waste. How did I manage that? By weaving the warp down to this.......
Actually it never would have occurred to me to try this, except for this photo of Peg's, from this post.
It was slow going to get a clean shed, but I just couldn't stop weaving. My painted warp colors were more defined at the ends of the warp, and more blended in the middle. I just didn't want to lose the color in that section of warp!
The project details for these are in this post. The only thing I can add is to say that there was very, very little draw-in and take-up in this project. I lost one to two eights of an inch in length, but that's it.
Even though these are woven with 20/2s cotton, it is interesting how heavy the fabric is as a warp-faced plain weave. Quite suitable for bookmarks. And other things, though I'm still trying to figure out what.
I need to get different project on the loom, but I plan to do more warp painting and ikat dyeing. These are definitely in my near weaving future.
Posted 2 Dec. 2008 at http://leighsfiberjournal.blogspot.com
Related Posts:
Experiments In Warp Painting - how I painted the warp
Learning Ikat Technique - how the ikat stripes were made
Weaving At Last - project details for these bookmarks
Subscribe to:
Posts (Atom)