Tuesday, August 29, 2006

b2f Warping – What To Do About Those Weights

I can't decide if my experimentation is actually accomplishing anything or if I'm merely creating more work for myself. Now that I have been converted to the back-to-front warping method, I am doing some fine tuning and problem solving. The bottom line here is warp tension, which was what motivated me to try b2f in the first place. I've been very happy with my results so far, though there are still a few things I'm trying to work out.

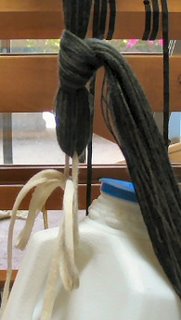
I tied the bout onto the weight with a slip knot and a shoe lace.When I used to warp front to back, I would hand tension my warp. After my first b2f warp, I decided to try using weights instead. When I did, I discovered that my warp tension was more even and weaving was more enjoyable.

Half gallon milk jugs filled with water work well as weights, so my next questions have been concerning how to tie them on and where to place them.

To tie them on, I've settled on the method pictured on the left.

I'm tying a slip knot in the warp bout and using a shoe lace through the knot's loop and the milk jug handle. I first tried to knot the warp itself through the jug handle, but this resulted in too much slippage. I'm sure there's a more conventional way to do this and I'll give it a try just as soon as someone tells me what it is.

Where to place the jugs has required a little more experimenting.

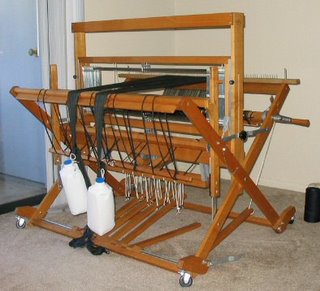
The problem with a set up like this . . .

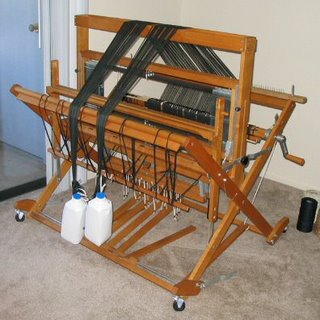
Weighting the warp, experiment 1.

. . . with the weighted warp hanging over the breast beam, is this......

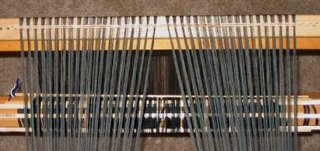
An unacceptable angle for the warp bouts.

If the warp winds on over the back beam with the two bouts at such an angle, then a gap is created in the warp on the warp beam. No good.

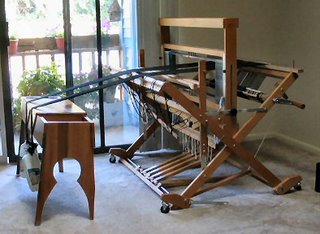
So I tried this . . .

Weighting the warp, experiment 2.

. . . in hopes of decreasing that angle by giving some length to the warp. As you can see, I did this by hanging the weights over my bench. But! Notice that the bench wants to tip over as I wind on. It's ever so slight in this photo, but it will go all the way over, believe me. This is also no good.

So, at someone's suggestion (Peg's I think?) I tried running the weighted warp over the top of my castle like this . . .

Weighting the warp, experiment 3.

. . . which worked much better except for one small problem, the placement of my raddle. The warp ends couldn't lie flat in the raddle teeth because of the angle of the warp. I should have secured the raddle to the top of the castle, which is what I shall do next time. This will also take care of another problem I had previously, discussed here. Fortunately the warp wound on without incident and I'm ready for the next step.

© 2006 Leigh's Fiber Journal

Related Post:

Sunday, August 27, 2006

Rare Breed Sweater – Karakul 1

I have been working on the Karakul sample for my rare breed sweater.

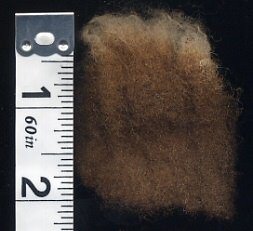
I bought the fleece at a SAFF fleece show a couple of years ago. I got it because it was a rare breed and chose this particular fleece for its color (thinking to use a variety of both breed and color in my sweater.) Karakul sheep are predominantly, black; so the light reddish color of this particular fleece is a little unusual for the breed.


This particular fleece was a show fleece and so quite clean. It had virtually no VM nor second cuts. It had been pretty well jumbled up by the time I got it, I presume from being handled by the judges.

Karakul is actually a dual coated breed. The fleece is quite open, so it was easy to separate the inner and outer coats. By firmly holding onto the tip of the lock, I used a dog comb to pull out the softer inner coat from the butt end of the staple.

This bit was taken from the sample I washed:


The little pile on the right is of reddish kempy fibers which are the shortest and the prickliest.

For my first sample however, I decided to wash a handful and then blend the two coats with my drum carder. Since it is a pretty coarse fiber, I thought I would spin it with as little twist as possible to make it more suitable for knitting.

I accomplished this by spinning with the worsted method and using the lowest ratio my Ashford Traditional offered. I drafted out about two inches for each treadle, resulting in less twist than I usually put in a knitting yarn.

You can see the difference of the twist angle in these two yarns.


The one on the right is some Ryeland spun a couple of years ago. It will be used for most of the sweater. On the right is the Karakul I just spun. Both yarns measure 10 wraps per inch.

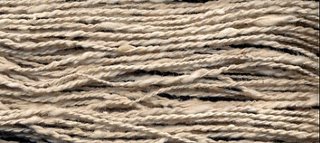
My finished skein looks like this:


Before I decide to use this skein for the sheep motif of my sweater, I'd like to experiment a bit more. Since I have an entire 3 pound fleece, I have plenty to play with. I'll be curious to see how a few more yarn samples compare with this one. After that I'll choose one to actually use in the sweater.

Tuesday, August 22, 2006

Rare Breed Sweater - Manx Loghtan

Of the three rare breed fleece samples I have to work on for my rare breed sweater, I've just finished spinning the Manx Loghtan.

Modern day Manx Loghtan sheep are found mostly on the Isle of Man. They descended from a Scottish primitive breed once found on the Scottish mainland and costal islands of Britain. I found a picture of the breed at OSU's website. Four horns are common, but individuals can have 2 to 6 horns.

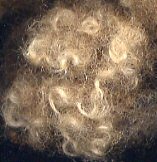
Manx Loghtan staples.The staples in my sample measured 2 to 2 and a half inches long. The crimp was not definable. The color is a lovely reddish brown with blond bleached tips. The staple was sound and the tips not tender, though they were harsher to touch.

Because of this harshness, I might have considered trimming them off to improve the hand of the yarn. However, I loved the little curls they made, Tips of Manx Loghtan staples.and wanted to incorporate the range of color in my yarn. So I spun the fleece with the tips.

The fleece was wonderfully open and didn't require anything more than washing to prepare for spinning. It contained some grease, but no VM (vegetable matter) and very few second cuts. To spin, I simply teased a few locks at a time and drafted them out of my hand.

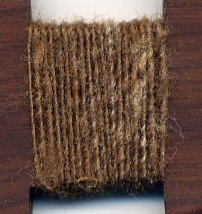
Manx Loghtan singles.My singles measured approximately 18 WPI. From the photo on the left you can see the blond color from the tips incorporated into the yarn. I'm hoping some of this will show up in the knitted sheep motif I plan to use for this sweater.

My 2-ply measures 10 WPI. The hand of the yarn is too harsh for next-to-skin wear but will be suitable in a small amount on an outerwear cardigan. Traditionally the yarn is used for hosiery and knitted outerwear.

My 2-ply yarn from the Manx Loghtan fleece sample.
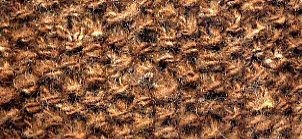
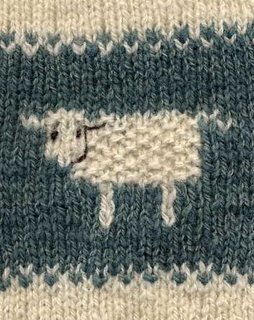
Lastly, I knitted up a small swatch in moss stitch, because I was curious! I find that knitting a yarn gives me a lot of information about it that the skein by itself doesn't.

Knitted swatch from the Manx Loghtan yarn.
I think it will work very nicely for one small knitted sheep motif.

Saturday, August 19, 2006

Four 5 Silk Blend Skeins

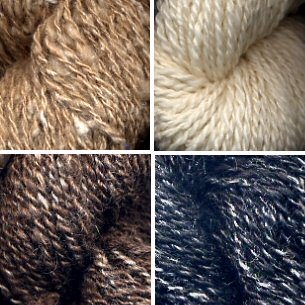
Spinning-wise, I’ve been slowly working on the four silk blend rovings which came with my silk package. But now that I'm getting ready to spin the remaining fleece samples for my rare breed sweater, I've needed to finish the silk blends in order to clear off my bobbins. Here are the results:

Leigh's 4 silk blend handspun yarns.From top left clockwise:
Carded camel down and tussah silk blend
Merino and tussah silk blend (the same yarn with which I had this problem.)
Black alpaca and silk blend
Bluefaced Leicester and tussah silk blend

Each blend was commercially prepared and weighted between 21 and 32 grams. I aimed for the same size yarn for each at about 18 WPI. My two favorites were the merino/tussah and the camel down/tussah. I like the color combination so perhaps a knitted scarf might be a possible project!

The 5th silk blend is one of cotton and tussah silk noil. I carded it on cotton hand carders:

Leigh's hand carded cotton and tussah noil yarn.
It measures 18 WPI as well, though I don’t plan to use it in a project with the others blends. I will have several small skeins of it when I’m done, and am thinking about trying to weave with it.

Next I can start spinning my Manx Loghtan, Leicester Longwool, and Karakul samples. Then I can get on with the designing and knitting, both of which I'm looking forward to.

Wednesday, August 16, 2006

Silk Fiber Fusion

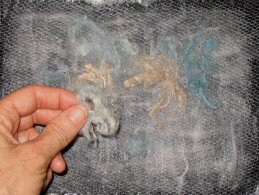
When I read this blog the other day, I remembered my silk goody pack. I was inspired to go get it out and look through it once more. I also pulled out some dyed silk noils sent to me by my friend Heather, who lives in Manitoba.

Heather does quite a bit of felting and fusion. A while ago she had shared some information with the Online Guild about silk fusion. I had saved a copy of her instructions on my hard drive, so I printed them out and gathered up my supplies:
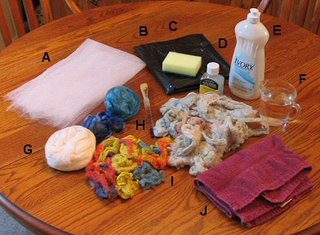
The supplies needed to fuse silk fibers.

A - netting, B - plastic to cover my work surface, C - sponge for soaking up excess water, D - acrylic gloss medium, E - dishwashing liquid, F - cup of warm water, G - various silk tops, H - small, soft artist's brush, I - variety of hand dyed silk noils, J - towel for hands, drips, whatever.

The first step was to cut a piece of netting twice as large as the piece I was going to make. The silk tops were drawn out to create two thin layers, the 2nd perpendicular to the first:
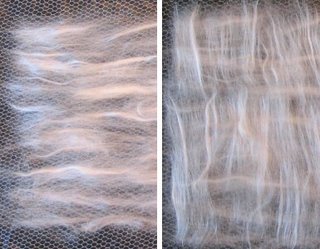
To start, the silk tops are laid out in layers.

The netting was folded over and the entire thing wetted thoroughly with a dilution of 1 teaspoon dishwashing liquid in 1 cup of warm water.

Wetting the silk layers.

When thoroughly wet, the netting was lifted so that embellishments could be added. Here I added some of the pastel silk noils:

Adding silk noil embellishments.

After embellishing, the netting is folded over once again and the entire thing rewetted. The sponge was used to mop up if I used too much water.

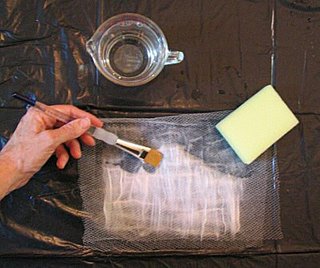
Next, a 50/50 mixture of acrylic gloss with water was brushed over the entire thing.
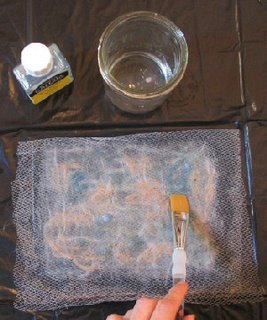
Applying the acrylic gloss medium.

Ideally, I should have had a drying rack or screen to place this on but I didn't. I set it aside on a clean, dry towel and turned it occasionally.

I had more of my acrylic mixture left, so I experimented:
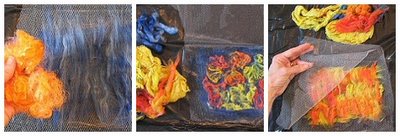
Three of my silk fusion experiments.

Left: I used my blue silk tops and embellished with some leftover throwsters waste which I had dyed.

Middle: Blue silk tops as a base embellished with silk noils.
Right: This one is of silk noils entirely. I teased them out to make several layers.

I allowed them all to dry overnight.

The next morning I carefully peeled the netting off:
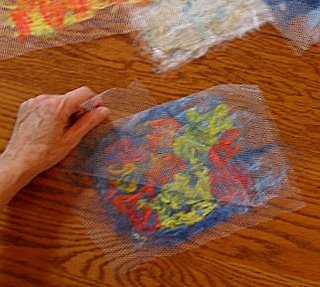
Peeling the netting from the dried silk fusion.

Here are my finished results:

My completed silk fusion pieces.

I put the complete set of my silk fusion project photos on my Flickr Photos.

At this point I have no plans for my masterpieces, except to keep as samples or perhaps use as insets in greeting cards. I can see where I made some places too thin and some too thick. There are some areas which could have used more the the acrylic mixture, but even so I am happy with them.

These were all quite spontaneous but I can see the potential for more thoughtful designing. If you want to see some beautiful silk fusion and projects made with it, spend some time exploring Sue B's blog. Her's are inspirational!
Monday, August 14, 2006

Shadow Weave Sample Strip Off the Loom

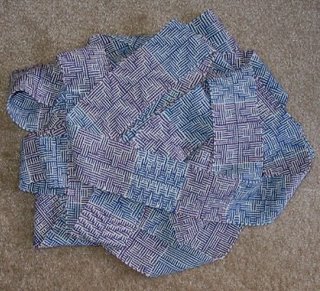
Leigh's shadow weave sample strip.
My shadow weave sampler strip is finally off the loom. I say finally, because it seemed to take an awfully long time to weave.

I wasn’t sure of the best way to photograph all ten yards, so it ended up in a pile. Close ups plus yarn and weaving details can be found in this post.
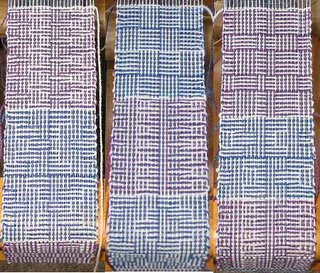
My weaving width was a fraction shy of 3 inches (46 ends sett at 16 epi). Fresh off the loom the strip measured 2 & 5/8 inches wide by 9 yards 5 inches in long. I might have been able to eek out a few more inches, but I finally had one thread break close to the end of the warp, and so just wove it off. The yarn, Knit Picks lace weight merino at 4141 yards per pound, proved to make a sturdy warp.

After wet finishing and steaming, it measured 2 & 1/2 inches by 8 & 2/3 yards.

Next will come some experimenting with lengths of this. And even though I’m curious to see how they will look sewn together lengthwise, I have to admit that mostly, I'm just glad to have it off the loom!

Next - Shadow Weave - The Next Warp

© 2006 Leigh's Fiber Journal

Related Posts:
Shadow Weave Profiles- how to interpret
Shadow Weave Samples 1 - Begins the series of samples

Saturday, August 12, 2006

Winter Knitting Project

Now that I have the bag to carry it in, it is time to seriously work on planning my winter knitting project. Summer and its heat are for knitting socks. Winter and its cold are for knitting sweaters.

My project this year will be my Rare Breed Sweater. I’ve been working on this idea for a long time. It first came to me in August 2002, when the Online Guild did its first rare breed challenge.
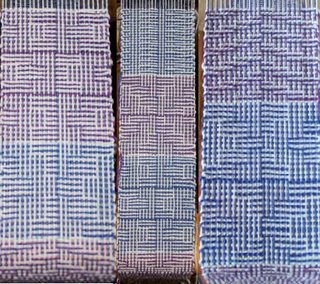
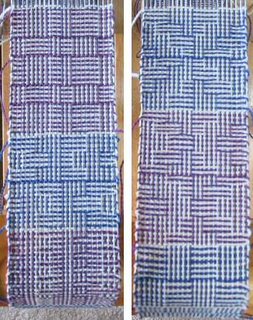
The breed for that first challenge was Hebridean. As I worked with my 300 grams of fleece samples I wondered (as always), “But what can I do with it???” Then I had one of those “light bulb” moments. I could use this sample, plus any rare breed samples I could get my hands on, in a motif featuring rare breed wools.

I later worked up a swatch idea with some of my handspun from the Online Guild‘s Ryeland Rare Breed Challenge:

Leigh's handknit swatch from the Online Guild's Ryeland Rare Breed Challenge.


Then I began collecting. Over the past four years I’ve obtained and spun samples of:

My handspun rare breed yarns so far.


Left to right: Cotswold, Lincoln Longwool, Tunis, Soay, North Ronaldsay, Shetland, Wensleydale, Navajo Churro, Jacob, Teeswater, Hebridean, White Faced Woodland, and Hog Island.

The Hog Island was roving which had been dyed blue before it was given to me. Of the North Ronaldsay and Navajo Churro, I have several colors to choose from.

I still have a few left to go:

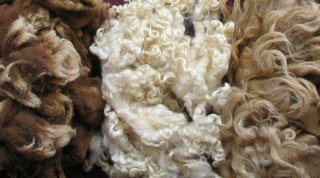
The 3 rare breed fleeces left to spin.


From the left, Manx Loghtan, Leicester Longwool, and Karakul are yet to be spun. This is good because it is still too hot to have a large wool project in one’s lap.

After I finish the last of the spinning, I will have to do some serious swatching to explore design ideas I have been contemplating. The body of the sweater will be Ryeland, as I purchased a whole kilo of raw fleece and so have the most yarn in that breed. Each knitted sheep will be a different rare breed.

I won’t pretend that this WKP (winter knitting project) will take only one winter. I knit for relaxation and pleasure (read I knit s-l-o-w-l-y) though I do usually manage to knit one sweater or vest each year. Even so, I am excited about finally getting to start the knitting part of this project. It’s been a long time coming.

© 2006 Leigh's Fiber Journal

Related Posts:
Rare Breed Sweater Swatches
TA-DAH! Rare Breed Sweater Done!

Monday, August 07, 2006

Sample Strip Bag Completed

The challenge has been “What do I do with all my handwoven sample strips.“ I presented an idea in my last post, and I completed it over the weekend. In contemplating the suggestions from the comments for this post, I was able to work though several things I had questions about.

My first question was about the bottom. I had vaguely thought to simply use one of my handwoven strips for the bottom, but Valerie’s suggestion to use commercial fabric made more sense as it addressed a couple of things: waste (as in, who’s going to see the bottom anyway), and wear (as in, why wear out handwoven fabric when commercial fabric will do), not to mention possibly getting the bottom of the bag dirty.

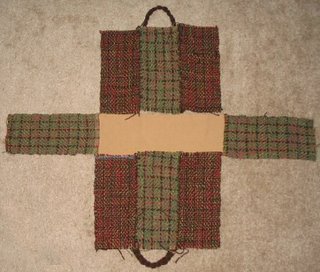
Sample strip bag pieces laid out.


First I braided the i-cord. It took about 7 yards for a two yard braid. I really liked Tricia’s idea of fulled i-cord, as it would have prevented any stretching of the handle. But since I wasn’t working with wool, I’ll have to save this suggestion for another time.


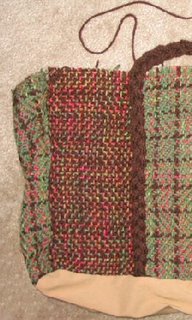
The bag's sides, strap, & bottom handsewn together.The handwoven side panels were whip stitched together and the i-cord was stitched to the outside in the same manner. Next, the end panels were placed wrong side together with the sides. I used a running stitch to sew them together, leaving the selvedges exposed on the outside of the bag to make a nice edge. Lastly, I sewed the bottom panel on by hand.

Another problem I had contemplated was that I didn’t want the bag to have a soft, droopy bottom. Initially I had wondered about putting cardboard in the bottom, but Charleen came through with the suggestion to use plastic canvas. Perfect!

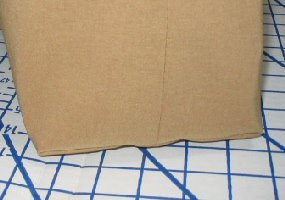
Bottom of the bag, inside & out.


I tucked the plastic in under the seam allowance around the bottom. This took care of the possibility of the corners of the plastic poking through my handwoven fabric. I tacked it down in a couple of places to prevent slippage. The result was a beautiful, firm bottom to the bag.

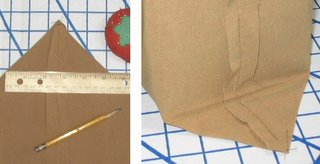
I made the lining from a simple rectangle of the same fabric I used for the bottom. After sewing up the side seams I measured for the corner seams. Using a ruler to keep the liner’s side seam centered, I measured and marked a line as long as the bag’s width.

How I sewed a square corner for the bottom of my bag.


Stitching across this line made a nice squared corner

Outside view of squared corner.


I sewed the lining to the bag with right sides together, leaving an opening on one end. I pulled the bag right side out and hand stitched the opening closed. I added a couple of reinforcing stitches for the hand straps and that was it!

The completed handwoven sample strip bag.


My plan is to use this for my Winter Knitting Project. I love to use baskets for yarns and knitting, but find that they are often awkward to transport. So this bag will be used for that.

© 2006 Leigh's Fiber Journal

Friday, August 04, 2006

Bag Idea for Sample Strips

With the discussion and ideas for samples and sample strips, I’ve been thinking about possible things to do with some of the extras.

Sometimes inspiration comes from unexpected places:

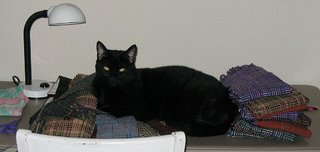
Rascal, making himself at home on my neat pile of handwoven log cabin scarves.


That “Oh, no” moment led to an idea:

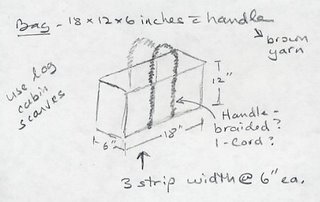
Sketch for a knitting bag made from log cabin scarves & sample strips.


Each scarf is 6 inches wide, so I can sew three together to make the body of the bag with an 18 inch width. I'll use another sample scarf for the ends. Haven't decided about the bottom yet.

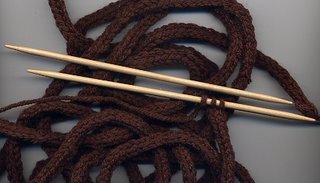
After contemplating several options for the strap/handle, I finally decided to knit an i-cord:

Knitted i-cord strap for bag.


I reckon a couple of miles ought to do. I’m thinking about braiding it to make it sturdier.

© 2006 Leigh's Fiber Journal

Next - Making the bag.

Wednesday, August 02, 2006

Shadow Weave Samples - 4

Leigh's Fiber Journal shadow weave samplerAfter I took the last shadow weave samples off the loom, I warped a 3 inch width of 10 yards (which the impatient side of me thinks was an insane decision) of Knit Picks Shadow , their lace weight merino. I warped back to front, which I am finally getting comfortable with. I've been using almost full half gallon milk jugs as weights and am very happy with my warp tension.

My idea for this warp has been to weave a long sample strip which I can cut and sew together into a vest? cardigan? pullover? handbag? ?????

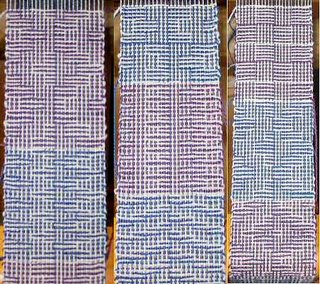
The warp alternates blue and white, while the weft colors of blue and purple with white alternate for each variation. These are an opposite development of shadow weave from Marian Powell's 1000+ Patterns in 4, 6, and 8 Harness Shadow Weaves, page 103. The yarn weighs in at 4141 yards per pound and my sett is 16 epi. (The individual photos weren’t all the same size, but you get the idea.)

Here is a sampling of the variations I’ve been trying:


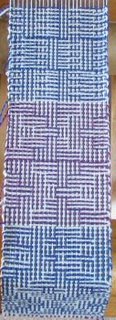
Leigh's Fiber Journal shadow weave samples
More shadow weave samples
And still more shadow weave samples!
Finally, here's the last of them.
One good thing about small samples like this is that it doesn’t matter if I make a few treadling errors. Who’s gonna know? There is also a lot of freedom to experiment; if I don’t like it, that’s okay because it’s only a small part of the entire strip.

This sampling/journaling/exploring/learning activity with weaving is a crucial step for me as a weaver. However, when I’m in a sampling mode, I struggle with the tension of the usefulness vs. uselessness of my end product. Oh sure, the samples are valuable to me personally, but somehow they don’t satisfy my inner desire to produce beautiful and useful things. Sometimes I weave scarves as samples, but how many scarves does one need?

This sample strip is an attempt to resolve that tension. How well it works will probably depend on whether I actually use it for anything. ;)

Next - Shadow Weave Sample Strip Off the Loom

© 2006 Leigh's Fiber Journal

Related Posts:
Shadow Weave: Doing the Triple S - my introduction
Shadow Weave Profiles- how to interpret
Shadow Weave Samples 1 - Begins the series of samples