Tuesday, April 23, 2024

The Italian Manner

A note at the bottom of Mary Meigs Atwater's Cottage Windows pattern states

"Pattern (h) may also be woven in the Italian manner."

This is the variation (pattern h, called "A Modern Arrangement") that I used for my Cottage Windows table runner. Before I pulled off the waste warp from the loom, I wanted to tie on a different color warp and give this a try. But first, I needed to research "The Italian Manner," also referred to as the Italian style or Italian method. 

The simplest definition I found was in Susan Wilson's Weave Classic Crackle & More. On page 53 she states,

"In the weaving literature, Italian manner or Italian style
refers to polychrome treadling with three colors."

Lucy Brusic is a little more specific. On page 26 of her A Crackle Weave Companion she explains, 

"Italian Manner in which a repeating thread alternates with the appropriate opposite blocks."

In examining her treadling chart on the same page, I see that this means that instead of tabby (using one color for both the 1-3 and 2-4 shots), Italian manner treadling uses two different colors for the background wefts using opposite sheds between the pattern shots. For example:

pattern
3-4
pattern
1-2

or

pattern
4-1
pattern
2-3

or

pattern
1-2
pattern
3-4

or 

pattern
2-3
pattern
4-1

Compare that to traditional crackle, which is

pattern
1-3
pattern
2-4

In other words, Italian manner replaces tabby with a different set of opposite sheds.

Other details: 
  • Traditional crackle uses one pattern color and one tabby color. 
  • Italian manner uses one pattern color and two background colors. The color sequence remains consistent throughout, it is the treadling that progresses with each block. 
  • Typically, a heavier pattern weft is used for both.

Harriet Tidball calls the Italian method, "classic crackle" (page 125 of The Weaver's Book), but on page 54 of Wilson's book, she points out a difference based on studying historical drafts. What Atwater, Thorpe, Snyder, and Tod call Italian manner begins the treadling sequence with the pattern weft. Classic crackle begins the treadling sequence with the background weft. Nit-picky? Perhaps. It's just interesting to note these differences of observation and interpretation.

Finally, here are some variations for the Italian manner according to Brusic (page 27):
  • 2-shuttle Italian Manner
    • heavier pattern weft in one color
    • warp-weight background weft in another color
    • treadled as for 3-shuttle Italian manner
  • 1-shuttle Italian Manner
    • weft similar in weight to warp
    • treadled as for 3-shuttle Italian manner
    • fabric is said to have a nice drape

I can't say that I've got it all figured out, but I do have a better grasp on Italian manner weaving than when I started this post.

Saturday, April 20, 2024

Step Two: The Countermarch Tie-Up

Assembling the loom was probably the easy part. The next step was tying up the lamms. But first, I needed to straighten out the mess with the heddles and make sure the heddle bars were even.

I color coded the heddles years ago, which was helpful because now I knew exactly where they belonged. This was good because it's nice to have the same number of heddles on each shaft. 

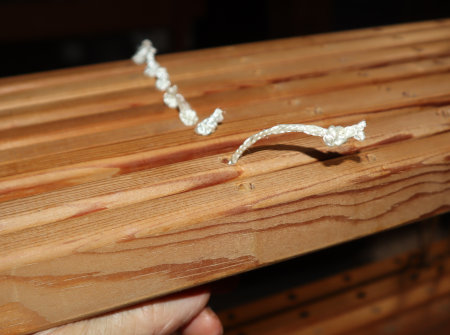
To make sure all the shafts were at the same height, I ran a string from beam to beam, threading it through one heddle on each shaft. 

Only one was stubbornly out of place, and this turned out to be a broken Texsolv peg in the countermarch. 

The pegs hold the Texsolve cord

One of the pegs was broken

Replacing it solved the problem. 

Then I was ready to attach the lams to the shafts. The tie-up fixture (upright posts and locking pins below) holds the lamms at the correct height for tie-up and stabilizes them.

The shorter upper lamms are tied to the bottom bar of each shaft.

The longer lower lamms are tied by a long cord to the countermarch. These were more challenging because the lamms are only about 14 inches off the ground and it felt like I was standing on my head to see to attach them! I had trouble holding the cords tight while inserting the peg into the cord. It finally occurred to me to use a tapestry needle to hold the cord taut so I could insert the pin.


That helped! And that completed the tie-up to attach the countermarch, shafts, and lamms.

Done!

The action of this arrangement is that the upper lamms lower the shafts and the lower lamms raise the shafts. Which does which depends on how the treadles are tied to the lamms. Because all the shafts are either raised or lowered, a good shed is created.

The next step will be to put on a warp and tie up the treadles. 

© 2024 Leigh's Fiber Journal

Related post

Saturday, April 13, 2024

Step One: Glimakra Assembled!

assembled and ready to be tied up

For the most part, assembly went pretty well. The instruction manual was clear and well diagrammed until it came to installing the lamms. The manual went right into how to tie them up, not how to attach them to the loom. I finally found a decent photo online and figured it out from there. Fortunately, I wasn't working from new out of the box, so it went fairly quickly. The harnesses, countermarche, beater, treadles, and bench were already assembled and just needed to be put in place.

That was the easy part! Next, I need to level the harnesses and tie up the lamms and treadles.


Related posts:

Thursday, April 11, 2024

Progress On Setting Up My Glimakra

Thank you to everyone who participated in my survey. I asked this question in a couple of places, and all the answers were interesting and with helpful pros and cons for a variety of floors. My goal, of course, is to finally set up my big floor loom. This project, unfortunately, has required a lot of steps to get to that point.

Since the room I want to use has been a storage room for about a decade, the first step was to go through boxes, sort contents, and decide what to keep and what to let go of. Much of it went into my studio/sewing room, and much of it was purged. Building materials went to Dan's workshop storage area, but we don't have a basement or garage, and our attic is limited as to what it can store (mostly Christmas decorations). So I still have to figure out how to store seasonal things like space heaters, box fans, beekeeping equipment, soap making supplies, archery items, surplus tincture bottles, etc. But the good news is that I finally cleared enough space to set up my loom!

The bad news is that the original hardwood floor is in pretty bad shape. The logical thing to do, of course, would be to put down a new floor. Actually, the logical thing to do would be to finish the room before setting up the loom. Even though it's on the to-do list, it doesn't seem likely it will be the priority in the near future. I'm going to make the best of it anyway!

For the floor, I decided to lay down a large area rug. In fact, I ended up buying a new area rug for the dining room and using the old one in this room. It's not in bad shape, just had the misfortune of first being barfed on by cats, which was cleaned up with a spray-on all-purpose cleaner which bleached it! (The responsible party will remain nameless, other than to say it wasn't me!) So I moved the rug into the room, scrubbed it by hand, and I think it will be fine. 

After the rug was dry, I laid out all the pieces of the loom.

wonky photo taken atop a step ladder

Next, I need to go through the assembly manual and inventory them. Hopefully, nothing is missing! Then I can start putting it all together. 

When I first got the loom, the previous owner passed on an assembly video. I no longer have a VCR player and couldn't find that video on YouTube, so I'll have to make do with written instructions. Hopefully, they're clearly written! 

Wish me luck!


Related posts

Tuesday, April 09, 2024

SURVEY: Floors under Floor Looms?

I'm interested in your preference! What kind of floor do you like to set your loom up on? 
  1. Carpet
  2. Area rug
  3. Bare floor (wood? tile? laminate? concrete?)
  4. Something else?
  5. No preference?
I'd love to know your preference and reason.


Related posts