Showing posts with label weaving. Show all posts

Saturday, December 07, 2024

Lap Robe Done

Finished at last, the Lap Robe I've been working on since July.
I'm happy with the way it turned out: the colors, the pattern, and especially the selvedges. I made one treadling mistake when I missed a reverse, but it's close to the end so I'll call it a border if anyone notices. Which I doubt because of the visual movement of the pattern. 

It's quite heavy, but I think it will be warm and suitable for its intended purpose. Best of all, it's finished in time to get it off in time for Christmas!

The Particulars
  • Yarn: Yarn Bee acrylic
    • warp variegated
    • weft solid
  • Warp tied onto my Dornik Herringbone threading
  • Sett: 8 e.p.i. 
  • PPI: 16 
  • Width
    • on loom: 37"
    • finished: 36"
  • Length
    • on loom: 60"
    • finished: 56" (excluding fringe)
Lap Robe Done © Dec. 2024

Related posts

Monday, August 19, 2024

Bathroom Rag Rug: Draft & Calculations For Warping

I got the brown rug warp I decided on and then started on my calculations for warping my table loom. My 10-dent reed is 23.25 inches wide, so at most I could thread 230 warp ends, with two dents left over for floating selvedges. I had to figure out how to fit the threading draft to this, to make sure the pattern look on the rug looks symmetrical. 

The Recipe Book gives this for the threading: 

Read right to left

Motif
This is one complete motif. Fortunately, the Recipe Book PDF includes WIF files, so I was able to have a drawdown draft without having to work it out myself.

Two repeats of the motif would be 212 warp ends. Subtract that from 230, and I have 18 extra dents, 9 on each side. Should I leave them empty and make a narrower rug? Add a border? Or, widen the edge blocks to compensate for draw-in, which always makes the motif narrower on the sides. I decided to simply repeat the beginning and ending threading, to "fatten" the blocks on the edges. 

With that decided, the warp was measured and the reed sleyed, so the next step will be threading the heddles. 

Here's the draft straight from the Recipe Book WIF file, tweaked for color, but without the extra threading on the selvedges. Tabby shots will square up the blocks.

You can click to enlarge.

In other weaving news, Dan has informed me that the next phase of his project will be dustless. So I can take the dust covers off my floor loom and resume weaving on the lap robe. Weaving on it is a relaxing way to spend a 30-minute break, so I'm glad to start working on it again. 

Sunday, August 04, 2024

Lap Robe: Weaving at Last

Between canning tomato sauce, mozzarella making, and my pokeberry dye experiments, time at the loom has been pretty slim. But at last I got the lap robe warp tied on, wound on, tensioned, and hemstitched.  Then weaving commenced. 

The first thing I noticed was how the softness of the yarn affected the beat. The sett is 8 ends per inch and for the throw rug, I ended up with 16 picks per inch. The weft for the lap robe is softer and a bit finer, so it flattened the angle of the herringbone pattern even more. This is pretty arbitrary, actually, but as I looked at it I saw it would be easy to treadle a diamond pattern instead of the herringbone. 


The treadling sequence is straightforward. 
1 - 2 - 3 - 4 - 5 - 6 - 7 - 8 - repeat

If I treadle that twice and then reverse,
7 - 6 - 5 - 4 - 3 - 2 - 1 - 8 - repeat

then I get an easy diamond pattern.


I like it.

The color stripes weren't planned, this is just the way the warp measured out. 


Having sections of 2, 3, or 4 warp ends the same color combination makes for a definite stripey look. If each was different, it would be less stripey and more . . . hodge-podge? Blended? Chaotic? Indistinct? Maybe even muddy.

What's fascinating to me is how two simple changes—yarn color and simple treadling changes—can create two different looks. The throw rug makes me think of the African Savanna. The lap robe makes me think of the American Southwest. 

Weaving will be a matter of plodding away as I have time, usually a half-hour here and a half-hour there. Finished length will probably be longer than a lap robe and more like an afghan, but that's okay too. It's all okay, really. 

Thursday, July 18, 2024

Tie-On Project: Lap Robe

Never one to waste a good threading, I've been been measuring warp for a lap robe using the same draft as my throw rug. This is going to be a gift for someone in assisted living, so I'm using washable yarn from Hobby Lobby. They have excellent sales, and that's the time to buy anything there.  

The warp yarn was on clearance, so I bought up what I could. I ended up with two different colorways to get enough, but they coordinate. 

When I calculated length, I found I had enough to make it a generous length, probably more afghan size. The weft is ivory. 

This post marks the beginning of the project. Hopefully, tying on the rest of the warp won't take long and I'll be weaving soon. 

Tie-On Project: Lap Robe © July 2024 

Related post

Monday, November 27, 2023

Busy Hands, Listening Mind

I'm not very good at multitasking. Not in general, anyway, and especially not when concentration is required. My family has learned not to talk at me when I'm cooking, because I inevitably do things like forget ingredients, forget to stir the pot, or because it otherwise delays the meal while I attempt to pay attention and respond.

Even so, fiber arts activities tend to be rhythmic in nature. Knitting, spinning, crocheting, and weaving occupy one's hands, and unless it's a complicated pattern that requires counting or concentration, they allow for things like conversation, watching a movie, or listening. It was due to my return to weaving that I discovered that my local library does not have a terribly impressive selection of CD audiobooks. It appears that downloadable books are what's popular now. 

One evening, I searched for free online audiobooks, and I discovered LibriVox. LibriVox is a website of human recorded books (as opposed to computer read books, which I find difficult to listen to.) These books are in the public domain, i.e. mostly written before 1923 for which copyrights have expired. It's a huge collection of well over 18,500 recordings of all genres. Everything is recorded by volunteers. Books can be listened to online or downloaded from either the LibriVox website, or from the Internet Archive. It's a fantastic resource!

Right now, I'm listening on my computer, but it would be nice to have something portable. The last such device I had, was back when walkmans were popular, which I don't think are even around any more. If someone can pass on some suggestions for a listening device, I'd appreciate it.

Thursday, September 14, 2023

Book Review: The Handweaver's Pattern Directory

Since picking up weaving again (intended!) I've been absorbing weaving websites, blogs, and videos. The most commonly recommended book I'm seeing is

by Anne Dixon

Seeing that it was published in 2007—two years before I packed up my loom for 14 years—I initially wondered why I didn't have it in my library already, considering what a bibliophile I am. But the subtitle explains it, "Over 600 weaves for 4-shaft looms." About the time this was published, I was selling my 4-shaft jack loom and weaving exclusively on my 8-shaft Glimakra. At the time, I was buying books specifically geared toward 8-shaft weaving.

Now, I'm weaving on a 4-shaft table loom, and have to agree that The Handweaver's Pattern Directory is a must-have for every 4-shaft weaver.

The book has two main sections: the introduction and the pattern directory.

The introduction starts with what to expect from the book and how to understand the weaving drafts. Next, it discusses basic equipment, fibers, yarns, selvedges, sett, weave structure, calculating warp length, color theory, and sampling. Everything is laid out logically, with plenty of photographs, making this section an excellent reference resource.

The directory is divided into four pattern sections: basic threadings, block drafts, lace weaves, and special threadings, which include things like undulating twills, advancing twills, syncopated threading, turned Monk's Belt threading, distorted weft, supplementary warp, warp face weaves, etc. Each section begins with an introduction and basic explanation, along with tips for weaving that category of patterns. Then comes the eye candy.

The photos are all in color, which gives this book a distinct advantage over the books I've been using for my
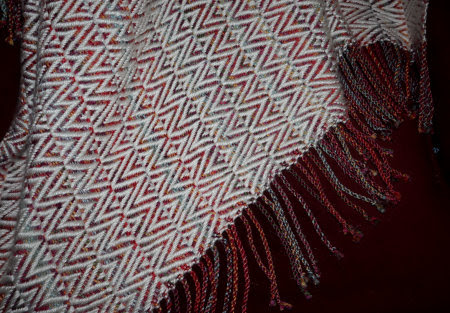
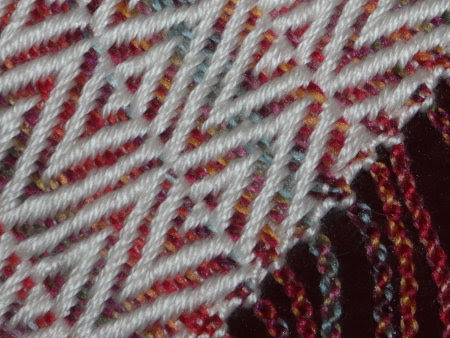
 sampler and twill gamp. The interplay of color in the various samples is interesting and helpful. And I think, makes it easier to follow the drafts. For example, the treadling draft uses the weft colors in the piece (rather than just long columns of tiny black squares) so it's easier to follow the changes and keep one's place.

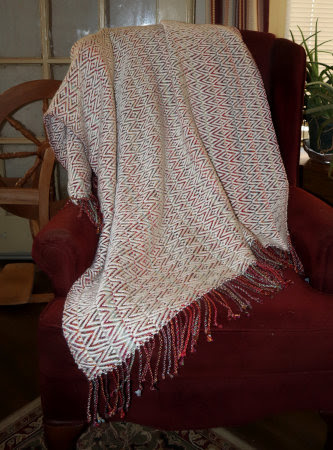
Most pages are set up three samples per, and explore a variety of treadling options (lever lift options for me!) for a particular threading. Some are set up as a two-page spread with three different threadings and three treadling patterns. This is perfect for gamps (definition here), which are excellent learning projects. In fact, I have my eye on "Crackle," pages 130 to 135.

The book wraps up with a chapter on how to finish handwovens, and includes everything to consider before taking it off the loom (preventing unraveling and uneven shrinkage), hemming, fringes, hemstitching, plus detailed information on wet finishing. Following are a glossary, an index (yay!) and a page of weaving resources. Also noteworthy, it's spiral bound, so the open pages lie flat, and the back flap, which folds out with a quick review of how to read the weaving drafts. 

So, yes, highly recommended. Amazingly, I almost didn't buy this book because surely, I don't need more books. But the price on Amazon was the best I'd seen and I needed to round up an order to get free shipping. Or so I told myself, lol. Anyway, it is now the first book I reach for, and it will be one of my most used weaving books, without a doubt.

Thursday, August 03, 2023

First Warp on the Table Loom

The Rasmussen table loom is assembled and ready to go!

Try as I might, I could not find a manual for this loom. But while it would have been nice, I figured a table loom is a loom, right? I've never worked on one before, but was guessing I could figure it out.

For my first warp, I decided to weave a sampler. For one thing, I don't want to be overly confident climbing back into the weaving saddle again. For another, I need to learn this loom. I figured a smaller piece for practice would likely mean fewer frustrations if I run into problems. 

To refresh my skills (and memory), I dusted off my copy of Learning To Weave by Deborah Chandler. Ironically, this is the book I was working my way through when I first started this blog!

I don't have a raddle for this loom, so my first warp will have to be front to back. This is how I learned, but I had a lot of trouble with tension, so I later started warping back to front. That helped a lot! (You can learn the details in my post, B2F vs F2B: Why I Switched.) 

Instructions for the sampler recommended two contrasting colors. I chose blue and white.

8/2 cotton

Then I had to figure out where to put my warping board to measure the warp. Over-the-door hooks on the closet door worked really well.

The sampler will be a small one, and I
need two yards, 60 ends of each color.

The first step after measuring the warp is sleying the reed. For that, the book said to secure the beater bar in its upright position. Well, that stumped me because there's no latch to secure the beater in any position. Then I took a closer look at the simple dowel setup for the beater. 

Beater bar set on one of the two dowels lets it move back and forth easily.

I had no idea why the loom had two dowels for the beater; maybe to shift it's position back to allow a little more weaving room(?) Then it dawned on me to try this . . .


Eureka! Placing the legs of the beater between the two dowels holds the beater upright so the reed can be sleyed!

Sleying the reed

I wondered how it would feel to be doing this after so many years. Would it be awkward and slow? I was happy that this wasn't the case. It all seemed so natural and went quickly.

Threading the heddles. I started by resting my arms on the back beam,
but quickly discovered it's more comfortable to work under the beam.

One nice thing about a table loom is that it's very compact. It's easy to turn the loom to thread the heddles from the back. 

Things came back to me as I worked. Things like remembering to secure the loose warp at all times, but especially when I walk away from the loom. That was a lesson taught to me by Catzee!

Every 12 threads in the heddles are tied with an overhand knot.
The loose warp waiting to be threaded is tied with a slip knot.

Better to be safe than sorry.

Potential for disaster seemingly fast asleep.

I found my threading hook to be too long for the short space I was working in, and so switched to my brass combo sleying/threading tool. Threading went more quickly after that. 

Of the methods for tying the warp to the back apron rod, I chose overhand knots. 

Tying the warp to the back apron rod.

Next came winding on the warp. I confess I was nervous about this. From the video, How To Put a Warp on Your Table Loom, Pt. 1, I learned that one advantage to a table loom is that it's easy to tension the warp by pulling it with one hand, while winding it on with the other. No weights or extra person necessary. But could I hold the tension evenly? That's the question. 

To double check, I read the "Tension during beaming" section in Deborah Chandler's book. She says

"The question of how to get even tension has a simple answer: don't apply any."

Wait, what????? I confess I never actually read her book from front to finish. I mostly used it as a reference resource after I took my weaving classes. I wasn't sure if no tension made sense, but I figured what the heck, this is a learning sampler, after all. What have I got to lose?

Winding on the warp with no tension.

She goes on to explain how to wind the warp tension free, when to stop and comb out tangles, and use warp separators. 

Ready to secure to the front of the loom.

Next on the list, attaching the warp to the front apron rod. For that, I decided to use my tried and true method of lashing on. 


I never had much luck tying and tightening knots, but found lashing on to be easier to achieve an even tension.

Lashed on warp

You can read my original post about lashing on here →How To Lash On a Warp.


And there it is. First warp on; it's time to weave!

Sunday, March 07, 2010

"Catzee's Cloth" Made the Complex Weavers Journal

If you can get your hands on a copy of the February 2010 Complex Weavers Journal, turn to page 13. On the bottom half of the page, featured as one of the participants of the 2009 Tied Weaves Study Group, there I am. Or rather, there's the Summer-and-Winter fabric I wove...

Both sides of Catzee's Cloth...inspired by my tortoiseshell cat, Catzee. The write up includes a black and white photo of a sample and the draft.

You can see color photos and read more of the details of the project on my following posts:

Of course it's an honor to be "published," even if it's only as a contributing member of a study group. But this sample is special to me because of Catzee.

She disappeared at the end of last August. In spite of turning the world upside down to find her, we never did, nor have a clue as to what happened. I have grieved over her more than I ever have any other cat. I still have to catch myself, and not allow the sadness to overwhelm me again, by focusing on happier thoughts.

Anyway, I just wanted to share this with you. I learned a lot by participating in the study group, and plan to do another someday, whenever we finally get settled and establish a routine on the homestead. Even though this blog isn't very active, I still appreciate every one of you who visits, especially those of you who are regulars and visit my homestead blog too! Thank you!

"Catzee's Cloth" Made the Complex Weavers Journal photos and text are © 7 March 2010 by Leigh at Leigh's Fiber Journal.

Monday, November 23, 2009

My $6.93 Shuttle

By Leigh

I was browsing a thrift shop this morning and found this...


Of course I bought it! (Click pic for a little bigger). It cost me a total of $6.93 including tax and is in excellent shape. I know absolutely zilch about end-feed shuttles, so I need your help! Did I just buy a pretty ornament for my studio? Or can I actually weave with it? It has no identifying markings, but stamped on the bottom are these: SH (or 5H) 852 on one side, and M 3394-37 on the other. It's 16.5 inches long. I'm assuming it's an industrial shuttle (???)

Help?

Thursday, November 12, 2009

Shams And Rags

By Leigh

I finished my quilted pillow shams!

Machine quilted pillow shams from bedsheetsThey aren't perfect, but I think they look well enough with the comforter.

I've also been cutting rag strips for the matching rag rug.

Matching rag rug rags strips also from bedsheets.
If you recall, this is going to be a summer & winter polychrome rag rug. This means that I will use a S & W threading, but will throw two different colored pattern shots between tabby shots. The whole thing is straightforward enough that I don't need to make a full drawdown for it. The threading will be a 2-block (4-shaft) summer and winter.

Polychrome threading draftMy sett will be 16 epi, and I want the squares to be the same size as those in the shams, 4 inches. That means each square will have 64 ends. With a threading unit of 4 ends, each block will be 16 units. I haven't calculated the width yet, probably four feet, for which I would need about 12 blocks and 768 ends. Length needs to be about 6 feet, which will probably require miles of rags!

Treadling will alternate two colors per block, following the same sequence as my pillow shams:

Pattern shot - blue
Pattern shot - green
Tabby a
Pattern shot - blue
Pattern shot - green
Tabby b
Repeat for four inches

Pattern shot - green
Pattern shot - brown
Tabby a
Pattern shot - green
Pattern shot - brown
Tabby b
Repeat for four inches

Pattern shot - brown
Pattern shot - blue
Tabby a
Pattern shot - brown
Pattern shot - blue
Tabby b
Repeat for four inches

Repeat

Rag cutting is rather slow going, I admit, but I can't get to my loom anyway, until we get the dining room floor down (which is next on the indoor project list). I started out measuring the width of the rags, but quickly abandoned that in preference to the eyeball method. It's faster and it will be close enough!

To be continued ........ one of these days.


Related Posts:
A Little Quilting
Summer & Winter: Polychrome Rug 1
Summer & Winter: Polychrome Rug 2

Sunday, October 25, 2009

Sheep To Shawl

By Leigh

For the past several years my guild has been doing a Sheep To Shawl at SAFF (Southeastern Animal Fiber Fair) at the WNC Ag Center in Asheville, NC. This year I was able to participate.

The Blue Barn at the WNC Ag Center

We had a great location and gorgeous autumn weather. Since this is a local event, most of our active guild members were volunteering in other aspects of the Fiber Fair, but we had four spinners and a weaver to demonstrate the process.

Folks were interested in the carding

We started with a donated, washed Border Leicester Fleece. Charlene, who coordinated the event, did the drum carding.

Barbara at her Lendrum
A lot of folks were interested in the entire process. This is Barbara, demonstrating spinning and answering questions.


Yours truly
Old fashioned wheel spinning.

Teena & her electric spinner helped the spinners stay ahead of the weavingTeena demonstrated on her electric spinner.

And she answered a lot of questions too.Ellen did the weaving.

Plain weave shawl in progress
The warp was a combination of 2-ply handspun and commercial wool yarn. There was a little alpaca thrown in as well. The singles we spun that day were used for the weft. The plan for the shawl is to raffle it with proceeds going toward the Blue Ridge Fiber Show.

The sheep to be sheared
In the afternoon, we had a shearing demonstration. This is Elspeth, a rescue sheep. She is a registered Shetland, who other than not having been sheared for at least two years, was healthy.

Tail end first
Paula, who owns Shetlands, did the shearing. She used a shearing stand and started at the tail.

Paula, shearing her way forward
As she sheared her way to the front, Elspeth's fleece was rolled up toward her head.

A gorgeous gray Shetland fleece
The fleece was in amazingly good condition, with very little cotting or felting. It weighted 11 pounds! Other than a break indicating the next year's growth, it was lovely. 

I'm sure Elsbeth felt better after that fleece was off
Elspeth got a massage after her ordeal. She wasn't too happy about being there, but calmed down considerably as the shearing progressed.

And the rest of the Fiber Fair?

SAFF 2009
It was bigger, better, and busier than ever, with more vendors, more classes, and more folks coming to look, buy, learn, and see.

My haul?

Rag rug shuttle
Just this, a 20.5 inch Schacht rag shuttle for the rag rug I plan to weave for our bedroom.

I didn't stay till the end because I had a pretty good drive home. It just felt good to get my wheel out and spin again. Hopefully this winter I can resume spinning as a daily activity. By the fire. Sounds good, doesn't it?

Sunday, September 20, 2009

Light At The End Of The Tunnel

By Leigh

In my case, the tunnel is house renovation, and the light is finally catching a glimpse of what it will be like to have a huge project in the living room done, tearing down the old fireplace and putting in a new hearth and chimney for a wood burning stove. This has not just meant spending most of our time on this, but it has also meant an upheaval of our living quarters. Because deconstruction and working with bricks and mortar is such as dusty, dirty job, we've moved all of the living room furniture to other parts of the house. We've been sporting that "just moved in" look for months now!

The tearing down phase seemed the quickest. The rebuilding part is going much more slowly. Still, we're finally getting to a point where I can visualize having our living room back. And with that, I'm starting to think about weaving for it.

What I'm currently contemplating, is weaving drapery fabric. I've never attempted anything like that before, but when we first bought the place, I immediately started to think about all the things I could weave for it: kitchen, bath, and table linens, rugs, curtains, drapes, throws, upholstery fabric, etc. Although I haven't yet given much thought to design and weave structure, I have been contemplating color.

Here are the colors I have to work with...

This is the fabric on my couch.
Coordinating fabric on cushion (came with couch)
Area rug - actually matches perfectly.
The colors are roughly accurate on your computer monitor.

Plus, I've been collecting paint chips for wall color ........

image fail of paint chips

......... well, never mind the paint chips. They would neither photograph nor scan anywhere near their actual color. Suffice it to say that they are coordinating pale to light neutrals for my walls. I also have one burgundy chair and my furniture is a medium/dark cherry.

I'm inspired enough with this that I would like to dig through my stash and pull out various colors of yarns to compare with my sofa, rug, cushions, and chair. Unfortunately, my stash is another matter, because I can't find all my yarns! Thanks to the current state of chaos in our home due to our project, some yarns are in my studio hidden behind piles of boxes, others are still packed away ............. somewhere.

Though we still have a long way to go on any number of house projects (especially kitchen and bathrooms), weaving is something to contemplate as cooler weather approaches. As much as I've loved being out of doors this summer, I am also looking forward to spending time indoors this winter, cozy with that new wood burning stove, and fibernating.